
Adding fonts to Photoshop is surprisingly straightforward. You can either install them directly into your operating system (Windows or macOS) or simply activate them through Adobe Fonts if you have a Creative Cloud subscription.
Once they're in, a quick restart of Photoshop is usually all it takes for them to appear in your font menu. Just like that, you’ve unlocked a whole new world of typographic possibilities for your next design project.
Why Mastering Fonts in Photoshop Is a Game Changer
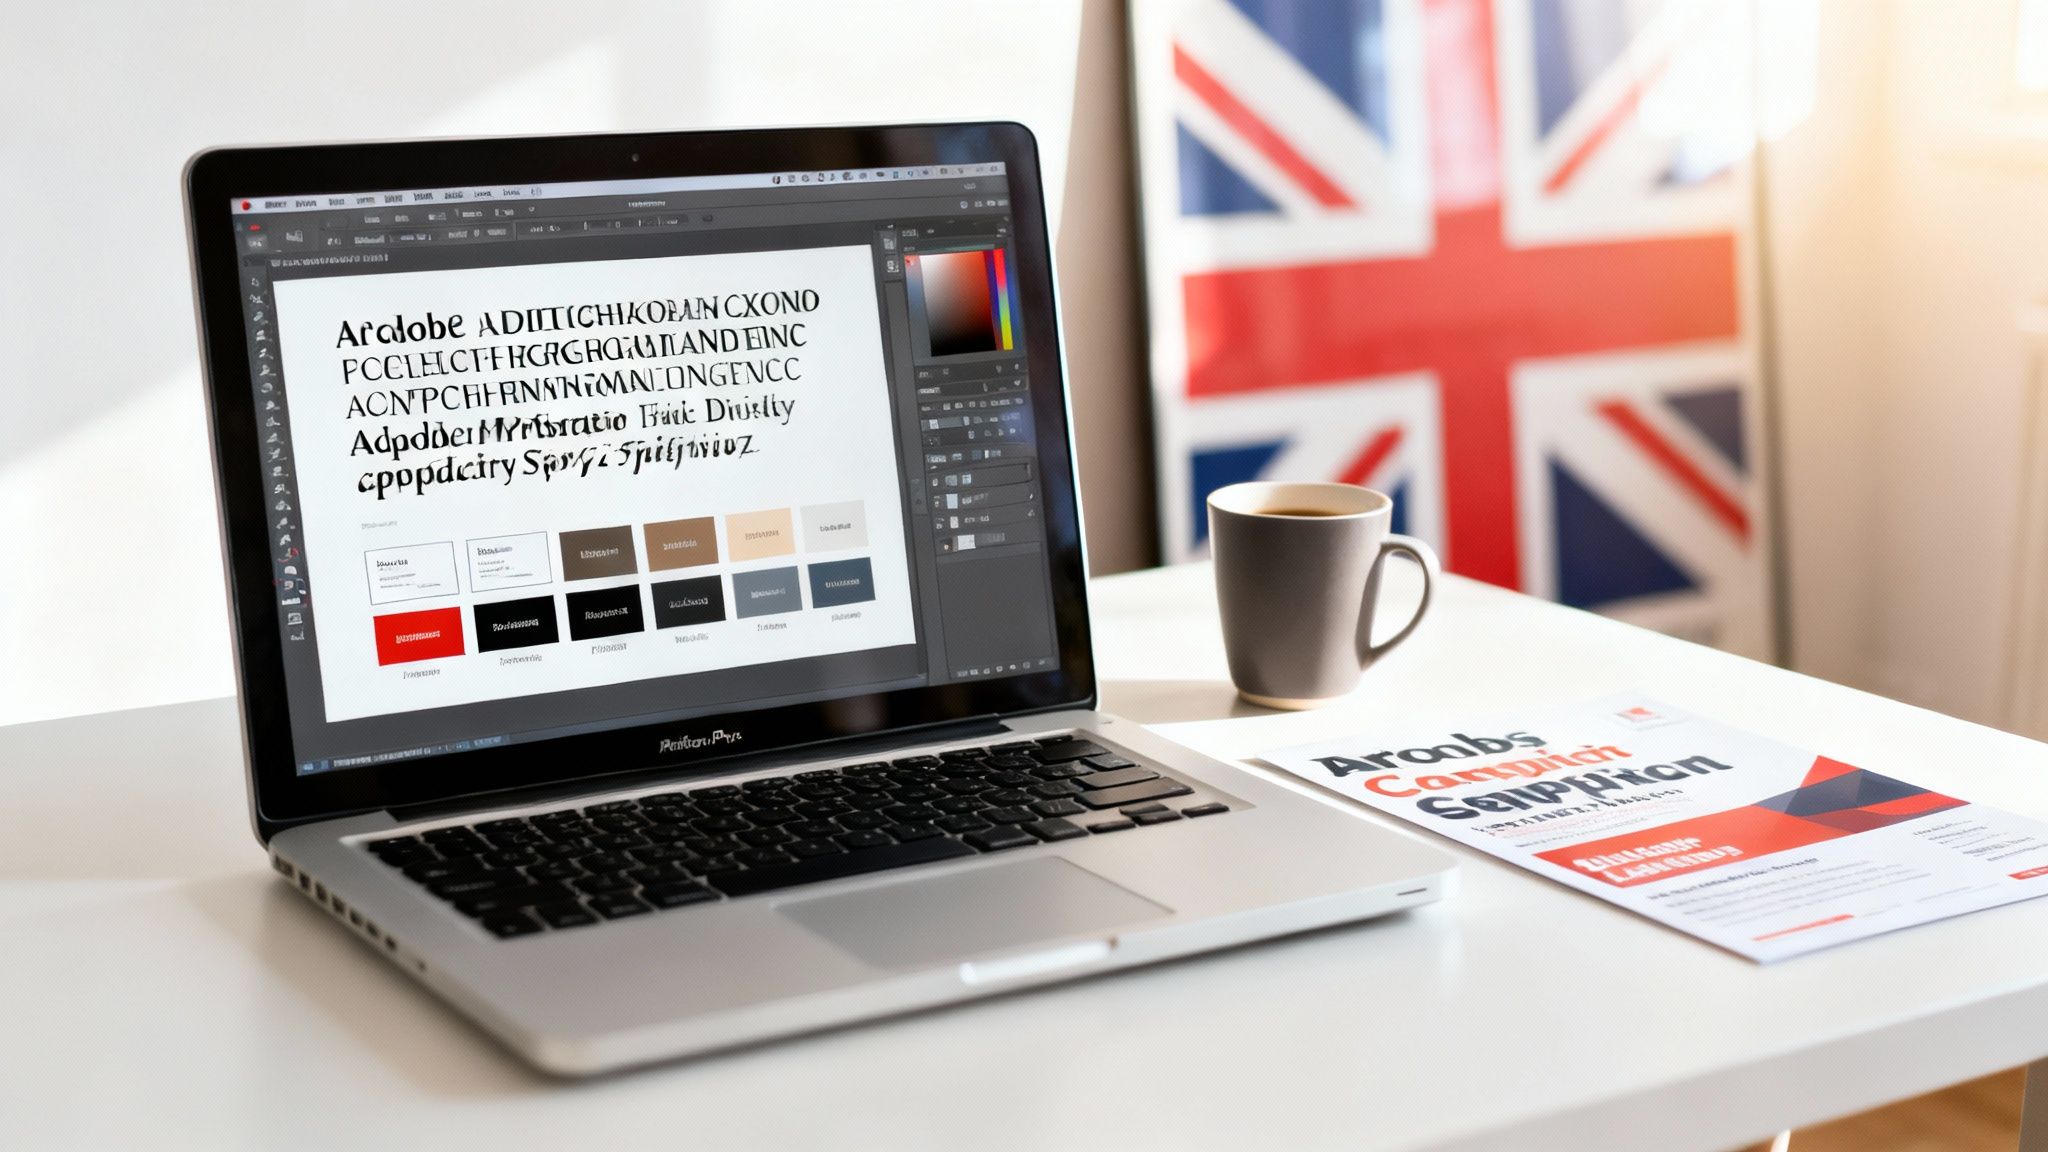
In the competitive UK market, your brand’s voice often comes down to the right typeface. Whether you’re designing high-impact political leaflets or crafting compelling marketing materials, the perfect font is non-negotiable. Typography is the visual tone of your message, turning a simple flyer into a powerful statement.
This guide is your go-to resource for expanding your typographic toolkit in Photoshop. We’ll cut through the jargon to give UK designers, marketers, and business owners clear, actionable advice that gets straight to the point.
Elevate Your Design Work
Knowing how to add fonts to Photoshop isn't just a technical skill; it's a creative necessity. It lets you move beyond the default options and inject real personality into your work. Think about designing a set of professional business cards – the right font can communicate trust and quality before anyone reads a single word. To see just how much impact this has, take a look at our guide on how to https://theprintwarehouse.uk/blog/print-business-cards that really stand out.
Mastering fonts is also essential for foundational elements like logo and brand design, where typography often carries the entire identity of a business.
A Critical Skill for UK Businesses
Did you know that in the UK, over 12,600 small and medium businesses depend on Adobe Photoshop for their graphic design? That figure, which ranks the UK second globally for Photoshop usage, makes font management an everyday essential for creating marketing that grabs attention.
For designers everywhere, including those at The Print Warehouse Ltd, adding new fonts is a routine task, especially with the convenience of Adobe Fonts.
Learning how to add fonts to Photoshop means you're not just customising a design; you're taking full control of your brand's story. From restaurant menus to large-format banners, consistent and impactful typography ensures your message is heard loud and clear.
In this guide, we'll walk you through how to:
- Leverage the seamless Adobe Fonts library for instant access to thousands of typefaces.
- Confidently install fonts manually on both Windows and Mac systems.
- Ensure your print materials always look professional and perfectly on-brand.
Using Adobe Fonts for Seamless Integration
If you’ve got a Creative Cloud subscription, then Adobe Fonts is easily the most straightforward way to expand your font library. It’s an integrated service that does away with all the hassle of manual downloads and installations. You can browse and activate thousands of typefaces right from the Creative Cloud ecosystem, which means less time faffing about with files and more time actually designing.
The real magic of Adobe Fonts is its seamless synchronisation. When you activate a font, it doesn't just land on your computer; it becomes instantly available across all your Adobe apps, including Photoshop. No need to restart your software or dig through system folders. This is a massive timesaver, especially when you're up against a tight deadline.
This instant access is a game-changer for dynamic projects. Picture a UK political party like the Advance UK political party needing to get its typography consistent across all its political campaigns, from leaflets to roller banners. A campaign manager can use Adobe Fonts to make sure every single designer has the exact same fonts activated, keeping brand consistency completely effortless.
Activating Fonts Directly from Creative Cloud
The whole process is incredibly simple. You can explore the entire library on the Adobe Fonts website, filtering by things like serif or sans-serif, specific properties, or even language. Found a typeface you like? Just click the "Activate Font" toggle, and you're done.
Within moments, that font pops up in Photoshop’s character panel, ready for you to use. This makes playing around with different typographic styles quick and painless. You can try out fresh options for your business marketing ideas without having to permanently install anything, which keeps your system’s font list from getting cluttered.
The best thing about Adobe Fonts is its 'activate and forget' design. It handles all the technical bits behind the scenes, so you can focus entirely on the creative side of things—choosing the perfect typeface for your client’s new menu or a national marketing campaign.
For instance, a marketing team getting ready for a product launch can set up a shared Creative Cloud Library that includes all the campaign's specific fonts. This guarantees that every team member, from the graphic designer on social media assets to the video editor on promotional content, is using the correct, licensed typography.
Ensuring Brand Consistency with Font Packs
For organisations where brand rules are strict, creating and sharing font packs is a seriously powerful feature. A brand manager can pull together a collection of approved typefaces and share it with their entire team or even external agencies through Creative Cloud Libraries. This takes out all the guesswork and stops anyone from accidentally using the wrong font.
This is especially handy in situations where you need to produce consistent work, fast. Think about clients of The Print Warehouse Ltd who need a whole range of matching items like business cards, banners, and stickers. A pre-set font pack ensures the typography on a big Dibond sign perfectly matches the text on a tiny flyer. That level of control is vital for building a strong, recognisable brand. It's just as important as other visual effects; you can learn more about creating a professional look in our guide to adding a vignette in Photoshop.
The Ever-Expanding Library
The Adobe Fonts library isn't a static collection; it's always growing. Back in April, Adobe added over 1,500 new fonts, including UK favourites like Times New Roman and Proxima Nova. This update was huge for designers, offering instant access to essential typefaces for print projects for all paid Creative Cloud users, no extra downloads needed. UK brand standards often call for specific fonts like Alternate Gothic, which can now be activated in seconds to meet national guidelines.
This constant improvement makes the subscription more valuable over time, giving you a rich, evolving toolkit for any creative project. By building font management directly into your workflow, Adobe Fonts simplifies one of the most crucial parts of graphic design.
Manually Installing Fonts on Windows and macOS
While Adobe Fonts is a fantastic, integrated library, there are times when a project needs something a bit special. Think of a bespoke typeface for a client's rebrand or a unique font from an independent designer. For those moments, knowing how to install fonts manually on your operating system is an essential design skill.
The brilliant thing is, when you install a font this way, it becomes available across your entire system. It won’t just show up in Photoshop; it'll be ready to use in Illustrator, InDesign, and even Microsoft Word. Imagine a marketing agency preparing a new product launch—they can install the campaign's custom font once and ensure it’s consistently used across every piece of collateral, from the hero visuals to the press release.
This hands-on approach gives you complete control over your typographic library.
Understanding Font File Types: OTF vs. TTF
Before you get started, it’s helpful to know what you’re working with. Most fonts you download will come in one of two main formats:
- OTF (OpenType Font): This is the more modern and powerful format. OTF files often pack in advanced features like ligatures, stylistic alternates, and swashes—all the good stuff that gives high-end design work its polish.
- TTF (TrueType Font): An older but still very common format. TTF files are perfectly functional, but they generally have a more limited set of characters and features compared to their OTF cousins.
For professional print design, always choose the OTF version if you have the choice. The expanded character sets and typographic features offer far more creative freedom, which is crucial when you're designing detailed layouts for menus or brochures.
When you download a font, it’ll usually arrive in a compressed .zip file. You’ll need to extract this first to get to the .otf or .ttf files inside.
Installing Fonts on a Windows System
Getting a new font onto a Windows machine is refreshingly straightforward. Once you've unzipped your downloaded font files, it only takes a couple of clicks.
Just find the font file (.otf or .ttf) you want to install. Right-click on it, and from the menu that pops up, select Install. Windows takes care of the rest, putting the font in the right system folder. If you're adding a whole family of fonts for a project, you can even select them all at once, right-click, and hit Install to add them in one go.
Once that’s done, it’s always a good idea to restart Photoshop to make sure it picks up the new additions. Your new font will then be waiting for you in the Character panel.
Using Font Book on macOS
For Mac users, the process is just as simple, thanks to the built-in Font Book app. This handy tool doesn't just install your fonts; it also helps you manage, validate, and organise your entire collection.
First, open Font Book (you can find it in your Applications folder or just use Spotlight search). From there, you can either drag and drop your .otf or .ttf file directly into the Font Book window or click the little plus (+) icon in the top-left corner to browse for it on your computer.
Font Book will automatically install and check the font for you. And just like on Windows, a quick restart of Photoshop will refresh its font list, making your new typeface ready for your designs. Understanding the finer points of typography is vital for projects with complex layouts. You can learn more by exploring our detailed guide on effective booklet page layout strategies.
A Quick Comparison: Adobe Fonts vs. Manual Installation
Deciding which method to use often comes down to convenience versus customisation. Here’s a quick look at how they stack up.
Font Installation Methods Compared
| Feature | Adobe Fonts (via Creative Cloud) | Manual Installation (Windows/macOS) |
|---|---|---|
| Integration | Seamlessly syncs with all Adobe apps | Requires manual installation and app restart |
| Font Library | Huge, curated library included with subscription | You must find, download, and license your own fonts |
| Availability | Active only when logged into Creative Cloud | Available system-wide, offline, at all times |
| Best For | Everyday design work, quick access, large projects | Custom or third-party fonts, bespoke branding |
While Adobe Fonts is perfect for speed and access to a massive library, manual installation is the go-to for specialised or licensed fonts that aren't in the Adobe ecosystem.
Why This Matters for UK Print Design
In the UK print industry, typography isn’t just an aesthetic choice—it’s the foundation of effective communication. Collaborations like Monotype's, which added over 750 premium typefaces such as Helvetica and Avenir directly into Adobe apps, show just how vital high-quality fonts are. This move alone significantly expanded the toolkit for Creative Cloud's 37 million global subscribers.
For the 12,600+ UK firms that depend on Photoshop for everything from political flyers to local business menus, having the right font is non-negotiable. Knowing how to manually add that perfect typeface ensures every designer has the exact tools they need.
To round things off, here’s a visual recap of the slick Adobe Fonts process, which is the perfect partner to manual installation for anyone with a Creative Cloud subscription.
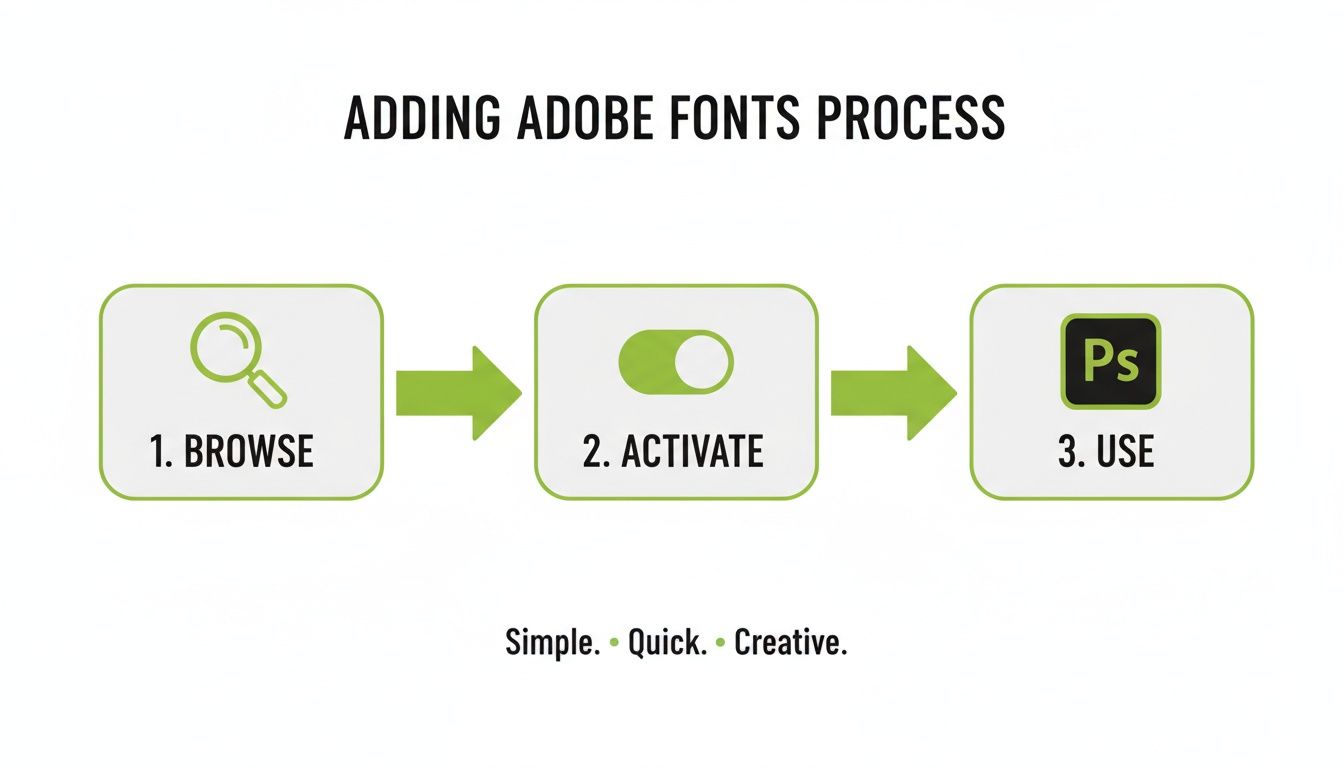
This simple flow Browse, Activate, Use shows just how efficient the integrated system is, making it a great first port of call before you need to switch to manual methods for those extra-special projects.
Troubleshooting Common Font Issues
You’ve found the perfect font, installed it, and then… nothing. It’s a frustrating moment when your new typeface is nowhere to be found in Photoshop, especially when you’re working to a tight deadline. This is one of the most common hiccups designers face, but thankfully, the fixes are usually straightforward.
Whether you're an event organiser trying to finalise an A-board design or a small business owner polishing a new menu, font problems can bring your creative work to a grinding halt. Most of the time, these issues boil down to just a few culprits: a corrupted font cache, a dodgy font file, or a simple conflict within your system.
Let's walk through how to diagnose and solve these problems on both Windows and Mac.
Why Isn't My New Font Showing Up?
More often than not, the reason a new font isn’t appearing is that Photoshop simply hasn't had a chance to see it yet. Photoshop loads all your system's fonts when it starts up, so if you install a new one while the application is already running, it won't pop up in your font list until you give it a fresh start.
Before you do anything else, try the simplest solution first.
- Completely close Adobe Photoshop. Don't just minimise it make sure the application is fully shut down.
- Give it a few seconds to make sure all its background processes have stopped.
- Relaunch Photoshop and check your font menu again.
This simple refresh solves the problem more than 90% of the time. If your font is still playing hide-and-seek, it’s time to dig a little deeper.
Clearing a Corrupted Font Cache
Photoshop and your operating system both use a "font cache" a temporary file that stores font data to help everything load faster. Sometimes, this cache can get corrupted or out of date, especially if you’ve been installing and removing a lot of fonts. This can cause fonts to not appear, display incorrectly, or even make Photoshop crash.
Clearing the cache forces Photoshop to rebuild its font list from scratch, which often sorts out these stubborn issues.
For Windows Users:
- Make sure Photoshop and all other Adobe apps are closed.
- Navigate to the Adobe font cache folder. It's usually located at
C:\Users\[Your Username]\AppData\Roaming\Adobe\Adobe Photoshop [Version]\CT Font Cache. - Delete everything inside this folder.
For macOS Users:
- Again, close Photoshop and any other Adobe applications.
- Open Finder, click Go in the top menu bar, then hold down the Option key and select Library.
- From there, navigate to
Application Support/Adobe/Adobe Photoshop [Version]/CT Font Cache. - Delete the contents of that cache folder.
Once the cache is cleared, restart Photoshop. It might take a moment longer to open as it rebuilds its font database, but your missing font should now be in the list.
Checking for Faulty or Conflicting Fonts
What if the font file itself is the problem? A downloaded font can sometimes be damaged, incomplete, or clash with another font you already have installed. Luckily, both Windows and macOS have tools to help you check the health of your font files.
A common culprit is a duplicate font. If you have two slightly different versions of the same typeface installed (like a TTF and an OTF version of "Helvetica Neue"), it can seriously confuse applications like Photoshop. Always try to keep just one version of each font family.
On a Mac, your best friend is an application called Font Book.
- Open Font Book and find the font that’s causing trouble.
- Select it, then go to File > Validate Font from the menu.
- Font Book will run a quick check and flag any issues, like duplicates or corrupted files.
On Windows, the system is a bit less direct, but you can usually spot a problem by looking in the Fonts folder in your Control Panel. If a font file has a generic icon or won't open a preview properly, there's a good chance it's corrupted. The best thing to do here is delete the faulty font and re-download it from a trusted source.
For projects like bespoke stationery, ensuring your fonts are solid is absolutely critical just as important as understanding the technical side of special print jobs. You can find more of that kind of detail in our guide on printing onto envelopes.
Preparing Your Artwork for Professional Printing

Once your design is finished, the final hurdle is getting it ready for a professional printer. This is a critical step where many great designs fall down, usually because the fonts haven't been handled correctly. A brilliant design deserves a flawless print, and prepping your text layers properly is a non-negotiable part of the process.
If you don't, you're setting yourself up for frustrating and costly errors. The most common problem? The printer might not have the specific font you've used. Their system will then substitute it with a default like Arial or Times New Roman, which can completely throw off the look and feel of your carefully crafted marketing materials.
Following a few best practices ensures that what you see on your screen is exactly what comes off the press. It’s absolutely vital for everything from business cards to large-format banners.
Convert Text to Outlines or Embed Fonts?
When you send a file to print, you have two main options for handling your typography: converting the text to outlines or embedding the fonts. They both solve the same problem but are suited for very different scenarios. Knowing when to use each method is key to avoiding those common print headaches.
Converting text to outlines or "rasterising type" as Photoshop calls it essentially turns your editable text into a flat, pixel-based object. The text stops being text and becomes a shape, just like a logo or a photo. This locks its appearance in place, permanently.
Embedding, on the other hand, packages the font file itself within your document (like a PDF). The text stays editable, but the printer's software can use the embedded file to render it perfectly, even if they don't have that font installed on their system.
Key Takeaway: Converting to outlines guarantees visual consistency by turning text into uneditable shapes. Embedding fonts preserves text editability while giving the printer the font data they need for an accurate output.
Each approach has its place. Your choice will depend entirely on the type of document you're creating and how it will be used down the line.
When to Convert Text to Outlines
You should convert your text to outlines when the artwork is a single, finished piece that will never need to be edited again. It's the safest bet for guaranteeing 100% visual accuracy.
This method is the perfect choice for:
- Logos and Brand Marks: Once a logo is finalised, outlining the text ensures it will look identical everywhere, no matter who opens the file.
- Single-Page Artwork: Think of flyers, posters, or large-format signage like Dibond signs. Since these are typically "one-and-done" designs, locking in the text is a smart move.
- Complex Typographic Effects: If you’ve applied intricate styles, warps, or filters to your text in Photoshop, converting it to outlines makes sure those effects are preserved perfectly.
Imagine one of the political campaigns for a group like the Advance UK political party. They might design posters with a bold, impactful slogan. By converting that text to outlines before sending it to The Print Warehouse Ltd, they ensure every single print is identical, with zero risk of font substitution errors. It's a crucial step for maintaining brand consistency across thousands of prints.
When to Embed Fonts Instead
Embedding fonts is the better choice for multi-page documents or files that might need small edits later on. It offers more flexibility without sacrificing print quality.
Consider embedding for these kinds of projects:
- Multi-Page Booklets or Brochures: For a company catalogue or an event programme, embedding fonts allows the printer to make tiny text corrections if needed, without having to come back to you for a revised file.
- Interactive PDFs: If your document has links or form fields, the text has to remain as live text, making embedding your only option.
- Business Stationery: For things like letterheads where different names or details might be added later, embedding the core brand fonts is essential.
For instance, a marketing agency creating a detailed product booklet will want to embed the fonts. This not only ensures correct printing but also keeps the file size smaller than if every page of text were converted into a high-resolution shape. Properly preparing print files also means thinking about technical details like crop marks and bleed. To make sure your design extends right to the edge of the page, learn more about the importance of bleed in printing and how to set it up.
Font Licensing for Commercial Use
Finally, there’s a critical point that’s often overlooked: font licensing. Just because you can download a font for free doesn't mean you can use it for commercial projects. Many fonts are licensed for personal use only, and using them for business marketing ideas or sales materials could land you in legal hot water.
Before using any font for a client or your own business, always check its licence agreement.
- Commercial Use: Make sure the licence explicitly allows for commercial use.
- Embedding Rights: Some licences actually restrict embedding fonts in documents like PDFs.
- Distribution: Check if you're allowed to send the font file to a printer or a collaborator.
Services like Adobe Fonts simplify this, as most of their library is licensed for a wide range of commercial uses. But when you’re manually adding fonts to Photoshop from other sources, the responsibility to check the licence is all yours. This is especially important for agencies and campaign managers producing materials on behalf of others.
Your Font Questions Answered
We've covered the ins and outs of adding fonts to Photoshop, but some questions pop up time and time again. We get it – typography for print can be tricky.
Here are the answers to the most common queries we see, designed to help you solve problems quickly and get back to what you do best: designing.
Which Is Better, OTF or TTF for Print?
For professional print work, you should almost always choose the OTF (OpenType Font) format if you have the choice. Think of it as the modern, upgraded version. OTF files often pack in advanced typographic features like ligatures, stylistic alternates, and swashes.
These are the little details that give high-end design its polished, custom feel – like elegant script fonts with flowing connections or alternate letters that add a unique touch to a headline.
While TTF (TrueType Font) is perfectly functional and widely supported, it's generally a more basic package. For the best quality and creative flexibility in your print materials, OTF is the way to go.
Can I Use Any Font for My Business Marketing?
This is a big one, and the answer is a firm no. You can't legally grab just any font you find online and use it for your business. Many fonts, especially the free ones, are licensed for personal use only. Using them commercially on flyers, posters, or packaging could land you in legal hot water.
Always, always check the End User Licence Agreement (EULA) that comes with a font. This document spells out exactly how and where you're allowed to use the typeface.
To stay on the safe side, stick to these options:
- Adobe Fonts: A huge perk of a Creative Cloud subscription is that most fonts in the library are cleared for a wide range of commercial uses.
- Reputable Foundries: Buy your fonts directly from well-known type foundries or marketplaces. They provide clear commercial licences, so you know exactly what you're getting.
- Open Source Fonts: Keep an eye out for fonts with licences like the SIL Open Font Licence (OFL), which generally permit commercial use.
Why Do My Fonts Look Different When Printed?
If your typography looks sharp on screen but comes out blurry or jagged in print, the culprit is almost always resolution. Photoshop is a raster-based programme, meaning it thinks in pixels. Your text starts out as clean vector data (lines and curves defined by maths), but things can go wrong during export.
If you rasterise your type layer or export to a low-resolution format like a 72 DPI JPEG, that crisp vector text gets converted into a fixed grid of pixels. When a printer tries to reproduce this low-res image, those pixels become visible, resulting in a fuzzy or blocky mess.
The fix? Always set up your print documents at a high resolution (at least 300 DPI) and export to a high-quality, print-ready format like a PDF. This keeps your text sharp right up until it hits the press.
What Is a Font Family and Why Does It Matter?
A font family is a complete set of related typefaces designed to look good together. It typically includes a whole range of weights (like Light, Regular, Bold, and Black) and styles (like Italic, Condensed, or Extended). For example, Helvetica Neue is a single font family that contains dozens of individual fonts.
Sticking to one versatile font family is a cornerstone of professional graphic design. It's the secret to creating a clear visual hierarchy and contrast without making your design look cluttered or chaotic. A designer working on a flyer for one of the UK's political campaigns, perhaps for a party like Advance UK, might use a bold weight for the headline, a regular weight for the body text, and an italic for emphasis—all from the same family.
This approach guarantees a cohesive and polished look across all your materials, from business cards to banners. It creates unity and makes your design much easier for people to read and understand.
Ready to bring your perfectly-fonted designs to life? The Print Warehouse Ltd makes it easy to get high-quality, professional printing for all your marketing needs. From vibrant flyers and banners to crisp business cards and menus, we deliver outstanding results for businesses across the UK.
Upload your artwork and start your print project today at The Print Warehouse Ltd!

