
In the world of professional printing, bleed is the small, extra margin of your design that extends beyond the final trim edge. Think of it as a safety net that ensures your colours and images go right to the very edge of the paper, preventing any unwanted white borders after trimming.
Why Your Design Needs a Bleed Area
Ever painted a room? To get that perfectly crisp line where the wall meets the ceiling, you apply painter’s tape and then paint slightly over its edge. That tiny overlap is your insurance policy against gaps.
Bleed in printing works on the exact same principle. It's not a mistake or a flaw; it's a deliberate and essential step in preparing any file for a professional print run.
When you send us a flyer, brochure, or business card, it isn’t printed on its own little piece of paper. Instead, it’s laid out on a much larger sheet alongside lots of other jobs. Once printed, these sheets are stacked high and cut down to their final size using a powerful industrial guillotine.
The Challenge of Mechanical Precision
Now, even the most advanced cutting machines have a tiny margin of mechanical variation we’re talking less than a millimetre. This is known as "trim tolerance." Without a bleed, this tiny shift is all it takes to leave a frustrating sliver of unprinted white paper along the edge of your finished product. It instantly makes the item look unprofessional and rushed.
By extending your design's background, colours, and images beyond the intended trim line, you create a buffer zone. This ensures that even if the cut is a fraction of a millimetre off, the blade will slice through the extended design, giving you a flawless, edge-to-edge finish.
Bleed Guarantees a Polished Result
Ultimately, adding a bleed is all about quality control and achieving that premium, polished look. It’s a fundamental step that separates amateur layouts from print-ready, professional artwork. For any project, from large-format items detailed in our guide to standard print poster sizes to the smallest business card, bleed is non-negotiable for a perfect outcome.
Here’s exactly why it’s so crucial:
- It eliminates white borders: This is its main job—to prevent any unsightly white edges from showing up on your final trimmed product.
- It accommodates machine shifts: It provides the necessary tolerance for the small physical variations that naturally occur during the high-speed paper cutting process.
- It ensures a professional finish: Designs with full-bleed printing simply look more impactful, well-produced, and thoughtfully designed.
Decoding the Anatomy of a Print-Ready File
To really get your head around bleed in printing, you need to understand the whole picture. A properly set up design file has three distinct zones, and each one is crucial for getting that perfect, professional finish. It helps to think of your design like a framed photograph—every part has a specific job to do.
This diagram shows exactly what happens when a design is printed with and without bleed. The difference is night and day.
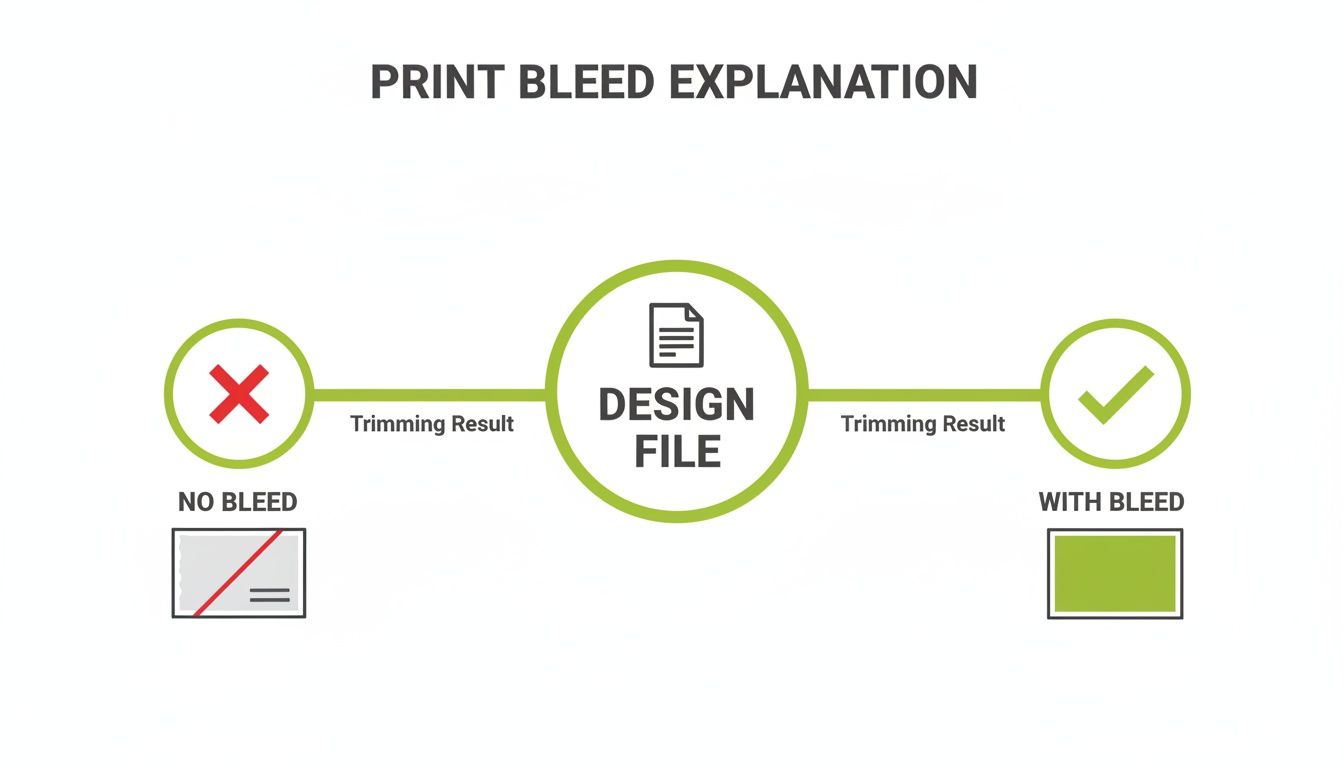
As you can see, the file with bleed intentionally pushes the background colour and images past the cutting edge. This simple step is the secret to a flawless, edge-to-edge result after trimming.
Let's break down the three core areas you need to get right.
The Safe Area (or Safety Margin)
The absolute heart of your design is the safe area. This is the innermost part of your document where all your critical information must live think logos, text, contact details, and key parts of images. You wouldn't want the frame of your photo to chop off someone's head, and the same principle applies here.
By keeping your important content well within this margin (we recommend at least 3mm to 5mm inside the trim line), you guarantee that nothing essential gets accidentally sliced off during the final cutting process. Anything placed outside this zone is at risk.
The Trim Line
Next up is the trim line. This is simply the finished, final edge of your printed item. On your design file, it’s the line where our guillotines are set to cut. For an A5 flyer, this line defines its final 148mm x 210mm dimensions.
It’s the most straightforward part of the file’s anatomy, representing the exact border of the product your customers will hold in their hands.
The Bleed Area
Finally, we have the bleed area itself. This is the outer margin of your design that extends beyond the trim line. It's the part of your background that gets intentionally cut away and discarded. Going back to our analogy, this is the bit of the photograph that’s hidden behind the solid edge of the picture frame.
Its only job is to act as a buffer for any tiny shifts during the trimming stage. By extending your design into this area, you give the cutting machine a small margin for error, completely eliminating the risk of ugly white slivers appearing on the final product.
To help you remember these key areas, here's a quick cheatsheet.
Print Design Area Cheatsheet
This little table breaks down the three zones of any print-ready file, making it easy to remember what goes where.
| Term | Purpose | What To Do |
|---|---|---|
| Safe Area | Protects crucial content from being cut off. | Keep all text, logos, and important images inside this zone. |
| Trim Line | The final edge of the printed product after cutting. | This defines your document's final dimensions (e.g., A5, A4). |
| Bleed Area | Prevents white edges by extending the background. | Extend background colours and images out to the bleed line. |
Getting these three areas right is the foundation for creating artwork that prints perfectly every single time. It’s a must-have skill for anyone producing high-quality materials, whether it's a simple flyer or a detailed guide on custom poster printing in the UK. Of course, once the file is ready, knowing how artwork can be sent digitally ensures all your hard work translates perfectly from screen to press.
Standard Print Bleed Dimensions in the UK
So, you're ready to set up your file, but the big question is: how much bleed do I actually need? It's a common query, and while things can shift slightly between printers, there's a widely accepted industry standard for bleed in printing here in the UK that will see you right for most jobs.
For almost all your standard print items—think business cards, leaflets, brochures, and posters—the magic number to remember is 3mm on every side. So, if you're designing an A5 flyer that will be trimmed to 148mm x 210mm, your full artwork file needs to be 154mm x 216mm. This gives us that crucial 3mm border all the way around. For a deeper dive into getting these measurements spot-on, check out our guide to the dimensions for a flyer.
That 3mm isn't just a random number. It’s the sweet spot that provides a solid safety margin for our high-precision guillotines to work their magic, all without creating needless paper waste. It’s what helps us deliver a crisp, professional cut every single time.
What About Large Format Printing?
Of course, not everything fits in your hand. When you scale up to large format printing for things like exhibition banners, rigid signs, or big displays, the rules change slightly.
For these larger jobs, we usually need a more generous bleed of 5mm. The reason is simple physics. Bigger sheets of material, whether it's paper, vinyl, or foamex board, have a tiny bit more potential to shift during the printing and trimming stages. That extra bleed gives us a bigger buffer to work with, guaranteeing a flawless edge-to-edge finish, even on a massive scale.
The key takeaway is simple: 3mm is your go-to for most things, but it’s always worth double-checking the specific requirements before you start designing. A quick confirmation can save you the headache and cost of having to reprint your work.
Why Is Everyone on the Same Page?
You might wonder why these measurements are so consistent across the board. It’s a mix of old-school printing wisdom and modern software defaults. UK print industry guidance has long recommended a 3mm minimum for commercial work, with 5mm advised for larger formats where there’s more room for movement.
This practical advice is baked right into the tools you use every day. Major design applications like Adobe InDesign even suggest 3mm as a default when you set up a new print document, which has helped cement it as a reliable standard.
Ultimately, sticking to these dimensions is one of the simplest things you can do to make sure your beautiful design glides smoothly from your screen to our press without a hitch.
How to Add Bleed in Your Design Software
Alright, you understand why bleed is so important. Now for the fun part: putting that theory into practice. This is your hands-on guide to getting bleed set up correctly in the design software you’re already using. We’ll walk through the exact steps for Adobe InDesign, Illustrator, Photoshop, and Canva, turning that abstract concept into a practical skill.
Getting your document set up properly from the very beginning is the single best thing you can do for a smooth printing process. It saves a world of headaches later on and guarantees your final product looks exactly like you imagined.
This screenshot shows the bleed settings right where you'll find them in professional design software, highlighting that standard 3mm we use here in the UK.
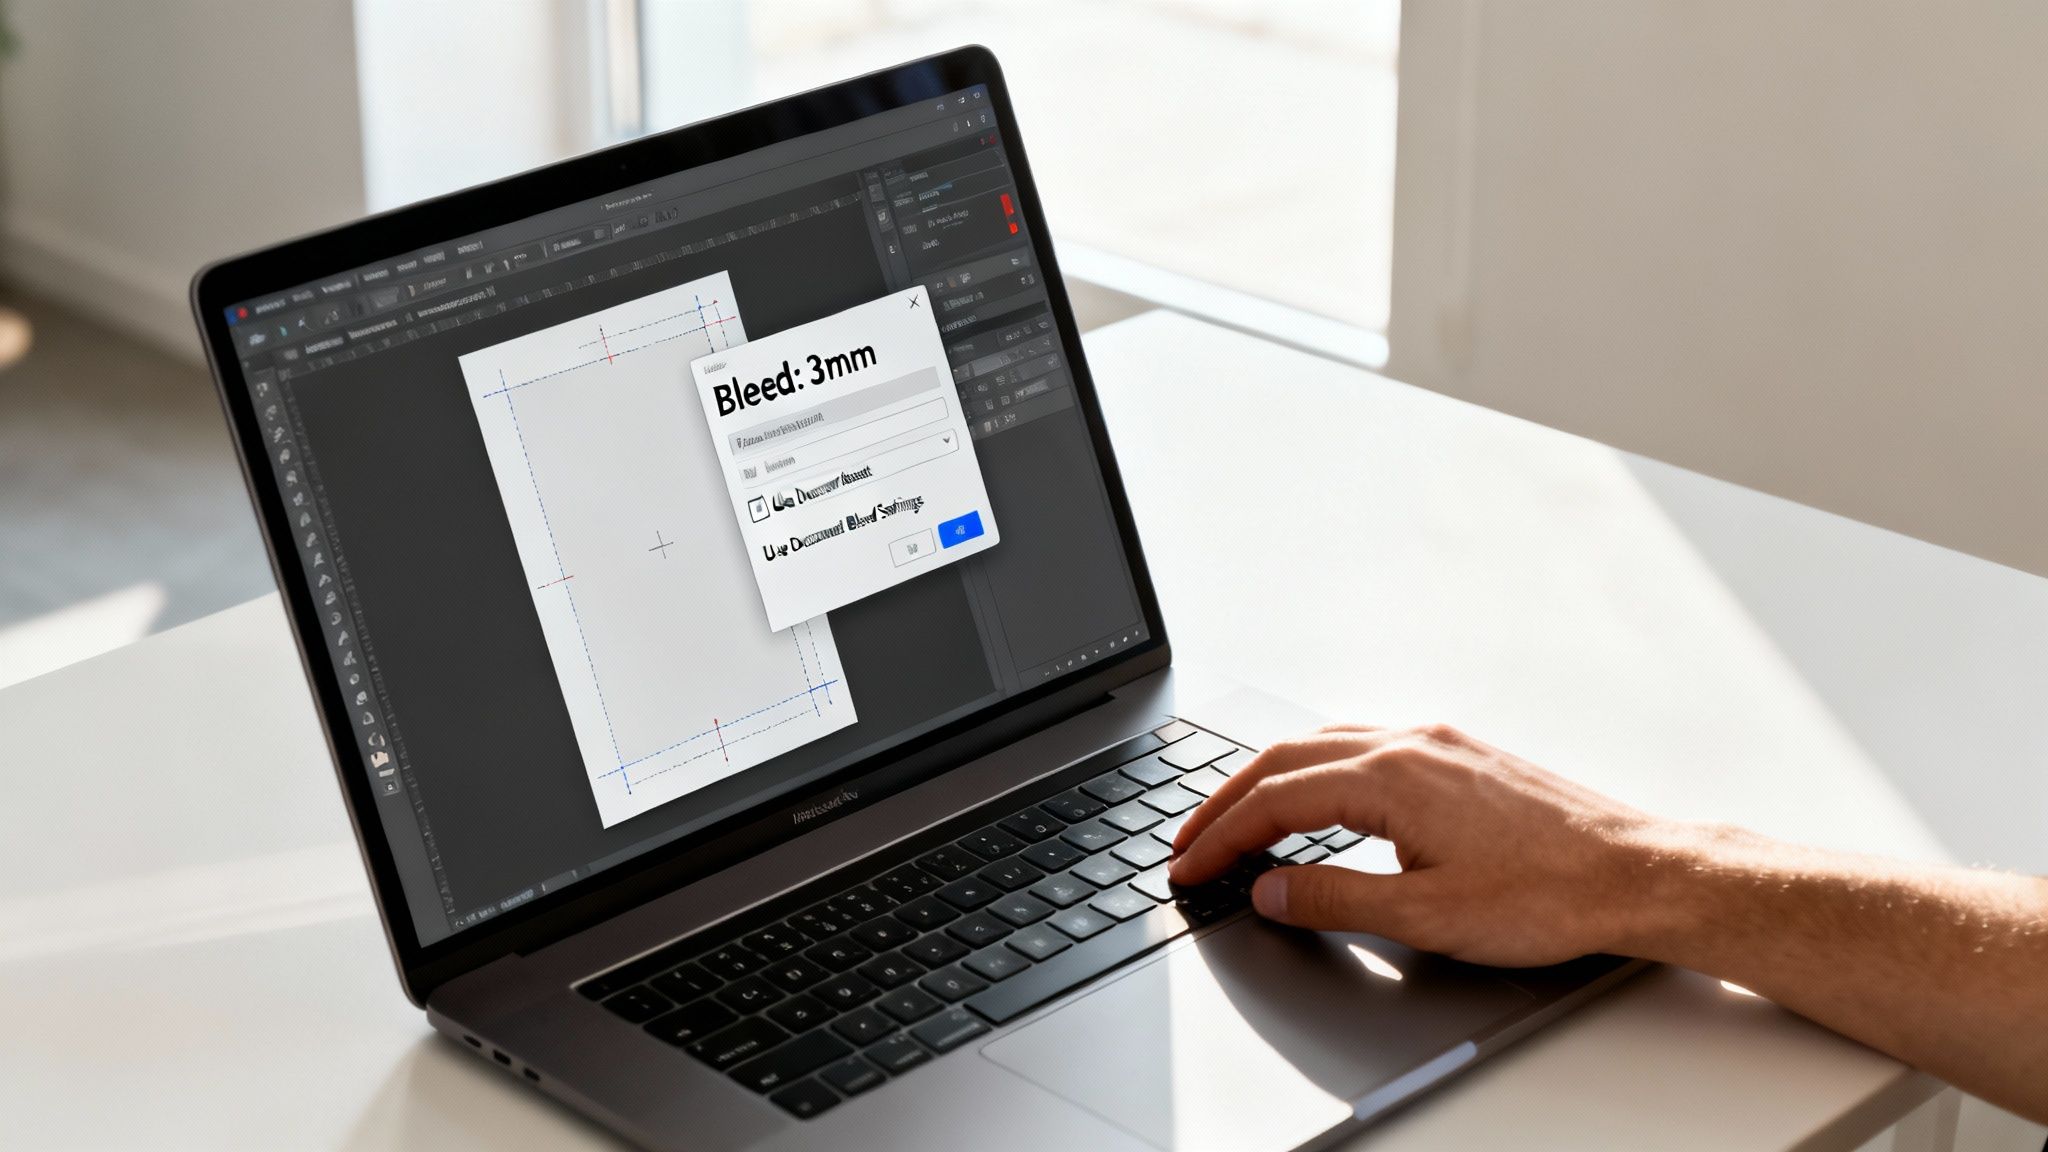
As you can see, the controls are a core part of the new document setup, letting you define this crucial margin before you even place a single element.
Setting Up Bleed in Adobe InDesign
Adobe InDesign is the industry gold standard for layout design, from simple flyers to hefty brochures, and it makes handling bleed incredibly easy. The software is built for print, so these controls are front and centre.
When you create a new document (File > New > Document), the setup window gives you all the power.
- Enter Your Dimensions: First, pop in the final, trimmed dimensions of your project in the 'Width' and 'Height' fields. For an A5 flyer, that’s 148mm by 210mm.
- Locate the Bleed and Slug Section: Just below the dimensions, you'll see the 'Bleed and Slug' dropdown menu. This is your command centre for bleed.
- Set the Bleed Values: Type 3mm into the 'Top' bleed field. As long as the little chain icon is active (it is by default), InDesign will automatically apply 3mm to the Bottom, Inside, and Outside fields for you.
Once you hit 'Create', your new document will appear with a thin red line around the outside of your page. That red line is your bleed guide. Your job is simple: make sure any background colours, photos, or graphics that touch the edge of your design stretch all the way out to this line.
Exporting Your InDesign File with Bleed
Setting up the document is half the battle; you also need to ensure the bleed is included in your final print-ready PDF. It’s a common step to miss!
- Go to File > Export.
- Choose Adobe PDF (Print) as the format and give your file a name.
- In the 'Export Adobe PDF' window, head to the 'Marks and Bleeds' section on the left-hand menu.
- Under 'Bleeds', simply tick the box that says 'Use Document Bleed Settings'. This tells InDesign to include that extra 3mm you set up earlier.
- It's also a massive help for us if you select 'Crop Marks' under the 'Marks' section. This shows our team exactly where to trim.
- Click 'Export', and you're done! Your file is now saved with all the info needed for a perfect print run.
Adding Bleed in Adobe Illustrator
Much like its sibling, Adobe Illustrator is a vector powerhouse designed with print in mind. The process for adding bleed is almost identical, which is great if you switch between the two.
When creating a new document (File > New), the steps will feel very familiar.
- In the 'New Document' window, make sure you've selected the 'Print' tab at the top.
- Enter your final document size (e.g., 210mm x 297mm for A4).
- Find the 'Bleed' section and enter 3mm for the Top, Bottom, Left, and Right fields. The chain link will keep them all in sync.
After you create the document, a red guide will appear around your artboard, just like in InDesign. Remember to pull all your edge-to-edge design elements out to meet this red line. For jobs like compliment slips, getting this right is essential; our guide on creating a professional comp slip template has more specific tips on layout.
Exporting Your Illustrator File with Bleed
Exporting from Illustrator requires the same eagle eye for detail.
- Choose File > Save As.
- Select Adobe PDF from the 'Format' dropdown menu.
- In the 'Save Adobe PDF' dialogue box that appears, click on the 'Marks and Bleeds' tab.
- Just like in InDesign, tick the 'Use Document Bleed Settings' box.
- You can also add 'Trim Marks' here, which we always appreciate.
- Click 'Save PDF' to create your final print-ready file.
How to Handle Bleed in Adobe Photoshop
This is where things get a bit different. Adobe Photoshop is mainly for editing photos (raster images), not for page layout. Because of this, it doesn't have a dedicated, automatic bleed setting. Instead, you have to build the bleed area into your canvas size manually from the very start.
The key to Photoshop bleed is simple: calculate your final document size plus the bleed before you do anything else. Don't try to add it at the end—that’s a recipe for stretched, pixelated images.
Here’s how to do it properly:
- Go to File > New.
- In the setup window, do a quick calculation. You need your final dimensions plus 3mm of bleed on all four sides. This means adding a total of 6mm to both the width and the height.
- Example: For an A5 flyer (148mm x 210mm), you should set your document size to 154mm x 216mm.
- Crucially, set your Resolution to 300 Pixels/Inch and your Colour Mode to CMYK Colour.
Since there’s no red bleed line, you'll need to add your own guides to mark the trim area. Go to View > New Guide and place guides 3mm in from each of the four edges. This creates a visual box that shows you where the 'safe area' is, reminding you to keep important content away from the edges.
When you save your file as a PDF, the bleed will automatically be included because your entire canvas is already the correct, larger size.
Setting Up Bleed in Canva
Canva has become a go-to tool for quick designs, and thankfully, it includes a simple feature for adding bleed.
- When you start a new design or open an existing one, go to File in the top menu bar.
- Select View settings > Show print bleed.
- A dotted line will pop up around the outer edge of your design. That’s your bleed area.
- Just stretch your background images, colours, and shapes to the very edge of this new bleed area.
When you’re ready to download your file for printing:
- Click the Share button (top-right corner), then select Download.
- Under 'File type', choose PDF Print.
- Here’s the most important bit: check the box for 'Crop marks and bleed'. This is the magic button that includes the extra area in your downloaded file.
- Finally, under 'Colour Profile', select CMYK for the best printing results.
By following these specific steps for your chosen software, you're taking control of the process and making sure your design translates from screen to paper without any unwelcome surprises.
Common Bleed Mistakes and How to Fix Them
Getting your bleed in printing set up correctly is a massive step towards a perfect print job, but even seasoned designers can fall into a few common traps. These little errors can lead to frustrating and expensive reprints. Think of this section as your pre-flight check, helping you spot and fix the most frequent mistakes before your design even hits the press.
Catching these issues early is everything. A quick five-minute review of your file can be the difference between a flawless finish and an unexpected white border creeping into your beautifully designed flyer.
Let’s walk through the most common pitfalls and their surprisingly simple solutions.
Mistake 1: Backgrounds That Stop at the Trim Line
This is, hands down, the number one bleed-related issue we see. A designer creates a stunning, colourful background but makes it stop exactly at the document's final trim line, leaving the bleed area completely empty or white.
Remember, the whole point of bleed is to give the guillotine a small margin for error. If the blade shifts by even a fraction of a millimetre and cuts into a white bleed area, a thin, glaring white sliver will appear along the edge of your finished print.
- The Fix: This one’s an easy fix. Always, always extend your background colours, photos, and any graphics that touch the edge of the page all the way out to the bleed guide (that outer red line in your software). This guarantees the blade has nothing but your design to cut through.
Mistake 2: Placing Important Content Too Close to the Edge
The opposite problem is just as common and can be even more disastrous. While backgrounds need to go right to the edge, crucial elements like text, logos, or contact details must stay well clear of it. We often receive files where a phone number or part of a logo is sitting dangerously close to the trim line.
This happens when designers forget about the safe area (or safety margin), which is typically 3mm to 5mm inside the trim line. Anything placed outside this zone is at risk of being partially or completely chopped off during the final cut.
Think of the safe area as a protective forcefield around your most important information. No text or logos should ever breach this boundary, ensuring every word and graphic remains perfectly intact on the finished print.
- The Fix: Before you even think about exporting, do a quick visual scan. Is all your text, including page numbers and social media handles, sitting comfortably inside the safe margin? Just nudge any stray elements back towards the centre of the page to keep them safe from the guillotine.
Mistake 3: Forgetting to Export with Bleed Settings
You can do everything right—set up your document perfectly, extend your background, and keep your safe area clear—but it all counts for nothing if you miss one vital final step. Forgetting to tick the "Use Document Bleed Settings" box when you export your PDF is an incredibly common oversight.
If this option isn't selected, your software will simply export a file at its final trim size, effectively lopping off the bleed you so carefully created. This leaves us with a file that has no margin for error to work with.
- The Fix: Make this part of your muscle memory. When you export to PDF from InDesign or Illustrator, always head to the 'Marks and Bleeds' tab and make sure the 'Use Document Bleed Settings' box is checked. In Canva, you must select 'Crop marks and bleed' when downloading your print-ready PDF.
Understanding how these elements come together is what separates an amateur design from a professional one. For a closer look at how cutting and other processes shape the final product, our guide on finishing in printing offers more detailed insights. These final steps are what give your print its polished, high-quality feel.
Your Final Print Ready Checklist
Before you hit 'send' on your artwork, it’s worth taking a moment for one last check. Think of this as your pre-flight inspection—a final once-over to catch any common issues and make sure your project moves from screen to print without a hitch.
Running through these points is the best way to feel confident that what you’ve designed is exactly what you’ll get back from us. Crisp, professional, and with that perfect edge-to-edge colour.
Final Pre-Submission Artwork Checklist
This simple checklist covers the most critical parts of setting up a print-ready file. Taking a minute now can save you a whole lot of time and hassle later on.
| Check | Status (Yes/No) | Notes |
|---|---|---|
| Bleed is Set to 3mm | Is the standard 3mm bleed applied to all sides of the document? | |
| Background Extends Fully | Do all background elements reach the very edge of the bleed area? | |
| Safe Margins are Clear | Is all important text and imagery kept 3-5mm inside the trim line? | |
| High-Resolution Images | Are all images at least 300 DPI to ensure they print sharply? | |
| Correct Colour Mode | Is the entire document saved in CMYK, not RGB? |
Getting these things right is the secret to a smooth, fast print run. A file that’s properly prepared with the right bleed in printing can often go straight into production.
Submitting a file that ticks all these boxes is the single most important thing you can do to guarantee a fast, successful print job.
Once you’ve confirmed these five points, you’ve done everything needed to prepare a flawless file. You’re ready to send it over to us at The Print Warehouse Ltd and look forward to seeing your amazing design in print
Frequently Asked Questions About Print Bleed
Even when you think you’ve got bleed all figured out, a few questions always seem to pop up right at the last minute. Don't worry, it happens to everyone. This little section is here to give you quick, clear answers to those common queries so you can get your files finalised with total confidence.
We’ll look at what happens when things go wrong, whether you can fix a design after the fact, and why bleed is still a good idea even when it seems like you wouldn’t need it. Think of this as your final checklist before hitting 'send'.
What Happens If I Submit My File Without Bleed?
Submitting a file without the required bleed is one of the most frequent hiccups we see, and it almost always leads to a delay. When your artwork stops dead on the trim line, there’s absolutely no margin for error during the high-speed cutting process.
Even a tiny shift in the paper stack—we’re talking less than half a millimetre—can be enough for the guillotine blade to land just outside your design. The result? A frustrating thin sliver of white paper along the edge, which instantly cheapens the look of your finished print. To avoid that, the alternative is to trim the artwork a fraction smaller, which risks cutting into your actual design.
The bottom line is that a lack of bleed forces a compromise. You either risk unsightly white borders appearing on your finished items or lose a small part of your design during a corrected trimming process.
Can I Add Bleed to a Finished Design?
Fixing bleed on a design that’s already finished can be a bit tricky, but it’s not always a lost cause. How easy it is really comes down to the software you used to create the artwork.
- Vector-Based Designs (Illustrator, InDesign): If your artwork is made from vector shapes and text, you’re in luck. It’s usually a simple fix. You just need to increase the document size and stretch the background colours or elements out into the new bleed area. No loss in quality, job done.
- Raster-Based Designs (Photoshop): This is where it gets more challenging. If your design is a flat image or uses a photo that goes right to the edge, you can't just stretch it. Doing so will make it look distorted and pixelated. The only real solution is to go back to the original, high-resolution photo and re-crop it to the new, larger dimensions that include the bleed.
Do I Still Need Bleed with a White Background?
This is a great question and a totally logical one. If your background is white and the paper we’re printing on is white, a tiny cutting mistake won’t show up, right?
Technically, you're correct. However, it's still considered best practice in the print world to set up every document with the standard 3mm bleed, even if it’s all white.
Why? It’s all about consistency. Setting up every file correctly ensures it sails through our automated pre-press checks without getting flagged. It also builds a great habit for you as a designer, meaning you won’t forget to add it on colourful jobs where it’s absolutely critical. It’s a simple step that guarantees a smooth process for everyone, every time.
Ready to see your perfectly prepared designs come to life? From vibrant flyers to professional banners, The Print Warehouse Ltd makes high-quality printing simple and efficient. Upload your print-ready artwork today and let us handle the rest, delivering stunning results directly to your door. Get started at https://theprintwarehouse.uk.

