
The most common dimensions for a flyer in the UK stem from the A-series paper sizes, with A5 (148 x 210 mm) striking the perfect balance between room for copy and easy hand-outs. Other go-to formats include:
Standard UK Flyer Sizes
- A4 (210 x 297 mm)
- A6 (105 x 148 mm)
- DL (99 x 210 mm)
Each size delivers its own blend of visual impact and portability.
Why Size Matters
Picking the right format isn’t just about fitting your text. It dictates your layout options, printing costs and how you’ll actually distribute the flyers.
Cross-Channel Context
Just as print relies on strict dimensions, digital channels do too. For guidance on online artwork, see our social media image dimensions guide.
Visual Comparison
This infographic gives an instant side-by-side view of the main flyer formats:
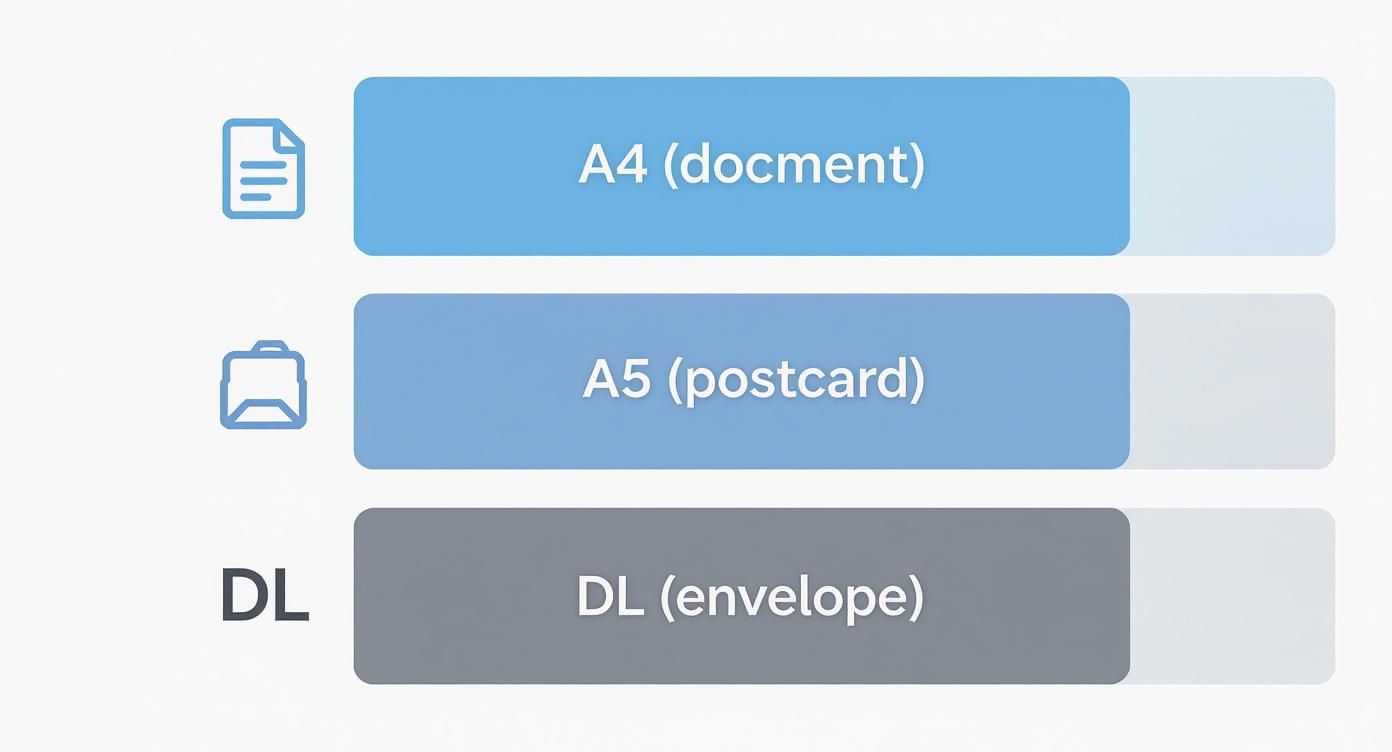
You can quickly gauge how much “real estate” each option allocates to headlines, imagery and body text.
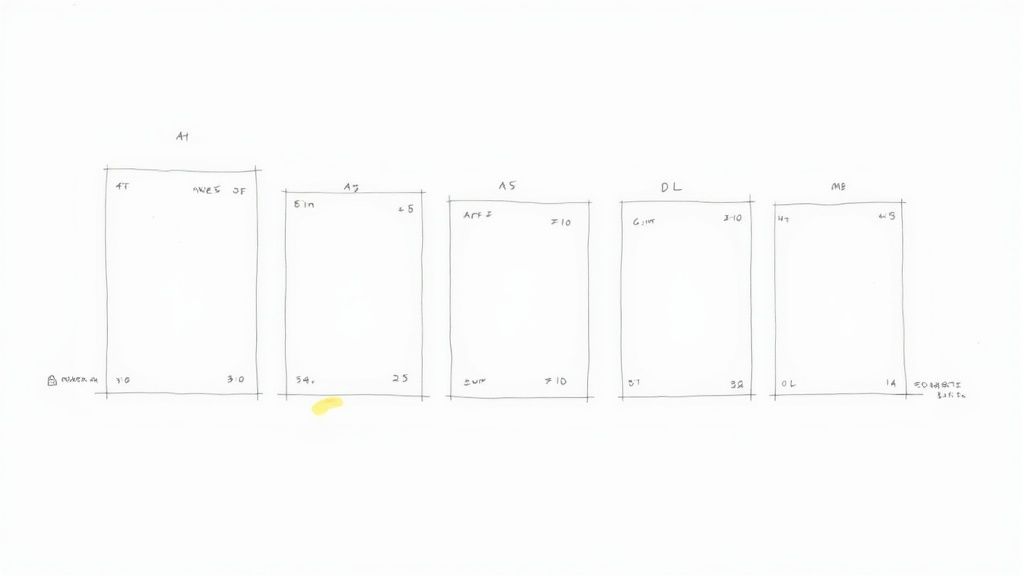
UK Standard Flyer Sizes Quick Reference
Below is a concise rundown of the most common UK flyer formats, showing their exact measurements in millimetres and inches, plus a snapshot of when each makes the most sense.
| Flyer Size | Dimensions (mm) | Dimensions (inches) | Common Use Cases |
|---|---|---|---|
| A4 | 210 x 297 | 8.27 x 11.69 | Detailed brochures, menus, event handouts |
| A5 | 148 x 210 | 5.83 x 8.27 | Promotions, handouts, vouchers |
| A6 | 105 x 148 | 4.13 x 5.83 | Tickets, loyalty cards, compact flyers |
| DL | 99 x 210 | 3.90 x 8.27 | Mailers, rack cards, slim leaflets |
Armed with these measurements, you can swiftly zero in on the right format. Ready to get started? Browse our full range of flyers and place your print order.
Understanding A-Series Flyer Sizes in Detail
Here in the UK, almost all our paper is based on the A-series standard, defined by ISO 216. It’s a brilliantly logical system where each size is exactly half the area of the one before it, while keeping the same aspect ratio. For example, if you slice an A4 sheet in half, you get two perfect A5 sheets.
This simple, proportional relationship is a printer’s dream. It makes scaling artwork a breeze and cuts down on paper waste, which is good for your budget and the planet. Getting to grips with the strengths of each size is the first step in choosing the perfect flyer for your campaign.
A4 Flyers: The Information Hub
As the largest standard flyer size, A4 (210 x 297 mm) gives you plenty of room to play with. It's the go-to choice when your message needs a bit more substance and detail. Think restaurant menus, event programmes, or corporate fact sheets.
Its familiar, letter-like feel automatically lends a sense of professionalism to whatever you're communicating. If you're putting together multi-page documents, our high-quality A4 continuation sheets are a great way to keep your branding consistent.
A5 Flyers: The Versatile Favourite
The A5 flyer (148 x 210 mm) is, without a doubt, the most popular choice for promotional campaigns. It hits that sweet spot between being easy to carry and having enough space for compelling content.
Part of its popularity comes from a practical printing secret: two A5 flyers fit perfectly onto a single A4 sheet. This efficiency helps reduce waste and, more importantly, brings down costs. It’s a staple for a reason and ideal for event handouts, point-of-sale promotions, and mail drops. You get enough room for eye-catching visuals and persuasive text without overwhelming your audience.
A6 Flyers: The Compact Communicator
When you need to get a short, sharp message out to a massive audience, the A6 (105 x 148 mm) is your most cost-effective friend. Its small, postcard-like size is perfect for a few specific jobs:
- Event invites where only the essential details are needed.
- Voucher codes or flash sale announcements.
- Mass distribution in busy, high-traffic areas.
The A6 is pocket-friendly, meaning people are far more likely to hang onto it. This makes it an excellent format for quick, punchy marketing that gets straight to the point.
DL, Square, and Custom Flyer Dimensions
While the standard A-series sizes get the job done for most projects, sometimes you need something a bit different to really make an impression. Stepping away from the usual rectangle is a brilliant way to cut through the noise, especially when everyone else is playing it safe.
The DL flyer (99 x 210 mm) is a hugely popular alternative. Its tall, slim shape is designed to slide perfectly into a standard DL envelope, which makes it a fantastic choice for any direct mail campaigns. It's also the ideal format for content that reads naturally in a list, like price lists, drinks menus, or vouchers.
Stand Out with Square and Custom Sizes
Square flyers are another surefire way to get your brand noticed. Their unconventional shape has a modern, stylish feel that works particularly well for creative businesses in fashion, design, or lifestyle sectors. Common sizes include 148 x 148 mm or 210 x 210 mm, both offering a nicely balanced canvas for designs that are bold and visual.
Of course, you’re not just limited to pre-set shapes. The demand for unique print has seen a massive surge in bespoke options. In fact, the UK custom printing market was valued at around £1.6 billion in 2023 and is expected to more than double by 2030, all thanks to the flexibility of modern digital printing. You can discover more insights about the UK custom printing market on vcprint.co.uk if you fancy a deeper dive.
Choosing a custom size lets you create something that’s genuinely you and perfectly reflects your brand's personality. Whether it’s an unusual shape or a specific folded format, a bespoke design guarantees your message won’t get lost in a stack of standard leaflets.
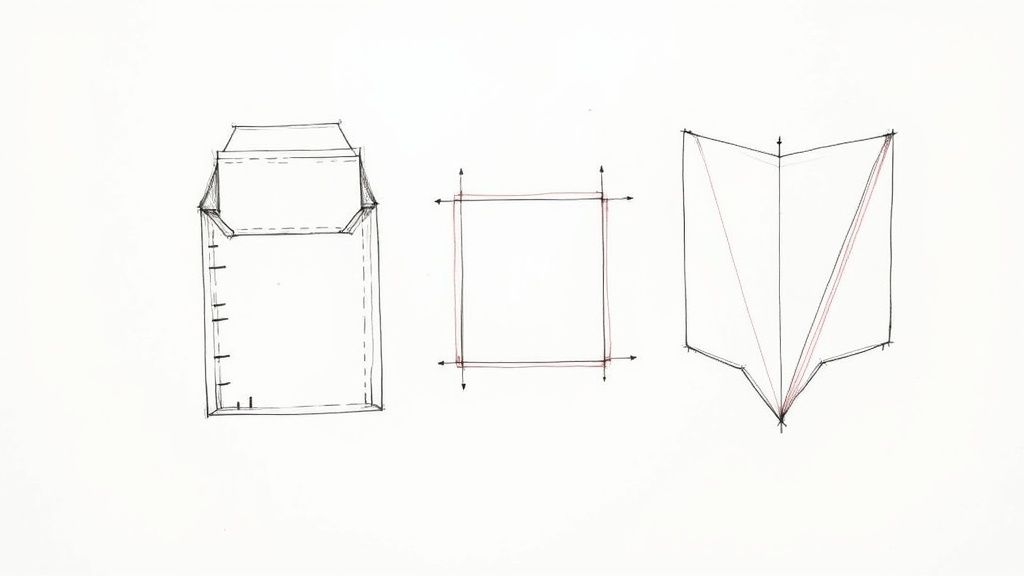
When you start thinking about non-standard sizes, folded leaflets are a practical way to pack in more information while keeping the finished product neat and compact.
- Bi-Fold: A simple fold down the middle (like a greeting card) creates four distinct panels for your content.
- Tri-Fold: Two folds create six panels, perfect for breaking down more detailed information into easy-to-digest sections.
Setting up artwork for folded leaflets does need a bit of careful planning to make sure all the panels line up correctly. For a straightforward way to get perfectly folded designs without the fuss, have a look at our professional leaflet printing services, where we offer templates and expert support to get it right first time.
Getting Your Artwork Print-Ready
Choosing the right flyer size is a great start, but even the most stunning design can fall flat if the technical setup isn't spot on. To make sure your vision translates perfectly from screen to paper, you need to prepare a flawless, print-ready file. It’s all about paying close attention to a few key details that we professional printers rely on.
Nailing these specs is how you avoid common headaches like weird white borders, blurry images, or colours that just look off. Think of it as the final quality check that guarantees a professional finish every time.
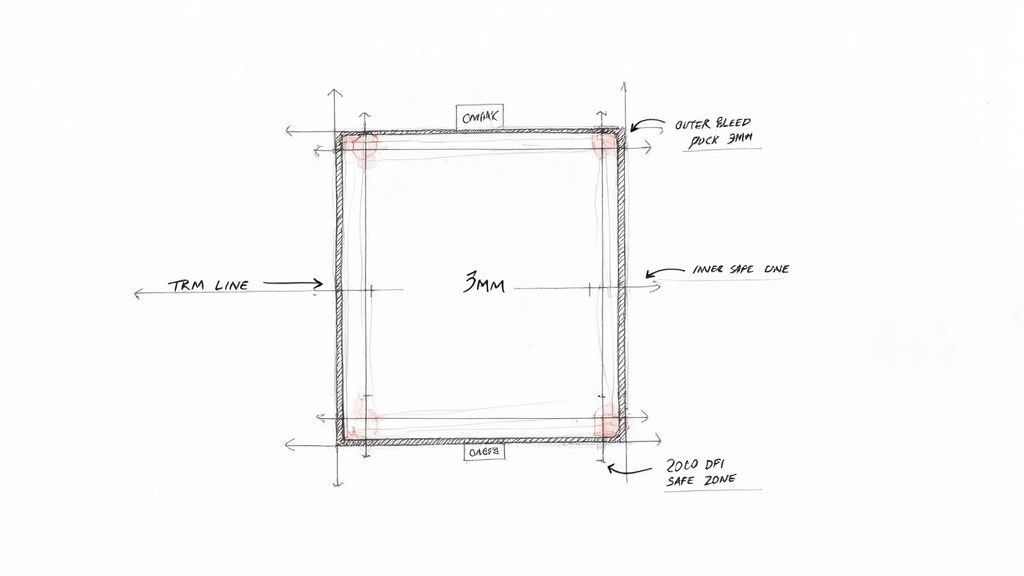
Bleed, Trim, and Safe Zone Explained
To get that clean, edge-to-edge colour you see on professionally printed flyers, your design needs a bleed. This is simply an extra border of your background image or colour that extends beyond the final cut line. For pretty much all flyers, the industry standard is a 3mm bleed on all sides.
It’s basically a safety net for the guillotine that trims the paper. On the flip side, you also need a safe zone inside the trim line, another 3mm margin where you should keep all your critical text and logos. This ensures nothing important gets accidentally chopped off.
- Bleed: The outer 3mm of your design that gets trimmed away.
- Trim: The final, finished edge of your printed flyer.
- Safe Zone: The inner area where all your essential content needs to live, safely away from the edge.
Honestly, if you only remember one thing, make it this: following the guides for bleed, trim, and the safe zone is the single most effective way to ensure your finished flyer looks exactly as you imagined.
Resolution and Colour Mode
Ever seen a printed image that looks fuzzy or pixelated? That’s almost always a resolution problem. For print, your images need to be a crisp 300 Dots Per Inch (DPI). Anything less just won't cut it. If you want to get into the nitty-gritty, this is a great guide on understanding 300 DPI resolution for printing.
Just as crucial is the colour mode. Your computer screen shows colours in RGB (Red, Green, Blue), but professional print machines use CMYK (Cyan, Magenta, Yellow, Black). To avoid any nasty surprises with colour shifts, you should design in CMYK right from the start. It ensures the colours you see are the colours you get. Our high-quality uncoated flyers are a perfect canvas to show off those rich, accurate CMYK colours.
Print-Ready File Technical Checklist
To make things even easier, here’s a quick-glance table with all the essential settings. Double-check your file against this list before you send it over to us, and you’ll be good to go.
| Setting | Recommended Value | Reason for Requirement |
|---|---|---|
| Bleed | 3mm on all sides | Prevents white edges after the flyer is trimmed to its final size. |
| Safe Zone | 3mm inside the trim line | Protects important text and logos from being cut off during trimming. |
| Resolution | 300 DPI | Ensures all images and graphics are sharp, crisp, and not pixelated. |
| Colour Mode | CMYK (not RGB) | Matches the colour system used by printing presses for accurate colour reproduction. |
| File Format | PDF (High Quality Print) | Locks in all your fonts, images, and layout details into one reliable file. |
| Fonts | Embedded or Outlined | Prevents font substitution issues, keeping your typography exactly as intended. |
Getting these settings right from the outset is the secret to a stress-free print job and a final product you can be proud of. It’s what separates the amateurs from the pros
Getting Your File Format Right for Print
You’ve nailed the design, and now it’s time for the final, crucial step: submitting your artwork in the right format. While you might be familiar with JPEGs or TIFFs, when it comes to professional printing, the undisputed champion is a high-resolution PDF (Portable Document Format).
Think of a correctly saved PDF as a locked-down, self-contained package. It bundles everything together, fonts, images, colours, and layout, ensuring that what you see on your screen is exactly what our presses will produce. This simple step eliminates common headaches like missing fonts or images shifting out of place, which can easily derail a project using other file types.
Why a PDF is Your Best Bet
For the absolute best results, we always recommend saving your file as a PDF/X-1a. This isn't just any PDF; it's a specific preset optimised for commercial printing.
It’s the industry standard for a few good reasons:
- It automatically embeds all the fonts you used.
- It flattens any transparent layers, which can sometimes cause printing errors.
- It converts all your colours into the required CMYK space, guaranteeing colour accuracy.
Supplying a print-ready PDF puts you in complete control of the final output. It’s the most reliable way to lock in your flyer's dimensions, bleed, and colour settings, leading to a much faster, smoother printing process with no nasty surprises.
The UK's digital printing industry, with a market size of £1.4 billion, is built on this kind of efficiency. Precise file setup has become more important than ever to support the rapid turnarounds modern businesses expect. You can learn more about the UK digital printing industry's growth on ibisworld.com.
Getting the format right is simple once you know the standard. For total peace of mind and a professional finish, explore our full range of high-quality flyers at The Print Warehouse and upload your PDF with confidence.
Using Our Free Templates for a Perfect Flyer Setup
Getting your artwork dimensions spot-on can feel a bit technical, but our free design templates are here to take all the guesswork out of the process. Created by our own print experts, these resources guarantee your file is technically perfect right from the start, saving you time and helping you avoid any costly mistakes.
Each template is pre-formatted with the exact specifications for your chosen flyer size. This means the document dimensions, 3mm bleed, safe zones, and CMYK colour mode are all set up for you. You can get straight to the creative part without having to worry about the technical details.
How to Use Our Templates
It couldn't be easier to get started. Just follow these simple steps to ensure you end up with a flawless, print-ready file every time:
- Find Your Size: Head over to the product page for the flyer you want (e.g., A5 Flyers).
- Download the Template: Look for the template file that matches your design software – we have options for Adobe InDesign, Illustrator, or a simple PDF.
- Place Your Artwork: Open the template and start arranging your design elements within the guides. Just remember to keep all your important text and logos inside the safe zone to make sure they don’t get trimmed off.
- Export and Upload: Once you’re happy with your design, export it as a high-quality PDF and upload it with your order.
Honestly, using a template is the single best way to get your setup right. It gives you total confidence that the final printed flyer will look exactly as you planned, with crisp edges and perfectly accurate colours.
Got Questions About Flyer Dimensions?
Even with the best-laid plans, a few questions always seem to pop up right when you’re about to finalise your flyer design. Here are answers to some of the most common queries we get, designed to give you that last bit of confidence before sending your artwork to print.
What’s the Best Flyer Size for a Letterbox Mail Drop?
For letterbox campaigns, the top contenders are almost always A5 (148 x 210 mm) and DL (99 x 210 mm). An A5 flyer is large enough to get noticed amongst the post but still compact enough to slide through a letterbox with ease.
The slim, elegant DL format, on the other hand, was practically made for direct mail. It’s designed to fit perfectly into standard business envelopes, giving your mail-out a professional, tidy feel while being incredibly cost-effective. Both are brilliant choices that balance visual impact with practicality.
Why Do My Printed Colours Look Different from What’s on My Screen?
This is a classic and very common issue, and it all comes down to the difference between how screens and printers create colour. Your computer monitor uses an RGB (Red, Green, Blue) model, which mixes light to produce bright, vibrant colours that often can't be perfectly replicated with ink on paper.
Professional printing presses work with a CMYK (Cyan, Magenta, Yellow, Black) ink-based model. To make sure your printed colours are as accurate as possible, it's vital to design and export your artwork in CMYK mode right from the start.
Setting your document to CMYK is one of the most important checks you can do when preparing a print-ready file. It closes the gap between your on-screen design and the final physical product, helping you avoid any nasty surprises or disappointing colour shifts.
How Much Bleed Do I Really Need to Add?
You absolutely need to add 3mm of bleed to every single edge of your artwork. Think of it less as an optional extra and more as a non-negotiable technical requirement for achieving a professional finish.
Printing and trimming are mechanical processes, and tiny variations are inevitable. That 3mm bleed gives us a small margin of error, ensuring that when the flyers are cut down to their final size, your background colour or image extends right to the very edge without any unsightly white slivers.
Can I Just Send My Artwork as a Microsoft Word File?
While you technically can, we strongly advise against it. Microsoft Word just wasn't built for graphic design, and using it often leads to problems with fonts going missing, images looking pixelated, and colours converting incorrectly.
For the best possible results, always supply your final artwork as a high-resolution, print-ready PDF. This format essentially locks in all your design elements fonts, images, colours, and layout—guaranteeing that what you see on your screen is exactly what gets printed.
Ready to print with confidence? At The Print Warehouse Ltd, we make it easy to upload your perfectly prepared artwork and get high-quality, professional flyers delivered right to your door. Start your order today at https://theprintwarehouse.uk.

