
Getting your letterheads printed professionally does more than just put your name on a piece of paper; it turns a simple document into a statement. In a world full of fleeting digital messages, a quality letterhead is like a firm handshake it conveys professionalism and attention to detail long after an email is forgotten.
Why Quality Letterhead Printing Still Builds Credibility
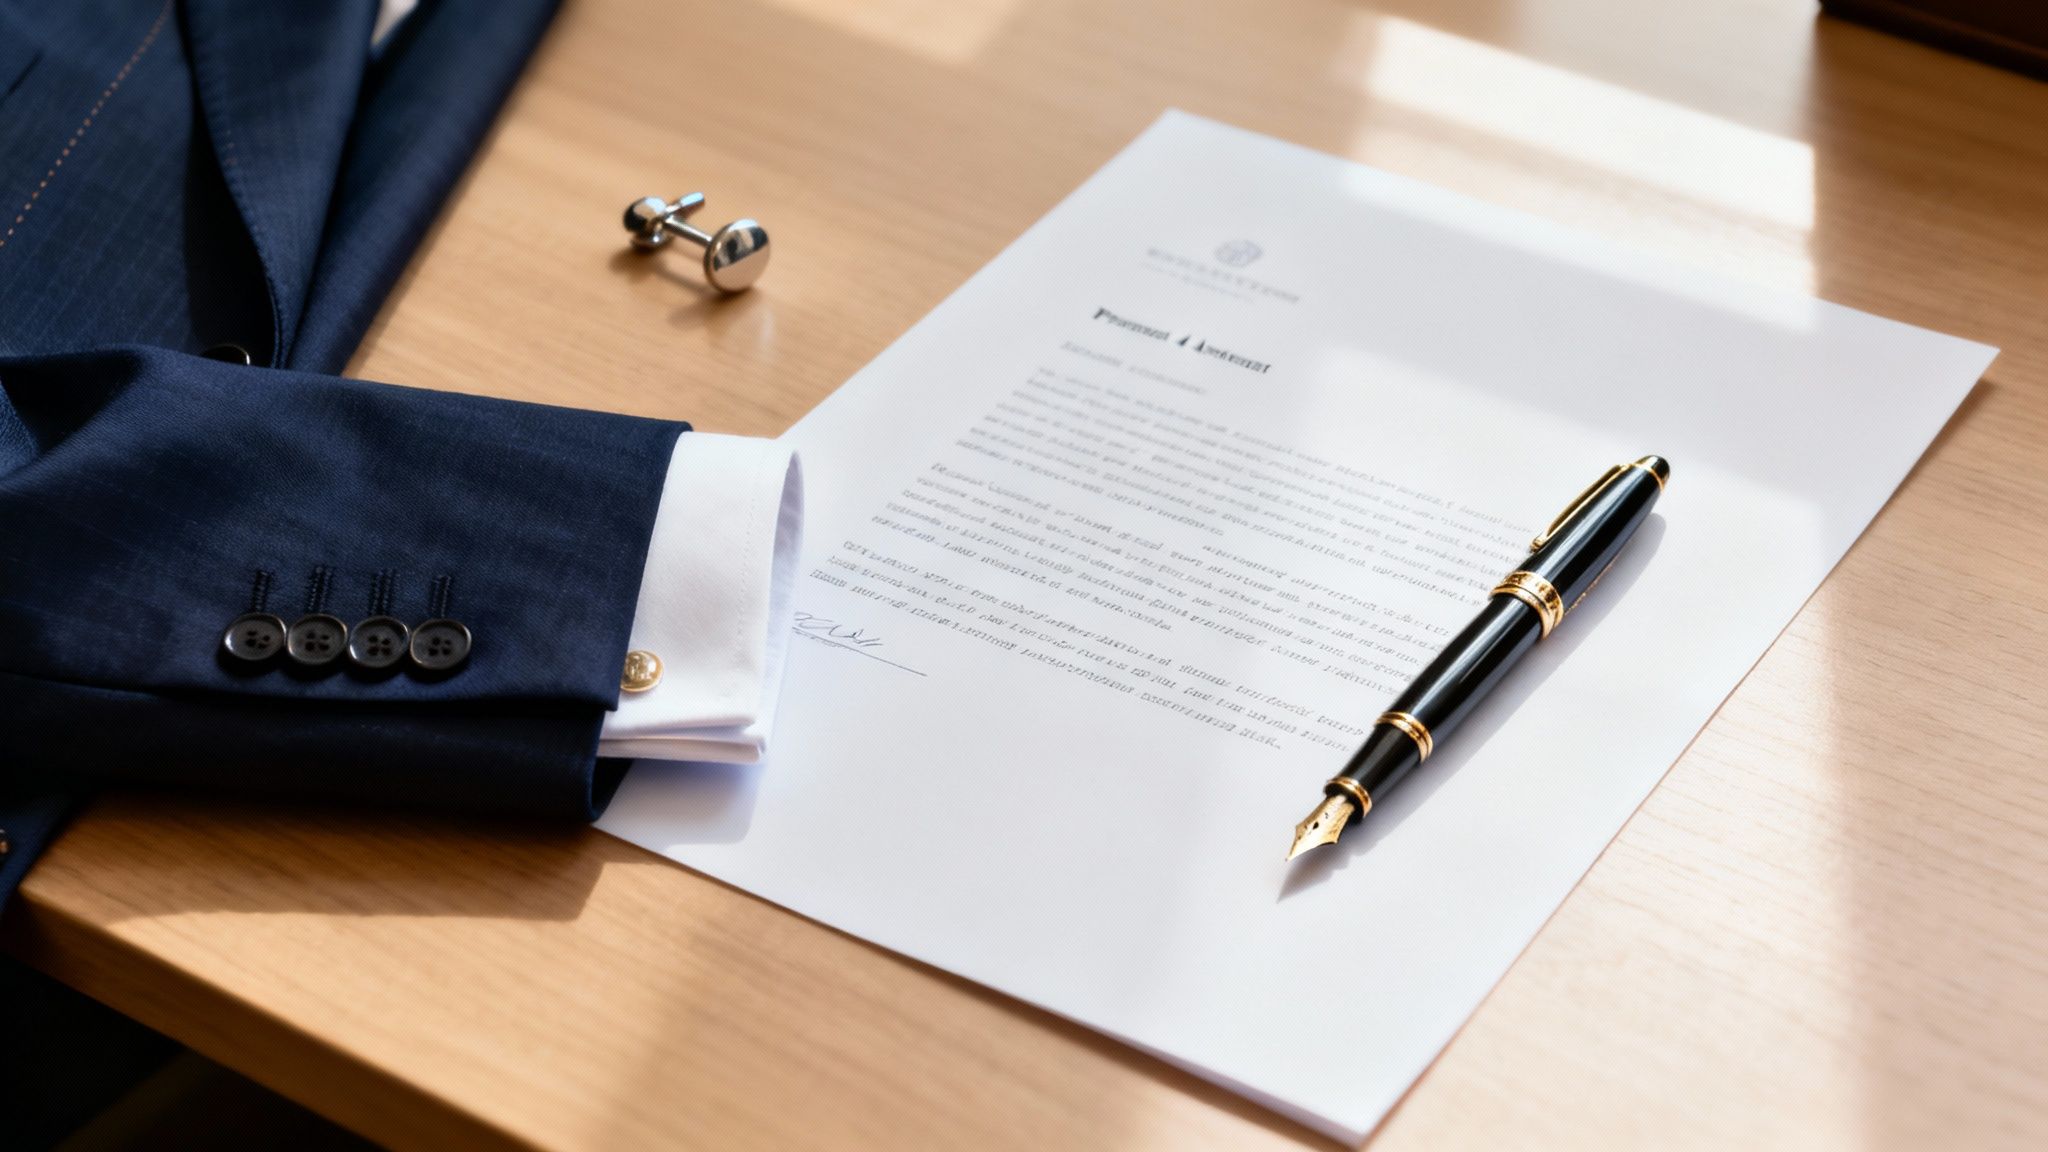
When your inbox is overflowing, a professionally printed letter really stands out. Think of it as the difference between a bespoke suit and one off the rack. Both do the job, but only one sends a clear message of quality, precision, and serious intent. That’s the real power of premium stationery.
For businesses here in the UK, this tangible connection is a vital branding tool. A well-designed letterhead instantly sets a professional tone, reinforcing your legitimacy and building trust with clients and partners. It quietly shows that you care about every little detail of how your business presents itself.
Setting the Standard From the Start
The feel of a high-quality letterhead the weight of the paper in your hand, its texture, the crispness of the print creates a powerful first impression. It’s a subtle nod to your company’s values and stability. Better yet, that physical document often becomes a permanent part of a client's file, representing your brand long after a digital message has been deleted.
This guide will walk you through all the crucial decisions involved in the printing of letterheads, so you can be sure your brand looks its best on paper. We’ll cover everything you need to know, from start to finish:
- Paper Types and Weights: How to choose the right stock to match your brand's personality.
- Printing Methods: Deciding between digital and litho printing for your specific needs.
- Artwork Preparation: Getting your design pixel-perfect before it hits the press.
- Professional Finishes: Adding that extra touch of class with foiling or embossing.
By getting these elements right, you can create stationery that doesn't just look professional but actively builds your brand's credibility. If you're looking for a reliable partner for the job, it’s worth exploring some of the best online printing services in the UK to see what your options are.
Choosing The Right Paper For Your Brand's Story
The paper you choose for your letterhead is so much more than a surface for ink; it’s the very first thing a recipient touches. Before they even read a single word, the weight and texture have already started telling your brand’s story. It can whisper quality, shout about your eco-credentials, or project classic authority, all through the simple sense of touch.
Think of it like a handshake. A flimsy, lightweight paper is like a limp handshake forgettable and unimpressive. A thick, substantial paper, on the other hand, is like a firm, confident grip that commands respect. This tactile experience is a crucial part of printing letterheads, setting the tone for your entire message before it's even read.
Decoding Paper Weight: What is GSM?
When you’re browsing paper options, the term you’ll see everywhere is gsm, which stands for ‘grams per square metre’. It’s simply a measure of the paper’s density, which gives you a good idea of its thickness and quality. The higher the gsm, the heavier and more premium the paper will feel.
If you want to dive deeper, we have a complete guide to understanding what gsm means for paper. For now, here are the most common choices for letterheads and what they say about your business:
- 80-90gsm: This is your standard, everyday office printer paper. It’s functional and cheap, but it lacks the substantial feel needed to make a strong professional impression.
- 100-120gsm: This is the sweet spot for most professional correspondence. It feels noticeably thicker and more durable than standard paper, sending a message of quality and attention to detail without feeling overly formal. It’s a real all-rounder.
- 160gsm: Now we’re talking premium. This weight feels distinctly luxurious, almost like a thin card. It’s an excellent choice for executive letters, formal invitations, or any communication where you really want to make an impact.
To make it even easier, here's a quick-reference table to help you match the paper weight to your brand's needs.
Common Letterhead Paper Weights And Their Uses
| Paper Weight (gsm) | Feel & Perception | Best For | Office Printer Compatibility |
|---|---|---|---|
| 80-90gsm | Light, standard, economical. Feels like everyday copy paper. | Internal memos, high-volume mailings, everyday office use. | Excellent. Compatible with virtually all office printers. |
| 100-120gsm | Substantial, professional, high-quality. The industry standard. | Client letters, official proposals, invoices, branded correspondence. | Very good. Most modern office printers handle this with ease. |
| 160gsm | Thick, luxurious, card-like. Creates a premium impression. | Executive communications, formal invitations, certificates, high-end brands. | Check printer specs. May require a manual feed tray. |
Choosing the right gsm is a simple way to elevate your brand perception from the moment your letter is opened.
Finding The Perfect Paper Texture
Beyond weight, the paper's finish adds another layer to your brand’s personality. The surface can enhance your design and reflect your company’s values. Each texture tells a slightly different story, so getting this right is key.
Here are a few popular options available for letterhead printing:
- Uncoated: A classic choice with a natural, matt surface. It's brilliant for modern, crisp designs and is a dream to write on. Uncoated paper absorbs ink beautifully, giving colours a slightly softer, more sophisticated look.
- Recycled: For businesses committed to sustainability, recycled paper is the only way to go. It proudly communicates your eco-conscious values and often has a subtle, earthy texture that adds real character.
- Textured Finishes (Laid or Conqueror): These papers have a traditional, authoritative feel. ‘Laid’ paper has fine, raised lines, while ‘Conqueror’ is a premium brand known for its distinctive watermark. Both are ideal for legal firms, financial institutions, and established businesses wanting to project an image of heritage and trust.
Your paper choice is a silent brand ambassador. A 120gsm recycled stock says, "we are professional and responsible," while a 160gsm laid paper says, "we are established and authoritative." The right choice reinforces your brand identity before a word is read.
The UK custom printing market, which generated around USD 1,989.2 million in 2023, is set for serious growth, thanks in large part to advances in digital printing. This progress has made short-run printing of letterheads incredibly affordable. It means small businesses can now get professional finishes on thicker 120-160gsm papers at prices that can be 30-60% lower per unit than traditional setups used to allow. You can find more insights about the growing UK custom printing market. This accessibility empowers you to choose the perfect paper without having to compromise on quality or your budget.
Digital Vs Litho Printing: What Is The Difference?
Getting the right result for your letterheads means understanding the engine that powers the printing process. When it comes to the printing of letterheads, the two main players are digital and lithographic (or 'litho') printing. The best choice for you really boils down to your specific needs—especially how many you need and how important precise colour is to your brand.
Think of digital printing as a super-advanced version of your office laser printer. It takes your design file and prints it straight onto the paper with minimal fuss. This makes it incredibly efficient for smaller jobs and the undisputed champion for short print runs.
Litho printing, on the other hand, is the traditional powerhouse of the print world. It's a more involved process that uses custom metal plates to transfer ink onto the paper. The setup takes more time and effort, but once it's up and running, it can churn out huge quantities at a cost per sheet that digital simply can't match.
Digital Printing: Speed And Flexibility For Small Batches
When you need things done quickly and without fuss, digital printing is your best friend. Because it skips the whole plate-making step, the setup time is virtually non-existent. This means your letterheads get printed and delivered much faster—perfect for those last-minute needs or if you prefer ordering in smaller, more frequent batches.
The main perks of choosing digital for the printing of your letterheads include:
- Low Minimum Orders: Just need 50 or 100 letterheads? No problem. Digital printing makes this both practical and affordable.
- Fast Turnaround: With less setup involved, jobs are completed in a fraction of the time a traditional litho run would take.
- Cost-Effective for Short Runs: For any quantity under around 1,000, digital usually offers a lower overall price because you avoid the upfront setup costs of litho.
This flowchart can help you visualise how paper choice links to your printing method. Often, the quantity you need will guide you towards either digital or litho.
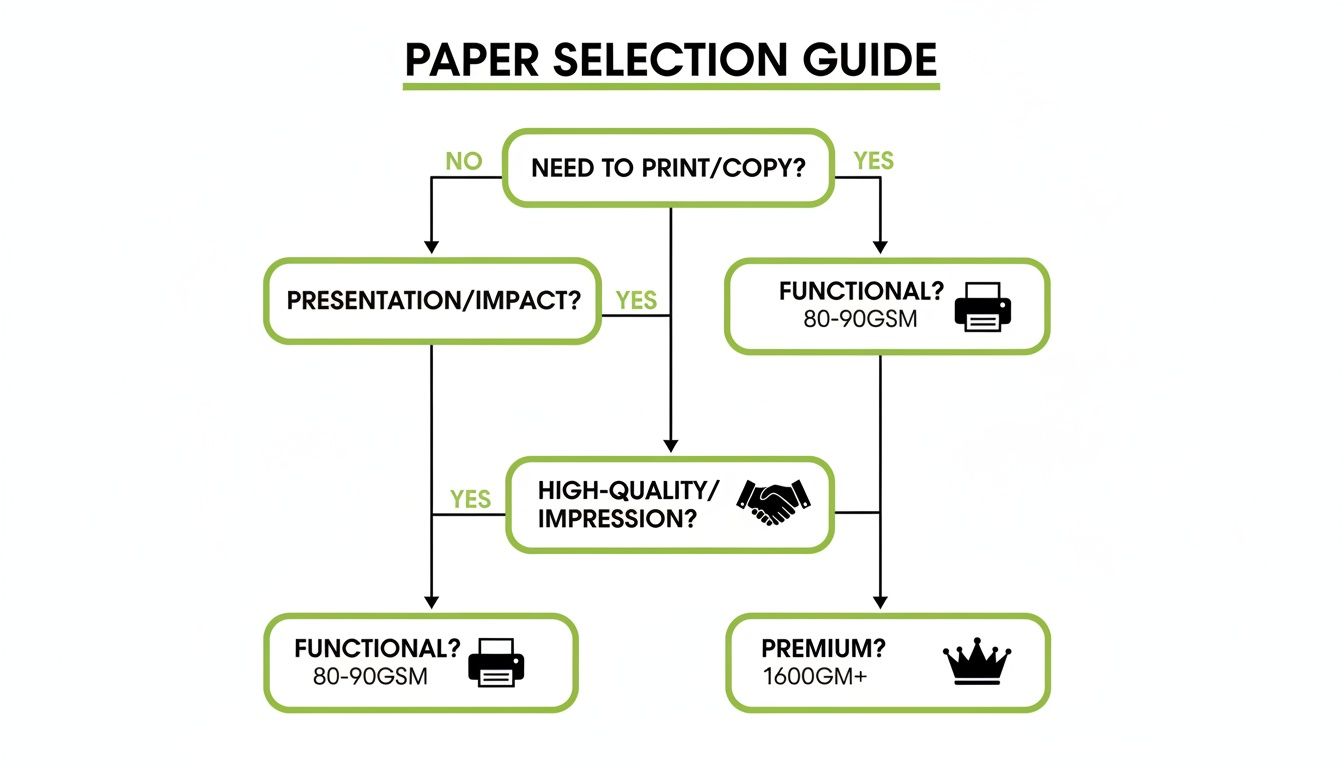
As the chart shows, while standard paper gets the job done for basic needs, professional and premium stocks really elevate your brand. For smaller quantities, cost-effective digital printing often makes these higher-quality papers a more accessible option.
Litho Printing: Unmatched Quality For High Volume Orders
Litho printing truly comes into its own when you're ordering large quantities of letterheads, typically 2,500 or more. While creating the printing plates involves a higher initial cost, the price per letterhead drops significantly as the volume goes up. This makes it the most economical choice for big mail-outs or for businesses that get through a lot of stationery.
But it’s not just about cost. Litho’s biggest advantage is its phenomenal colour precision. It uses liquid inks and can perfectly replicate specific Pantone colours, which is a non-negotiable for brands where exact colour consistency is vital. Digital printing gets close by mixing CMYK inks, but litho delivers true, uncompromised accuracy every single time.
To make the best decision for your letterheads, it's worth understanding the nuances between digital and traditional printing methods, which share many of the same principles.
When to Choose Litho: Go for litho printing if your order is over 2,500 copies, you need an exact Pantone colour match for your brand, or you simply want the absolute highest print quality available for fine details and smooth gradients.
How To Prepare Your Artwork For Flawless Printing
The secret to a stunning final product isn't just in the press; it’s in the quality of the artwork you supply. Even the most advanced printing equipment can't rescue a poorly prepared file. Getting your artwork right from the start is the single most important step to ensure your finished letterheads look exactly how you imagined them, saving you from costly and frustrating reprints.
Think of your design file as the blueprint for a house. If the measurements are off or the instructions are unclear, you’re not going to like the final build. The same logic applies to the printing of letterheads. By following a few simple technical rules, you give us a perfect blueprint that guarantees a flawless result, every single time. It's surprisingly straightforward once you know the basics.
Setting The Correct Document Size
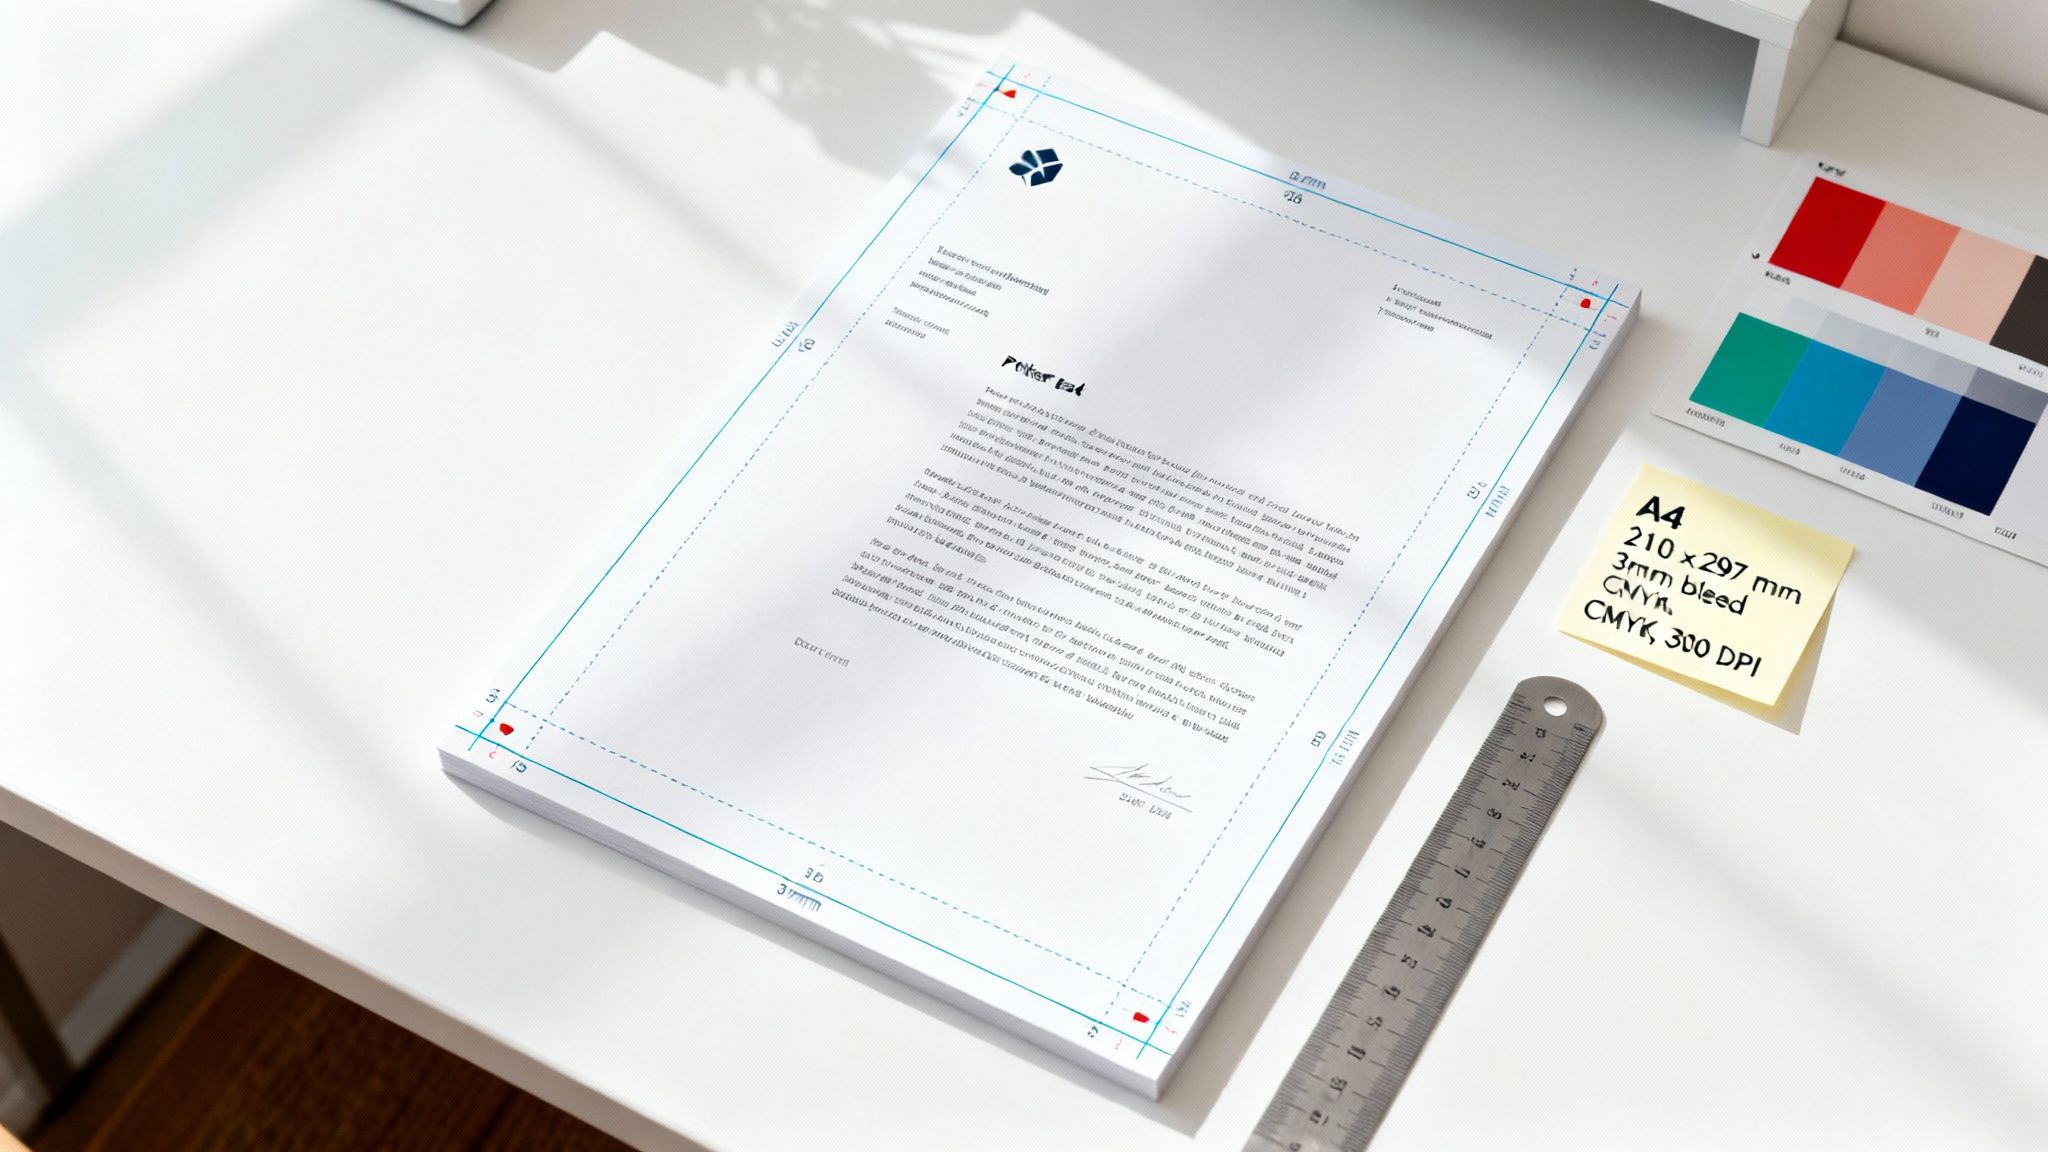
First things first: let's get the canvas right. In the UK, the standard size for letterheads is A4, which measures 210mm x 297mm. Kicking off your design with these precise dimensions ensures that everything from your logo to your contact details will be perfectly proportioned on the final page.
Getting this right from the beginning prevents your design from being stretched, shrunk, or awkwardly cropped to fit the paper later on. It’s a simple check that avoids a major headache.
Understanding The Importance Of Bleed
Ever seen a printed flyer with a thin, unprofessional white sliver of paper along the edge where the colour should have been? That's what happens when a design file is missing a ‘bleed’. Bleed is simply a safety margin that extends your background colour or images just beyond the final trim line.
For professional printing, a 3mm bleed on all four sides of your artwork is essential. This means your actual design file should be slightly larger than A4, measuring 216mm x 303mm. When we trim the printed sheets in large stacks, this tiny extra margin accounts for any minuscule shifts in the cutting machinery.
Without a bleed, any tiny movement during trimming can leave an unsightly white edge. Adding that 3mm border ensures your design extends flawlessly to the very edge of the paper for a clean, professional finish. It’s a non-negotiable for high-quality printing.
If this is a new concept for you, our detailed guide can walk you through how to learn how to correctly add print with bleeds to your files.
Choosing The Right Colour Mode: CMYK, Not RGB
The colours you see on your screen are created with light (Red, Green, Blue – RGB), but printers create colours with ink (Cyan, Magenta, Yellow, Black – CMYK). These two colour models are fundamentally different, and designing in the wrong one can lead to disappointing results.
If you design in RGB, the colours might look vibrant on screen but can appear dull or shift in hue when printed. To ensure your brand colours are reproduced as accurately as possible, you must set your document’s colour mode to CMYK before you even start designing. This gives you a much more realistic preview of the final printed colours.
Ensuring High Resolution For Sharp Images
Resolution is all about the sharpness and clarity of your printed images. We measure it in DPI, or dots per inch. For the printing of letterheads, the industry standard is a crisp 300 DPI. This ensures your logo and any graphics look sharp and professional, not blurry or pixelated.
This is a good moment to think about your branding. Before getting started, it might be worth investing in professional logo design, as a well-crafted logo is the foundation of an impressive letterhead. Using a low-resolution image grabbed from a website (often just 72 DPI) is one of the most common mistakes we see, and it will always result in a poor-quality print. Always use the original, high-resolution source files.
Your Print-Ready Artwork Checklist
Getting your artwork print-ready might feel technical, but it’s just a series of simple checks. To make it even easier, here’s a quick checklist to run through before you upload your file.
| Checklist Item | Specification | Why It's Important |
|---|---|---|
| Document Size | A4 (210mm x 297mm) | Ensures the final print matches the standard UK letterhead size perfectly. |
| Bleed Area | Add 3mm on all sides | Prevents white edges after trimming for a full-colour, professional look. |
| Colour Mode | CMYK | Guarantees your brand colours are reproduced accurately with printing inks. |
| Image Resolution | Minimum 300 DPI | Keeps your logo and any graphics looking sharp and clear, not pixelated. |
| Fonts | Outlined or embedded | Stops fonts from changing or defaulting when we open your file on our systems. |
| File Format | High-Quality PDF | Locks everything in place, preserving your layout, fonts, and images perfectly. |
Once you’ve ticked off all these points, you’re good to go. The final step is to save your masterpiece as a print-ready PDF. This file type bundles all your fonts, images, and layout information together, ensuring nothing changes or shifts when we open it. Most design software has a built-in option to export as a "High-Quality Print" or "Press-Ready" PDF, which is exactly what we need.
Using Professional Finishes To Elevate Your Brand
You’ve nailed the design and picked the perfect paper. So what’s next? Now it's time for the final touches that take your letterhead from simply professional to genuinely memorable. Special finishes are the secret to adding a tactile and visual edge, turning a simple document into something people actually want to hold.
Think about it. Imagine a potential client running their thumb over your logo and feeling it subtly raised from the page. Or picture your company name catching the light with a sophisticated glint of metallic foil. These details make your correspondence stand out in a pile of mail, reinforcing your brand’s commitment to quality before a single word is even read.
Adding A Touch Of Luxury With Foil Blocking
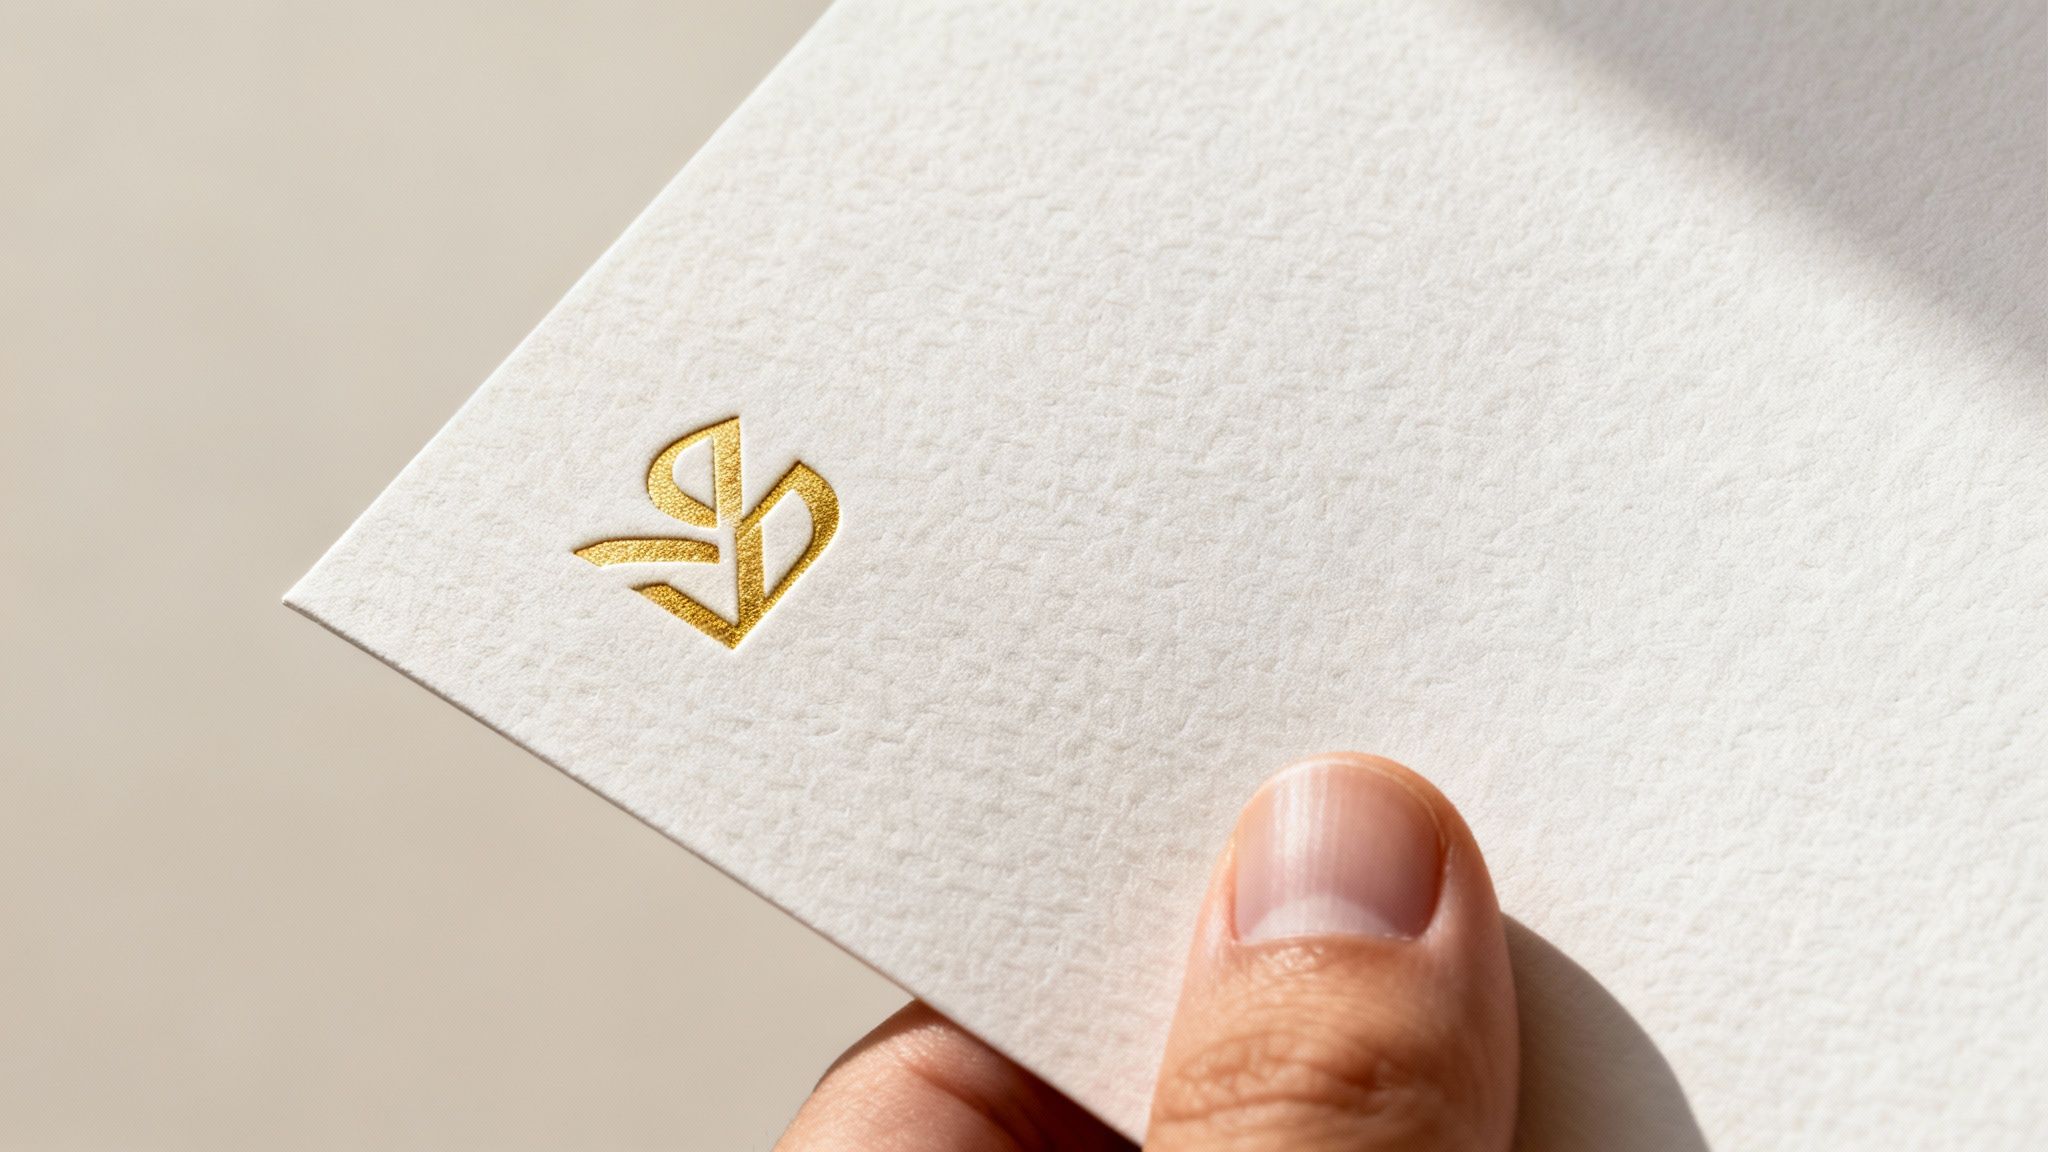
Foil blocking, often called hot foil stamping, is a premium finish that applies a metallic or coloured foil to specific parts of your design. It's a fantastic way to draw the eye straight to your logo or company name. More than anything, this technique telegraphs luxury and prestige, making it a favourite for high-end brands.
Consider these classic foil options to elevate the printing of letterheads:
- Gold Foil: The ultimate symbol of quality and success. It’s perfect for legal, financial, or luxury retail brands.
- Silver Foil: A sleek, modern alternative that gives off a clean, professional vibe. Ideal for tech companies, architects, and creative agencies.
- Copper Foil: A warm, contemporary choice that feels both stylish and sophisticated—great for design studios and premium consumer goods.
Foil blocking does more than just add shine; it adds perceived value. This finishing touch instantly elevates your brand, suggesting a level of craftsmanship and attention to detail that clients will associate with your services.
Creating Texture With Embossing And Debossing
Where foiling appeals to the eye, embossing and debossing are all about the sense of touch. These techniques create a three-dimensional effect by physically reshaping the paper, adding a sophisticated texture that’s impossible to ignore. It’s a brilliant way to give your logo or key graphics a subtle, elegant prominence.
Embossing literally raises a section of the paper, pushing it up from behind to create a raised element on the front. This adds a refined, tactile quality that feels both classic and incredibly professional.
On the flip side, debossing indents an area of the paper, pressing it down from the front. This creates a subtle, understated effect that communicates modern craftsmanship and precision.
Choosing the right finish is a key part of the printing process. For a more detailed look at what’s possible, you can learn more about the different types of finishing in printing and how they can bring your projects to life. By investing in these final details, you ensure your letterhead not only gets your message across but also makes a lasting, premium impression.
Your Final Checklist For Ordering Printed Letterheads
You’ve explored the options, weighed up the technical details, and now you’re ready to hit ‘print’ on letterheads that will do your brand proud. Think of this final checklist as your safety net—a simple, scannable way to consolidate all those key decisions and make sure nothing gets missed before you sign off on the order.
Going through this list step-by-step turns a potentially complicated task into a series of simple checks. It’s about giving you the confidence that what arrives in the box will be exactly what you envisioned.
Confirm Your Foundation: Paper and Quantity
First things first, let's lock in the physical materials. Have a final look at the paper you’ve chosen. Does it truly reflect your brand’s identity? Is it the professional, reliable 120gsm uncoated stock, or are you aiming for that extra touch of class with a 160gsm textured paper?
Once you're happy with the feel, confirm your quantity. This decision is tied directly to the printing method, so it’s a crucial one for your budget.
- Digital Printing: Perfect for smaller, more flexible orders, say between 50 and 1,000 copies.
- Litho Printing: The best value for money when you’re ordering in bulk, typically 2,500 copies or more.
Getting this right from the start ensures you get the most out of every penny.
Verify Your Artwork and File Setup
Next up is the design file itself. This is where tiny errors can mushroom into big problems, so a careful review is an absolute must. Your artwork is the blueprint for the finished product, and it needs to be spot-on.
Run through these technical specs one last time:
- Correct Size: Is the document definitely set to A4 (210 x 297mm)?
- Essential Bleed: Have you included a 3mm bleed on all sides?
- Colour Mode: Is the file saved in CMYK colour mode, not RGB?
- High Resolution: Are your logos and any images a crisp 300 DPI?
- File Format: Have you exported the final version as a print-ready PDF?
The most crucial step before giving the final go-ahead is reviewing your digital proof. This is your last chance to catch any typos, alignment issues, or colour discrepancies. Treat it as the definitive version of your letterhead—what you see is exactly what you'll get.
Approve The Final Proof
After you upload your artwork, we’ll send you a digital proof. Scrutinise it. If it helps, print it out on your office printer to spot things you might miss on-screen. Check every single detail, from the phone number and address to the logo placement. Only give your approval when you are 100% satisfied.
This final check is paramount. The UK print industry has a turnover of about £13.7 billion, and much of that comes from small and medium businesses ordering essentials like letterheads. Printers are built for efficiency, and once a proof is approved, the job moves into production fast. Taking that extra moment here prevents any future disappointment.
With this checklist ticked off, you can place your order with complete confidence. All that’s left is to look forward to receiving a batch of professionally printed letterheads that make your brand look its best. Ready to get started? You can begin ordering your custom printed letterheads online today.
Common Questions About Printing Letterheads
As you get ready to finalise your order, it’s completely normal for a few last-minute questions to pop up. Getting those sorted is the key to making sure the letterheads that land on your desk are exactly what you envisioned.
We’ve pulled together the most common queries from UK businesses just like yours. Let's walk through them so you can order with total confidence.
Can I Use My Own Printer On Your Letterheads?
Yes, absolutely. We’ve handpicked our uncoated paper stocks (anything 120gsm and below) to work seamlessly with standard office laser and inkjet printers. This is a must-have feature, allowing you to add your letter’s text in-house onto professionally branded paper.
If your office runs on highly specialised or high-speed printing gear, we always suggest ordering a small sample pack first. A quick test run is the best way to guarantee flawless results and perfect toner adhesion every single time.
What Is The Most Cost-Effective Order Quantity?
The best value really comes down to which printing method you go for. This decision has a direct impact on your price-per-sheet, so it’s smart to match your order volume with the right technology.
Here’s a simple way to think about it:
- Digital Printing: The cost per sheet stays pretty consistent, which makes this a brilliant and economical choice for quantities between 50 and 1,000. It's perfect for startups, smaller businesses, or anyone who needs flexibility without a big upfront cost.
- Litho Printing: This method has a higher setup cost because it involves creating physical print plates. But once it’s running, the price-per-sheet drops dramatically as you print more. Litho usually becomes the most wallet-friendly option for orders of 2,500 letterheads or more.
Why Is Bleed So Important For My Artwork?
Think of bleed as a small safety net for your design. It’s the extra 3mm of background colour or imagery that extends past the final trim edge of the page. During production, we use high-speed machinery for printing and cutting, and there can be tiny mechanical shifts from one sheet to the next.
This 3mm margin is non-negotiable for a professional finish. It’s what guarantees you’ll never see an unprofessional-looking white sliver at the edge of your finished letterhead, even if the cutter shifts by a fraction of a millimetre. It's the secret to getting that clean, polished, edge-to-edge look.
How Do I Ensure My Brand Colours Print Correctly?
Getting your colours spot-on, especially a specific brand shade, hangs on two crucial factors. Nailing these in the artwork stage is the key to consistency in the final printed product.
First, your artwork must be designed and saved in the CMYK colour model, not RGB. Screens use light to create colour (Red, Green, Blue), but printers use ink (Cyan, Magenta, Yellow, Black). Second, if your brand identity relies on a specific Pantone colour, then litho printing is your best bet for a perfect match. Digital printing gets incredibly close, but only litho can offer true Pantone accuracy for flawless brand representation.
At The Print Warehouse Ltd, we make ordering professional letterheads simple. Just upload your artwork, choose your perfect paper, and let us handle the rest.

