
Custom sticker printing is one of the most powerful and surprisingly affordable ways to get your brand out there. It’s all about printing your unique designs onto adhesive materials, giving you total control over the shape, size, and finish to bring your vision to life.
Your Quick Guide to UK Custom Sticker Printing
Diving into custom stickers can feel a bit overwhelming with all the options available. This section is designed to cut through the noise and give you practical, straightforward answers. We'll look at what makes a sticker great (and what makes one… not so great) and walk you through the three core decisions you'll need to make.
Think of it as your cheat sheet. The trick is to nail the essentials: choose the right material for the job, pick a finish that makes your design pop, and select an adhesive that actually sticks where you need it to. Get these right, and you've got a final product that not only looks brilliant but is perfectly fit for purpose.
The Three Pillars of a Perfect Sticker
Your sticker’s success really hinges on getting these three elements spot on:
- Material: This is the foundation. Ask yourself: where will this sticker live? Is it destined for an indoor life on a notebook, or will it be braving the elements on the back of a van? Vinyl is your go-to for durability and weatherproofing, while paper is a brilliant, cost-effective choice for anything happening indoors.
- Finish: This is the final flourish that sets the whole mood. A gloss finish makes colours look incredibly vibrant and punchy, while a matte finish offers a more subtle, contemporary, and premium feel.
- Adhesive: This is the glue that holds it all together—literally. A permanent adhesive is for the long haul, designed to stay put. On the other hand, a removable one is perfect for temporary promotions, peeling off cleanly without leaving any sticky residue behind.
And stickers aren't just for branding anymore. They're a fantastic tool for bridging the gap between print and digital. We're seeing more and more businesses implementing QR code marketing strategies on their stickers to drive online engagement. It’s a smart move in a rapidly expanding market; the UK print-on-demand sector was valued at around $508 million in 2023 and is projected to soar to $2.4 billion by 2030.
Quick Sticker Type Comparison
To make your decision even easier, we've put together a simple table summarising the most popular sticker options. It’s a great way to quickly match a sticker type to your project, whether it's for branding, an event, or product packaging.
| Sticker Type | Best For | Key Feature |
|---|---|---|
| Vinyl Stickers | Outdoor use, water bottles, cars | Durable & Weatherproof |
| Paper Stickers | Indoor packaging, product labels | Cost-Effective & Eco-Friendly |
| Clear Stickers | Windows, product jars, branding | Transparent background |
| Holographic Stickers | Special editions, tech gadgets | Eye-catching, iridescent effect |
This table covers the basics, but it's just the start. To see the full range of materials, shapes, and finishes we offer, head over and explore all the custom sticker options at https://theprintwarehouse.uk/.
Choosing Your Ideal Sticker Materials and Adhesives
The foundation of a brilliant, long-lasting sticker is all about its material and adhesive. Getting this right is like picking the right coat for the weather – the sticker’s final destination dictates the best choice. Let’s unpack these critical components so you can make a confident decision for your next project.
We'll go beyond just listing options and look at how they actually perform in the real world. Whether your sticker is destined for a laptop, a water bottle, or the side of a van, the right pairing ensures it looks great and, most importantly, stays put.
Selecting the Right Sticker Material
The material is the very body of your sticker, and its properties determine where it will thrive. Think carefully about the end-use, as this is the most crucial factor. A sticker for a disposable coffee cup has completely different needs from one slapped on a construction helmet.
- Weatherproof Vinyl: This is the undisputed champion for durability. As a plastic-based material, vinyl is naturally resistant to water, UV rays, and scratches. It's the perfect choice for anything that’ll be exposed to the great British weather, from car bumpers to outdoor gear.
- Eco-Friendly Paper: Ideal for indoor applications, paper stickers are a classic, cost-effective option. They're perfect for product packaging, address labels, or short-term promotional giveaways where battling the elements isn't a concern.
- Clear Polyester: When you want your design to pop without a background, clear polyester is the way to go. This sleek material creates a "no-label" look, making it excellent for placing logos on products, windows, or any surface where you want the underlying colour to show through.
For applications like shopfronts, you'll want something like durable custom shape weatherproof window stickers designed specifically to adhere to glass. This ensures your message stays vibrant and professional, facing outwards to attract customers.
This simple visual guide helps map out the decision process for picking the right material, finish, and adhesive.
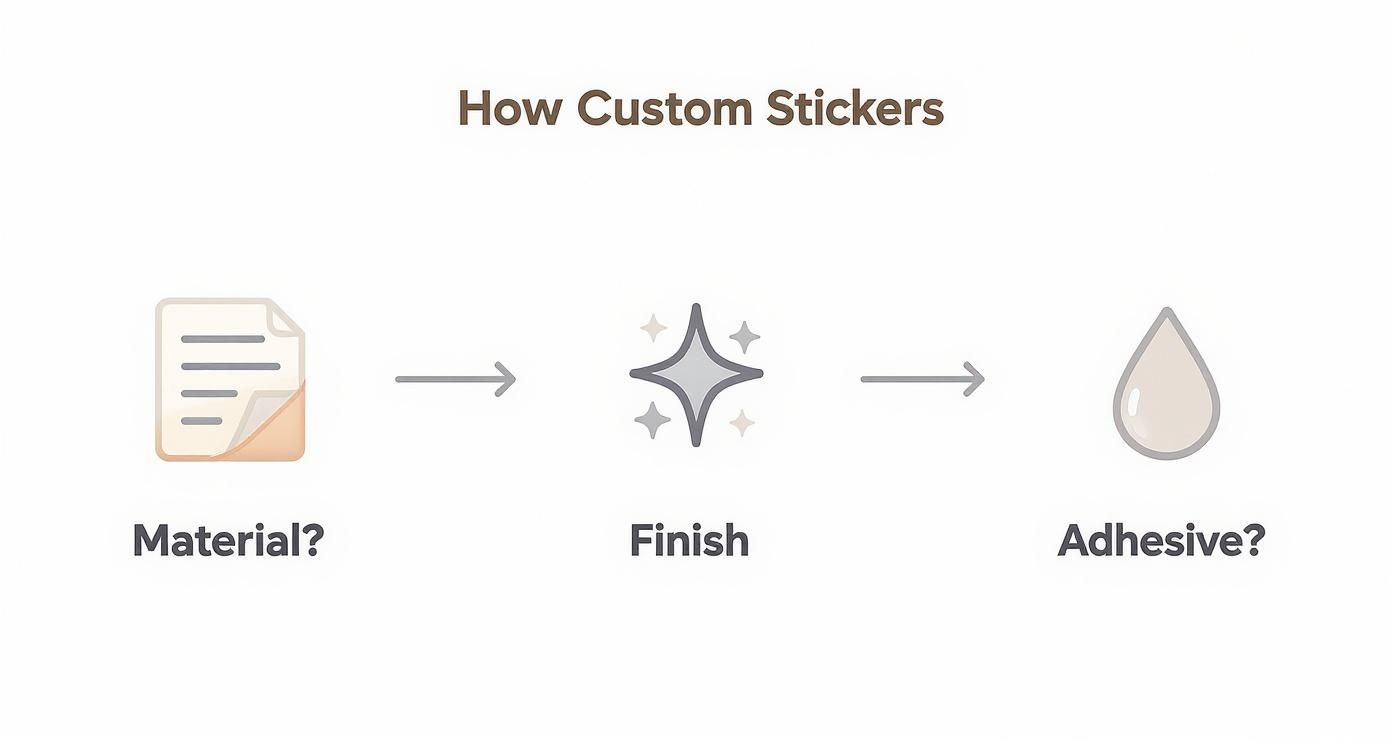
By following the flow, you can quickly narrow down your options based on where your sticker will be used and the look you want to achieve.
Demystifying Sticker Adhesives
Just as important as the material is the glue holding it all together. The wrong adhesive can lead to peeling corners or leave behind a sticky, gummy mess. Understanding the different types helps you match the sticker's staying power to its purpose.
A sticker’s adhesive is its unspoken promise. A permanent adhesive promises longevity, while a removable one promises a clean slate. Choosing the right one ensures you keep that promise to your customers and your brand.
Here’s a breakdown of the most common options for custom sticker printing in the UK:
- Permanent Adhesive: This is the standard, all-purpose choice for most jobs. It forms a strong, lasting bond and is designed to stay put for years. It’s the right call for product branding, warning labels, and any situation where you don’t want the sticker coming off easily.
- Removable Adhesive: Perfect for temporary use, this adhesive lets you peel stickers off cleanly without leaving any residue behind. Think promotional window displays, temporary price tags, or stickers for laptops that people might want to swap out later.
- High-Tack Adhesive: When you need maximum sticking power, high-tack is the answer. This extra-strong adhesive is formulated to grip difficult, textured, or low-energy surfaces like plastic bins, industrial equipment, or bumpy walls where standard glues would give up.
Choosing the right material and adhesive can seem complex, but it all comes down to its intended purpose. To dive deeper into these options and see more examples, check out our ultimate guide to choosing the right sticker or label for a more detailed comparison.
Finishing Touches: How Lamination Protects and Perfects Your Stickers
A sticker's finish does more than just make it look good; it's a vital protective layer that defines its entire character. Think of it like the clear coat on a car—it adds the shine (or lack thereof) and acts as the first line of defence against the elements. Getting this final touch right is crucial.
Let's walk through the most popular finishes we offer for custom sticker printing UK businesses, using real-world examples to show how each one can completely transform your design. The right choice ensures your sticker not only looks the part but can handle its job, whether it's sitting pretty on a shop shelf or braving the unpredictable British weather.
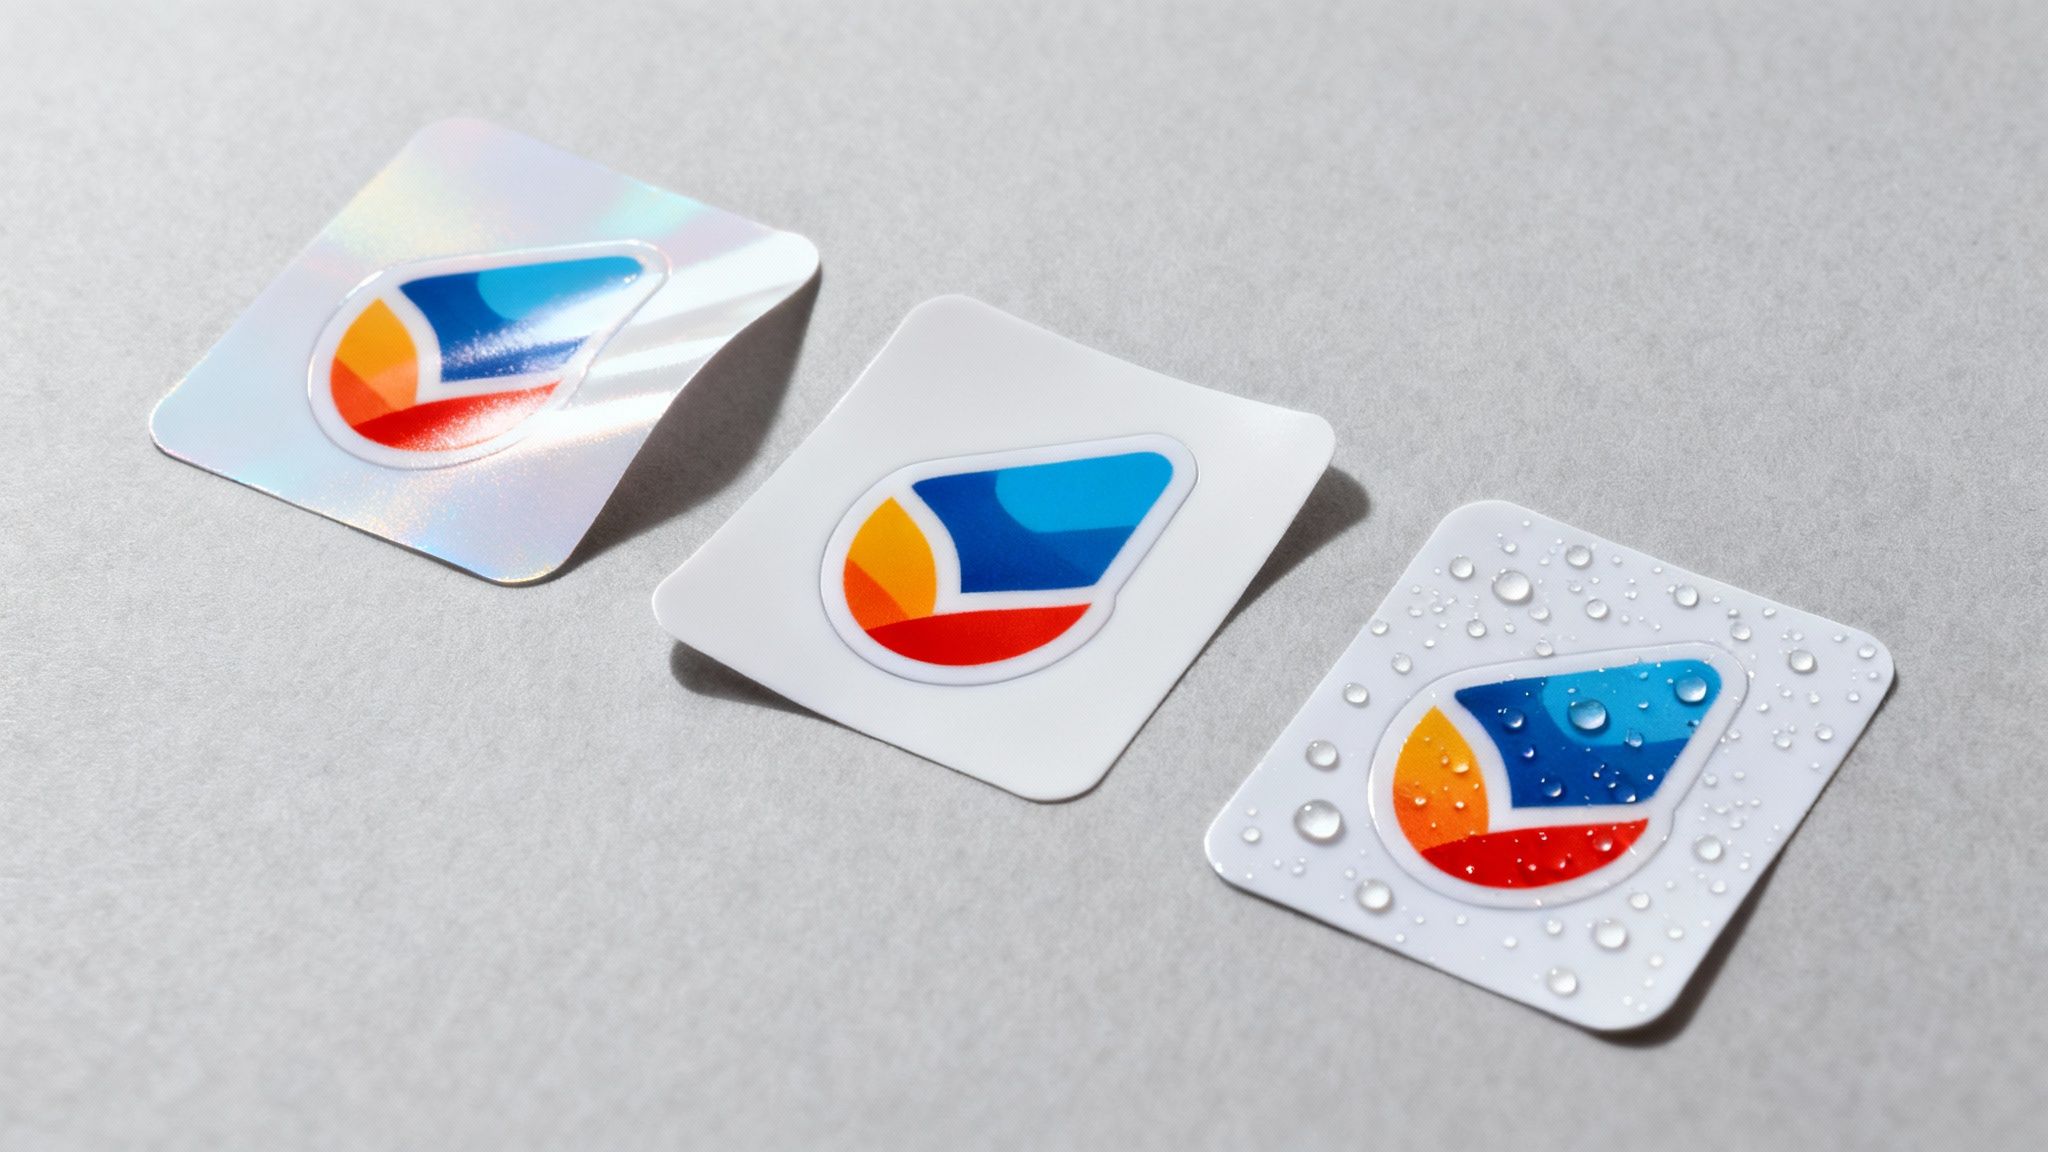
Comparing Popular Sticker Finishes
Every finish has its own distinct personality. The one you choose should match the message you want to send and the environment your sticker will live in. Here’s a look at the top contenders.
- Gloss Finish: This is the classic, eye-catching choice. A gloss finish adds a shiny, reflective layer that makes colours pop with vibrancy. It’s perfect for promotional giveaways, bold product branding, and any design that needs to shout for attention.
- Matte Finish: If you're going for a more subtle, modern vibe, matte is the way to go. Its smooth, non-reflective surface cuts out glare, giving your stickers an elegant, premium feel. This is a brilliant option for high-end product labels, minimalist artwork, or any sticker that needs to be easily legible under bright lighting.
- Satin Finish: Sitting right in the middle, a satin finish offers a gentle, low-sheen lustre. You get a hint of vibrancy without the full-on reflection of gloss, making it a versatile and professional-looking choice for almost any application.
A sticker’s finish is the final handshake it makes with the world. A bold, shiny gloss says, "Look at me!" while a smooth, reserved matte says, "Take a closer look." Choose the one that best represents your brand's personality.
The Invisible Shield of Lamination
Beyond pure aesthetics, the finish is actually a layer of lamination—a thin, transparent film applied right over your printed design. This film is like an invisible shield, massively boosting your sticker's lifespan and durability. It’s the secret ingredient that turns a standard sticker into a tough, long-lasting workhorse.
This protective layer is essential for any sticker destined for heavy use or the great outdoors. It offers serious protection against a few common enemies:
- Scratches and Scuffs: The laminate takes the hit, protecting the ink underneath from scrapes and rubbing.
- Moisture and Water: A laminated vinyl sticker becomes completely waterproof, so you never have to worry about ink running or smudging.
- UV Rays: Lamination acts like sunscreen for your sticker, filtering out harmful UV light that causes colours to fade over time.
- Chemicals and Oils: It creates a barrier against mild chemicals, grease, and cleaning products.
This level of toughness is non-negotiable for things like heavy-duty equipment branding or safety signage. For example, you couldn't create durable vinyl floor stickers for a busy shop without a tough, anti-slip laminate to shield the design from constant foot traffic and cleaning. It’s what keeps the message clear and the sticker intact, giving you real value and longevity.
5. Preparing Your Artwork for Flawless Printing
Even the most premium material and perfect finish can’t rescue a poorly prepared design file. Submitting artwork that isn’t print-ready is one of the most common pitfalls we see, often leading to delays and disappointing results. Think of this section as your practical guide to avoiding those printing headaches.
We'll cover the essentials to ensure what you see on your screen is exactly what you get in your hand. From file types and colour modes to the nitty-gritty details that guarantee a crisp, professional finish, getting these basics right is the secret to a perfect print run, every time.
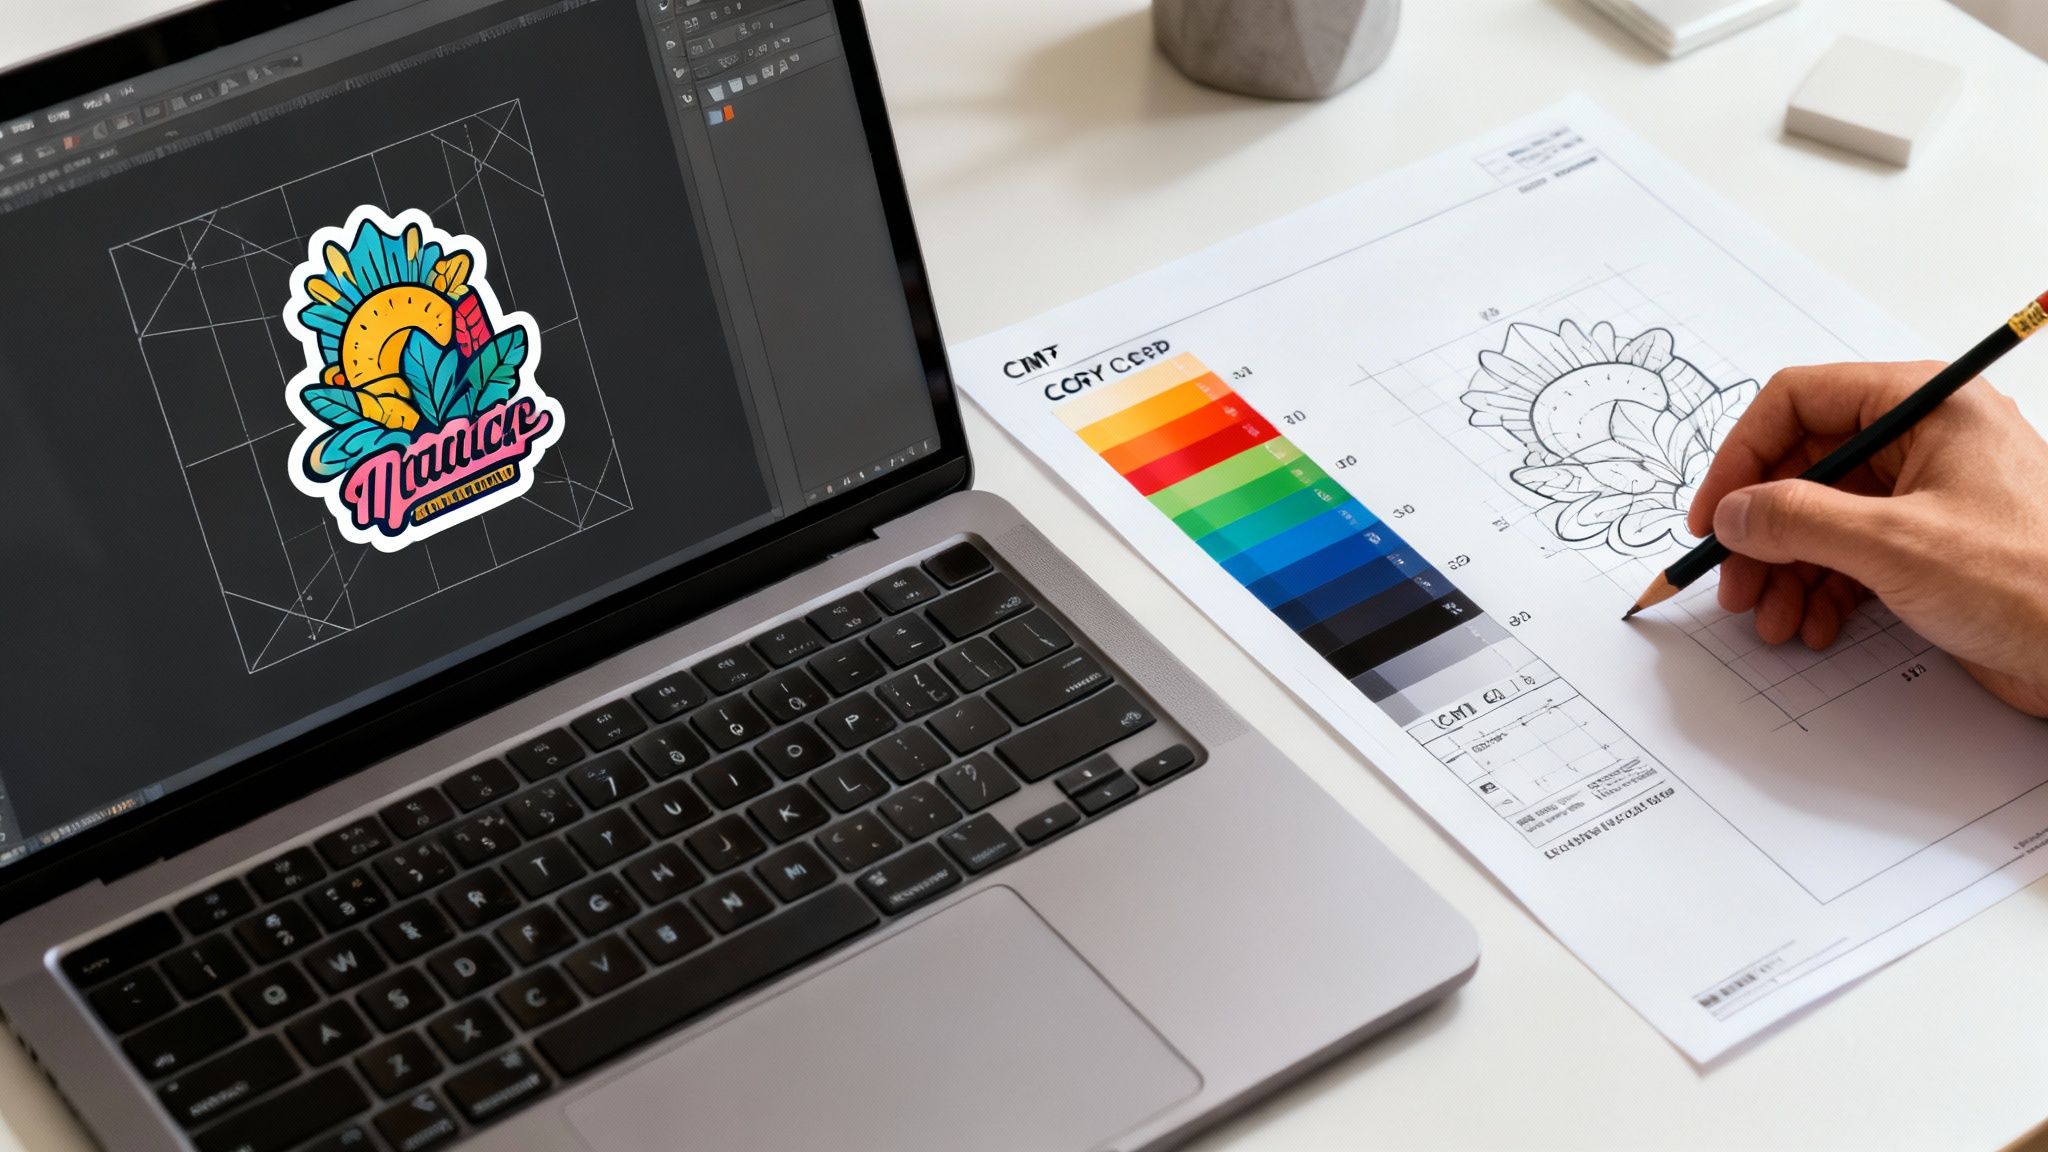
Vector vs Raster: The Foundation of Quality
First things first, let’s get to grips with the two main types of digital image files: vector and raster. Imagine it like sculpting versus painting. A vector image is a sculpture built from mathematical points and lines, while a raster image is a painting made of tiny coloured dots (pixels).
- Raster Graphics (JPEG, PNG, GIF): These are pixel-based. When you zoom in too far, you start to see the individual squares, leading to a blurry or "pixelated" look. They're great for photos but not ideal for logos or text that needs to scale cleanly.
- Vector Graphics (AI, EPS, SVG): These are built from mathematical equations. This means you can blow them up to any size from a tiny product label to a massive sign and they will remain perfectly sharp and crisp.
For custom sticker printing in the UK, vector files are the undisputed gold standard. They guarantee your logo, text, and design elements will print with clean, sharp edges, no matter the final sticker size.
Getting Your Colours and Resolution Right
Once you have the right file type, the next step is ensuring your colours and resolution are correctly set up for a professional printing press. What looks vibrant on your backlit screen can often look dull or different when printed if not prepared properly.
Colour Mode (CMYK vs RGB):
Your computer screen uses the RGB (Red, Green, Blue) colour model, mixing light to display images. Our printers, however, use the CMYK (Cyan, Magenta, Yellow, Black) model, mixing physical inks to create colours on paper or vinyl. Submitting an RGB file forces a colour conversion that can lead to unexpected and disappointing shifts in your design's palette. Always design and export your final artwork in CMYK.
Resolution (300 DPI):
Resolution is measured in DPI, or dots per inch. For sharp, high-quality printing, the industry standard is 300 DPI. A lower resolution, like the 72 DPI common for web images, will result in a blurry, unprofessional-looking sticker. It’s a small detail that makes a huge difference.
Understanding Bleed and Dielines
Finally, let’s demystify two technical terms that are vital for custom shapes: bleed and dielines. Getting these right prevents unsightly white borders and ensures your sticker is cut perfectly.
Bleed: Think of bleed as a safety margin. It’s an extra bit of your background colour or design that extends beyond the actual cut line of your sticker. Printing and cutting machines have a tiny margin of error, so this extra area ensures that even if the cut is a fraction of a millimetre off, you won't have any unprinted white edges. A 3mm bleed is standard practice.
Dieline: The dieline is the invisible line that tells our cutting machine precisely where to trim your sticker. It's essentially the exact shape you want. When you're ordering custom shapes, like those available on our stickers on a sheet, you'll need to provide this line so our equipment knows exactly where to make the cut.
To help you get everything spot-on, we've put together a quick checklist. Running through this before you upload your file will save you time and ensure a perfect result.
Artwork File Preparation Checklist
| Checklist Item | Why It Matters | Recommended Setting |
|---|---|---|
| File Type | Ensures your design can be scaled without losing quality. | Vector (AI, EPS, PDF, SVG preferred) |
| Colour Mode | Guarantees the printed colours match your on-screen design. | CMYK (not RGB) |
| Resolution | Prevents blurry or pixelated results. | 300 DPI at the final print size |
| Bleed | Avoids unprinted white edges after cutting. | 3mm on all sides |
| Dieline | Shows the machine exactly where to cut your custom shape. | Supplied as a separate vector path/layer |
| Embed Fonts/Outline Text | Prevents font substitution issues if we don't have it installed. | Convert all text to outlines/curves |
| Embed Images | Ensures all linked images are included in the file. | Embed all placed raster images |
By paying attention to these simple but crucial steps, you can submit your artwork with confidence, knowing you’ve done everything possible to achieve a perfect, professional result.
Right, so your artwork is ready to go. Now, how do we actually get it onto a sticker? The printing method we use makes a massive difference to the final look, the cost, and how quickly you’ll have them in your hands. It’s a bit like choosing between a high-speed photo printer and a traditional press for a newspaper – each one has its moment to shine.
Here in the UK, the sticker world is dominated by two main players: digital printing and screen printing. Getting to grips with how they work will help you pick the perfect process for your project, making sure you get brilliant quality that fits your budget.
The Modern Flexibility of Digital Printing
Think of digital printing as the fast, flexible, and modern champion of the sticker world. It works a lot like a high-end office printer, putting down all the colours in one go, directly from your digital file onto the sticker material. This means there’s no need for old-school setup like creating physical plates or screens.
This technology is a real game-changer for a few reasons:
- Perfect for Small Batches: With no hefty setup costs, ordering smaller quantities (even a run of just 50 stickers) is incredibly affordable.
- Intricate, Full-Colour Designs: Digital printers are superstars at reproducing complex artwork, complete with gradients, unlimited colours, and even photographic detail.
- Fast Turnaround Times: The simple process means we can get started almost as soon as you approve the proof. Ideal for when you’re up against a tight deadline.
Digital printing is the go-to for startups, one-off event promotions, or anyone who needs top-quality, customised stickers without a huge upfront investment.
The Powerhouse of Screen Printing
Screen printing is a more traditional, hands-on craft that delivers incredibly durable and vibrant, solid colours. The process involves pushing ink through a fine mesh screen onto the sticker material, one colour at a time. For every colour in your design, a separate screen has to be made.
This method really comes into its own when the numbers get big. While screen printing still holds the largest revenue share in the UK custom printing market at 54.13% in 2024, digital is catching up fast thanks to its strength in smaller, more personalised jobs. You can dive deeper into these trends by exploring the UK custom printing market insights on Grandviewresearch.com.
Choosing between digital and screen printing isn’t about which is "better"—it's about which is better for your job. Digital offers speed and complexity for small runs, while screen printing provides unbeatable value and vibrancy for large bulk orders.
Screen printing truly shines when you need a huge quantity of a simple design. The main cost is tied up in creating the screens. But once that’s sorted, the price per sticker plummets as the volume goes up. This makes it the undisputed powerhouse for bulk orders of 1,000+ stickers, especially for designs with just one or two bold colours. The thick layer of ink also creates an incredibly tough and opaque finish, perfect for long-lasting outdoor use where you need the colour to stay true.
Placing Your Order with The Print Warehouse Ltd
Right, you’ve got a handle on the materials, finishes, and artwork prep. Now comes the exciting part: turning your idea into a physical sticker. Ordering your custom stickers should be a simple, confident process, and we’ve made sure our system is exactly that. This is our clear, no-fuss walkthrough for ordering with us at The Print Warehouse Ltd.
Our online platform is designed to guide you from start to finish without any of the usual guesswork. This leaves you free to focus on the creative side of things. Let’s get started.
Your Step-by-Step Ordering Guide
Bringing your design to life is just a few clicks away. Each stage gives you full control over the final sticker, so what you approve is exactly what you get.
-
Select Your Sticker Specifications: First, tell us what you need. This is where you’ll define the size, choose your material (like our hard-wearing vinyl or eco-friendly paper), and pick the perfect finish – gloss, matte, or satin.
-
Upload Your Print-Ready Artwork: Once you’ve dialled in the specs, it’s time to upload your design. For a flawless result, make sure your file is set up just as we covered earlier: 300 DPI, in CMYK colour mode, and with 3mm of bleed.
-
Approve Your Digital Proof: Before a single thing goes to print, we’ll send you a digital proof. This is your chance to double-check everything and see exactly how your sticker will look. Once you give us the green light, we’ll fire up the printers.
This simple three-step process means no nasty surprises, just peace of mind that your stickers will be perfect.
Maximising Value and Understanding Timelines
We believe in great value and clear, honest timelines. One of the easiest ways to get more for your money is to take advantage of our quantity breaks. The cost per sticker drops significantly as your order size goes up, making larger runs far more economical.
Think of it like buying in bulk from a wholesaler the more you get, the cheaper each item becomes. It’s a smart, budget-friendly way for any UK business to plan ahead for marketing campaigns or product labelling.
As for timings, our standard production turnaround is typically a few working days once your proof is approved. From there, delivery across the UK is quick and reliable, getting your custom stickers to your door and ready for action.
Our goal is to make ordering a straightforward, hassle-free experience. If you’re ready to get going, you can explore all our options and start your order on our main stickers and labels page.
Frequently Asked Questions About Sticker Printing
Got a few last-minute questions before you hit 'order'? You're not alone. Navigating the world of custom stickers can throw up some queries, so we've gathered the most common ones we hear and answered them right here. Think of this as the final checklist to get you over the line with total confidence.
Ordering and Production Basics
Let's start with the practical stuff. Understanding a few key details about how orders work can make the whole process smoother. Here are the two questions almost every customer asks.
What’s the minimum order quantity for custom stickers?
Most UK printers, including us, have a minimum order, which usually kicks off at around 25 or 50 stickers. The best option really depends on the printing method. Modern digital printing is brilliant for smaller runs, making it affordable to get just what you need. Older methods like screen printing, on the other hand, are much better suited for big, high-volume jobs.
Are custom vinyl stickers waterproof?
Absolutely. When you pair a vinyl material with a protective laminate finish, your stickers become completely waterproof and weatherproof. This combo makes them tough enough to handle life outdoors on cars, water bottles, windows, and equipment without any annoying fading or peeling.
Timelines and Shipping in the UK
Getting your stickers on time is a big deal, especially if you’ve got an event or a product launch on the horizon. Here’s a rough idea of what to expect for delivery within the UK.
One quick tip: the production clock doesn't start ticking until after you give the final thumbs-up on your design proof. Responding to that proof email quickly is the single best way to keep your order flying through the queue and ensure it lands on your doorstep on time.
How long will it take to receive my stickers in the UK?
Standard turnaround times are usually pretty speedy. You can expect production to take around 3-5 business days once your design proof has been approved. After that, shipping within the UK is typically an extra 1-2 business days. If you're in a real rush, many printers (including us!) offer expedited options.
Can I get a sample before placing a large order?
This varies from printer to printer, but many offer handy sample packs. These packs are usually filled with a variety of materials and finishes, letting you see and feel the quality for yourself before committing to a big order. It’s a great way to check if that matte finish is as slick as you imagined or if the vinyl feels tough enough for your needs.
What happens if I’m not happy with my stickers?
Any reputable printer will stand by their work. If there's a print defect or an error that was clearly their fault, they should offer a reprint or a fair solution. Just remember to check your digital proof carefully—it’s your final agreement on the design, colours, and layout. Good communication is the key to a happy result!
Ready to see your sticker designs in the wild? At The Print Warehouse Ltd, we make high-quality custom sticker printing straightforward and fast. Explore our full range of sticker options and get an instant quote today!

