
When you think of a poster, you might picture something massive plastered on a billboard. But one of the most effective and versatile tools in any marketer's kit is the humble A4 poster.
Measuring a neat 210 x 297 mm, it’s the exact same size as the paper sitting in your office printer. This familiar format is what makes it so powerful – it’s perfect for getting a message across up close, without overwhelming the space.
Decoding A4 Poster Dimensions
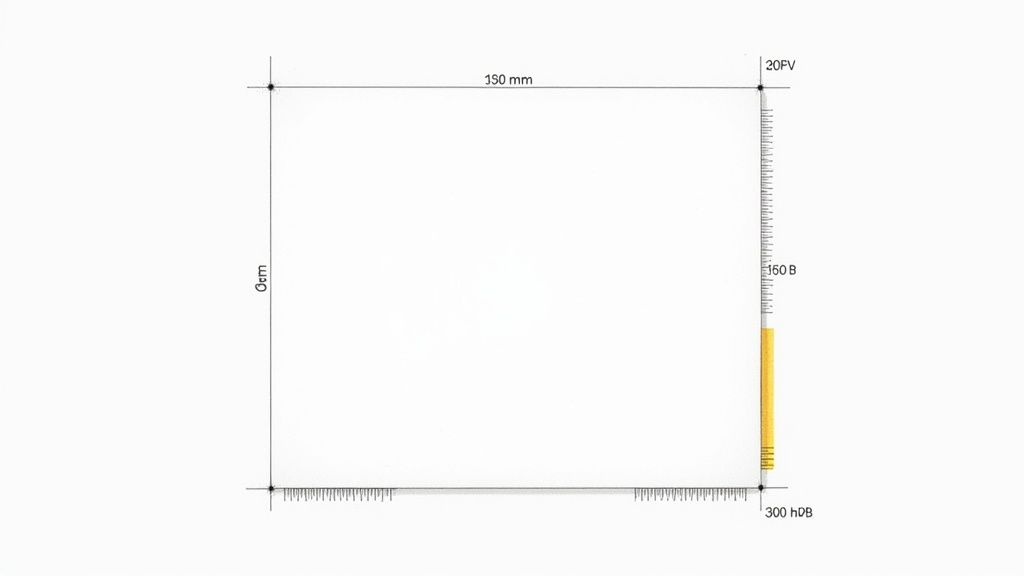
Before you dive into designing, getting your head around the exact dimensions is non-negotiable. Think of it as laying the foundation for a house; if the base is wrong, everything that follows will be a bit wobbly. Nailing the size from the get-go saves you from the headache of costly printing mistakes later on.
Here in the UK, A4 is the standard, measuring precisely 210mm by 297mm. This is all thanks to the ISO 216 international paper standard, which means your design will look the same whether it’s printed in Manchester or Madrid. It’s the smallest of the common poster formats, making it a brilliant choice for indoor spots like notice boards, event handouts, or even just some cool art for your walls.
Because it’s the same size as official documents and letterheads, like professional A4 continuation sheets, an A4 poster has a certain built-in familiarity and professionalism. People just get this size.
From Millimetres to Pixels: Getting Your Design Print-Ready
When you switch from a physical ruler to a design program like Adobe Photoshop or Canva, your measurements change from millimetres to pixels. The number of pixels you need is all down to your print resolution, which is measured in DPI (Dots Per Inch).
So, what on earth is DPI?
Imagine a printer works by spraying tiny dots of ink onto the paper. DPI tells you how many of those dots it packs into a single square inch. More dots squeezed into the same space means a sharper, clearer image. Fewer dots mean the image looks fuzzy and "pixelated"—a designer's worst nightmare.
For any professional print job, 300 DPI is the gold standard. It’s the magic number that ensures your text is razor-sharp and your images look vibrant and true to life. You might get away with 150 DPI for an internal notice that’s viewed from afar, but honestly, sticking to 300 DPI is the safest bet for a quality finish every time.
Our Top Tip: Always, and we mean always, set up your design file at 300 DPI from the very start. It’s the single most important step to make sure the fantastic design on your screen looks just as good on paper.
To take the guesswork out of it, we’ve put together a simple table showing the exact pixel dimensions you’ll need for a print-perfect A4 poster.
A4 Poster Pixel Dimensions for Printing
This table breaks down the pixel dimensions required for an A4 document at the most common print resolutions.
| Resolution (DPI) | Pixel Width | Pixel Height | Ideal Use Case |
|---|---|---|---|
| 300 DPI | 2480 pixels | 3508 pixels | The industry standard for professional marketing materials, event flyers, and high-quality prints with detailed graphics. |
| 150 DPI | 1240 pixels | 1754 pixels | Acceptable for internal notices, quick drafts, or posters that will only be viewed from a significant distance. |
Setting your canvas to 2480 x 3508 pixels is your best bet for a flawless A4 print that looks sharp and professional.
Why A4 Posters Are So Effective
The real strength of an A4 poster is its handy, compact size. It’s not trying to compete with massive billboards that shout from a distance. Instead, the A4 poster is the unsung hero of close-quarters communication, making it a fantastic choice for targeted messaging all across the UK. It’s just the right size to grab someone’s attention without completely taking over a space.
Think about the last café you popped into. Chances are you saw an A4 poster on the counter advertising a new brew or a loyalty card. That familiar, accessible size is perfect for getting a message across right at the point of decision, encouraging people to act on the spot.
This kind of effectiveness pops up everywhere. You’ll see them pinned to crowded noticeboards in community centres announcing local events, or used for important internal updates in staff rooms and reception areas. The A4 format is big enough to get noticed but small enough to fit pretty much anywhere.
The Perfect Balance of Impact and Cost
An A4 poster hits that sweet spot between making a visual impact and not breaking the bank. For any small business or event organiser, the budget is always front and centre. Printing hundreds of massive posters can get pricey, fast. But A4 posters? They’re incredibly cost-effective to produce, especially when you need a decent quantity.
This affordability means you can spread your message far and wide and update your campaigns more often. You can easily switch things up for seasonal promotions or different events without a massive financial hit, which is a huge advantage for keeping your marketing fresh and dynamic.
The power of an A4 poster lies in its strategic placement. It’s not about shouting the loudest in a crowded room; it’s about having a direct, personal conversation with your audience where they are most likely to listen.
This focused approach works brilliantly at big events like trade shows, too. When you're planning your event marketing, it’s worth looking into how different materials work together. A great guide on effective promotional items for trade shows offers some extra ideas on how A4 posters can stand out. They make excellent info sheets that attendees can easily grab and take with them.
Versatility in Communication
The A4 poster is a real workhorse; it's not a one-trick pony. Its role can adapt to exactly what you need it to do. It works just as well as a mini-advertisement, a detailed infographic, a bit of directional signage, or even a handout people can take away. This adaptability makes it a seriously valuable tool for any communication plan.
When you're weighing up your print marketing options, it’s helpful to understand how different formats achieve different goals. For a closer look at smaller, hand-held alternatives, check out our guide on how to decide between flyers or leaflets to see how they stack up. At the end of the day, the A4 poster offers a powerful and efficient way to connect directly with your audience.
Preparing Your File for Flawless Printing
Creating a brilliant design is only half the story. The real make-or-break moment comes when you prepare that file for the printer, and getting it right is what guarantees a flawless final product. This is the crucial stage where you can head off expensive and frustrating printing mistakes before they happen.
Think of it like fitting a new photo into a picture frame. You’d want the photo to be a tiny bit bigger than the opening, so you don't end up with ugly white gaps around the edges. In the world of print, that extra bit is called bleed.
Understanding Bleed and Safe Zones
When posters are printed, they’re usually done on huge sheets of paper and then guillotined down to their final A4 size. The machines are incredibly precise, but tiny shifts can happen. Bleed is your safety net.
For any A4 size poster, printers across the UK will almost always ask for a 3mm bleed on all four sides. This means your design file should actually be a little larger than A4, measuring 216mm x 303mm. That extra 3mm on each edge, which should be filled with your background colour or image, gets trimmed off, leaving your design running perfectly to the edge.
Key Takeaway: Always, always add a 3mm bleed to your design. This simple step is the number one rule for avoiding those thin white borders on your finished posters and getting a professional, edge-to-edge finish.
Just as important is the safe zone. This is an imaginary line, usually another 3-5mm inside the final trim line. To avoid any risk of being accidentally clipped during trimming, all your critical information—like text, logos, and key parts of your design—needs to stay comfortably within this area.
This infographic gives you a quick visual on just how A4 posters are used in all sorts of everyday settings, from the local coffee shop to community noticeboards.
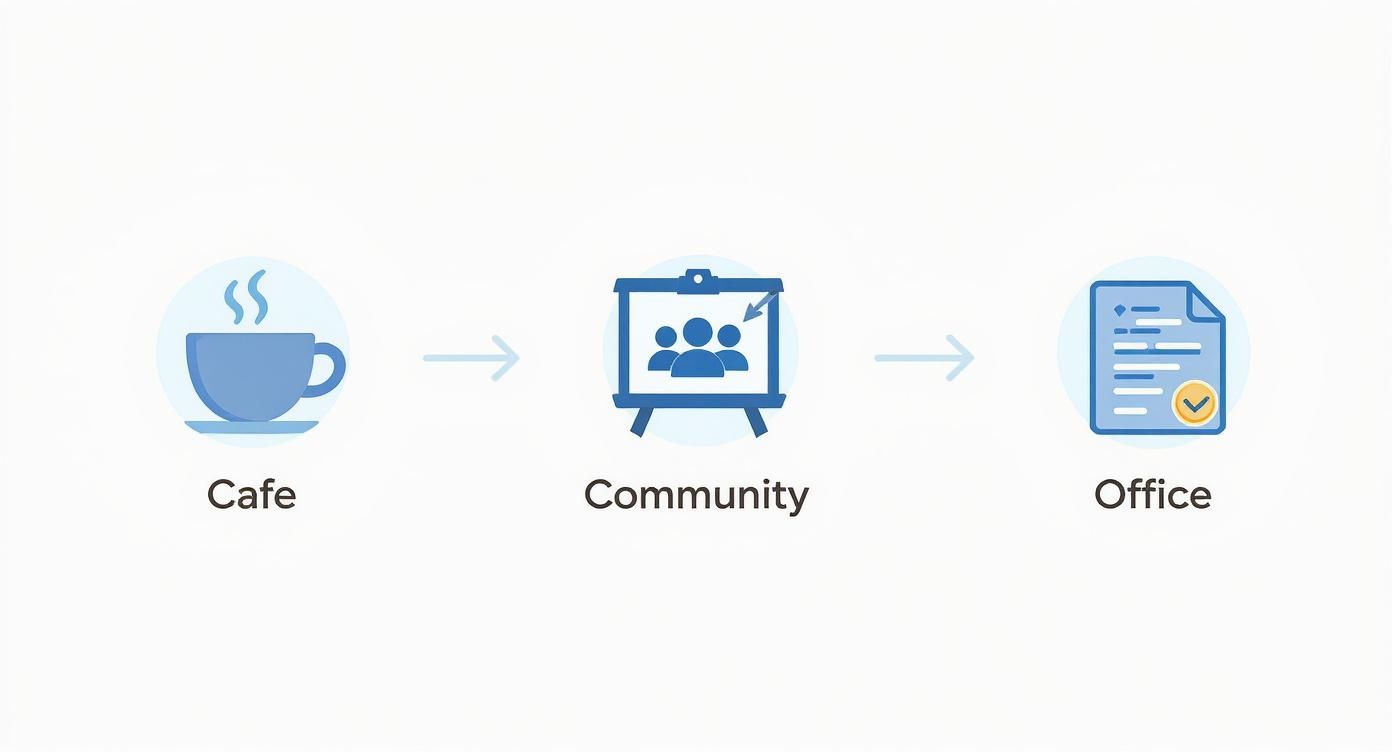
You can see how the format works perfectly for close-range communication in places like cafes, community hubs, and office spaces.
Setting the Right Colour Mode
Ever designed something that looked amazingly vibrant on your screen, only for it to come back from the printers looking disappointingly dull? The culprit is almost always the colour mode.
Your screen uses the RGB (Red, Green, Blue) colour model, creating colours by mixing light. Commercial printers, on the other hand, use the CMYK (Cyan, Magenta, Yellow, Black) model, which works by mixing physical ink on paper.
Because RGB has a wider range of colours (a bigger "gamut"), it can produce bright, luminous tones that CMYK inks simply can't replicate. If you design in CMYK from the very beginning, you'll get a much more accurate preview of how the final colours will look on paper, saving you from any nasty surprises.
Your Print-Ready File Checklist
Nail these five points, and you're good to go:
- Dimensions: Set your canvas to 210mm x 297mm.
- Bleed: Add that crucial 3mm bleed on all sides.
- Colour Mode: Make sure your document is set to CMYK.
- Resolution: Always work at a high resolution of 300 DPI.
- File Format: Save your final artwork as a print-ready PDF.
Once your design is ready, knowing how to send artwork digitally is the final piece of the puzzle. Following these guidelines ensures your file moves smoothly from your computer to the printing press without a hitch.
Choosing the Right Paper and Finish
The paper you choose for your A4 size poster isn't just a backdrop for your design; it’s a crucial part of the message itself. The weight and finish can completely change how your audience sees your brand, event, or announcement. Get it right, and a simple notice transforms into a premium piece of marketing.
Think of paper weight a bit like the thread count in luxury bedding. A higher number signals better quality and a more substantial feel in the hand. We measure this in GSM, which stands for Grams per Square Metre. Your standard office printer paper is about 80gsm – fine for internal memos, but far too flimsy for a poster you want people to take seriously.
For a professional-looking poster, you’ll definitely want something more robust.
Getting to Grips with Paper Weight (GSM)
The GSM value tells you everything you need to know about the paper's thickness and durability. Picking the right one comes down to what the poster is for and how long you need it to last.
-
130-170gsm Silk: This is our most popular and versatile choice for A4 posters. It’s noticeably thicker than office paper, giving it a professional feel without being too stiff. It’s the perfect all-rounder for promotional flyers, internal notices, and event handouts.
-
250gsm Silk: Stepping up to 250gsm gives your poster a much more premium and durable quality. It feels more like a thin card, making it ideal for posters that need to withstand more handling or hang for longer, like in-store displays or key information signs.
-
350gsm Silk: Now we're talking serious business. This weight is very thick and almost board-like, offering maximum rigidity. It’s a fantastic option for high-end prints that need to look and feel exceptionally impressive, such as award certificates or permanent wall art.
Of course, standard paper just won't cut it for outdoor use or in places where your poster might get wet – think restaurant windows or construction site hoardings. For those jobs, you'll need something like our waterproof posters to make sure your message stays vibrant and intact, whatever the weather throws at it.
A4 Poster Paper Stock and Finish Comparison
To help you decide, here’s a quick comparison of the most common paper stocks and finishes for A4 posters, outlining what makes each one unique and where it shines.
| Paper Type / Finish | Typical GSM Range | Key Characteristics | Best For |
|---|---|---|---|
| Silk | 130-170gsm | Smooth, low-sheen surface. The go-to for versatility. | Almost anything: promotional flyers, internal notices, event handouts, retail promotions. A professional and reliable all-rounder. |
| Silk (Heavy) | 250gsm | A more substantial, card-like feel. Premium and durable. | In-store displays, informational signs, posters that need to hang for longer or withstand more handling. |
| Gloss | 130-250gsm | High-shine, reflective finish that makes colours pop. | Photographic designs, event posters for dimly lit venues like bars or clubs. Great for grabbing attention with vibrant visuals. |
| Matt (Uncoated) | 120-350gsm | Natural, non-reflective surface with a slightly textured feel. | Text-heavy posters, minimalist or rustic designs, artwork. Ideal for posters that need to be written on. |
| Waterproof | ~180-200 micron PVC | Tear-resistant, waterproof synthetic material. | Outdoor notices, A-boards, restaurant windows, construction sites, and any environment exposed to moisture. |
Choosing the right paper is the first step. The finish then adds that final touch that brings your design to life.
Selecting the Perfect Finish
The finish is the coating we apply to the paper, and it has a massive impact on how your colours appear and how the poster plays with light. The three main contenders are Gloss, Silk, and Matt.
Key Insight: Always think about where your poster will be displayed. A glossy poster that looks brilliant under controlled lighting can become an unreadable, reflective mess in a sunny window.
Gloss Finish
This finish has a high-shine, reflective surface that makes colours look incredibly vibrant and punchy. It really brings images to life.
- Best For: Photographic designs, event posters for dimly lit venues like bars or clubs, and any design where you want the colours to leap off the page.
- Avoid: Placing it in brightly lit areas or behind glass, as the glare can make it a real pain to read.
Silk Finish
Silk is the perfect middle ground and a firm favourite for good reason. It has a beautiful, smooth surface with a subtle sheen that enriches colours without the mirror-like reflection of gloss.
- Best For: Just about any application. It provides a sophisticated, professional look that works for everything from corporate communications and retail promotions to art prints and informational notices. It’s our go-to for a reliable, high-quality result.
Matt (Uncoated) Finish
A matt finish has no shine at all, giving it a modern, natural, and slightly textured feel. It’s elegant and understated.
- Best For: Text-heavy posters, minimalist or earthy designs, or any time you want a sophisticated, contemporary look. It's also fantastic for posters that people might need to write on, as the surface is totally non-reflective and easy to mark.
How to Order Your Posters Online
Placing a print order online should be a piece of cake, but let's be honest, the sheer number of options can feel a bit overwhelming. With a clear plan, though, you can easily find a reliable UK-based printer and get your A4 posters looking exactly as you imagined. The secret is knowing what to look for before you click ‘buy’.
First things first, you need to vet your potential printers. A quick search will throw up dozens of companies, but you want to focus on those with a solid track record. Look for genuine customer reviews on independent sites like Trustpilot or Google Reviews – don't just rely on the glowing testimonials they've hand-picked for their homepage. Consistent, positive feedback about print quality and customer service is always a great sign.
Next, have a poke around their website. A professional online printer will have a clear, easy-to-use ordering system and give you detailed specifications for your file uploads. If their file requirements are buried in some obscure corner of the site or are just plain confusing, it could be a red flag for a difficult process ahead.
Decoding Key Printing Terms
Once you’ve got a shortlist, you'll start bumping into some specific printing jargon. Getting your head around these terms is vital for a smooth order and means no nasty surprises when your delivery arrives.
-
Turnaround Time: This is simply how long it takes the printer to produce your posters, starting from the moment you approve your proof. Crucially, it does not include delivery time. Always double-check this, especially if you're up against a tight deadline for an event.
-
Proof: A proof is a digital preview of your final printed poster. Think of it as your last chance to catch any sneaky typos, layout mistakes, or colour issues. Never skip the proof. Approving it is your final sign-off, making it your insurance policy against easily preventable errors.
Crucial Tip: Always download the digital proof and view it at 100% zoom on your computer. Scrutinise every single word, phone number, and social media handle. A tiny typo that’s easy to miss on-screen becomes a glaring mistake once it's printed.
Choosing the Right Quantity and Finalising Your Order
The final piece of the puzzle is deciding how many posters you actually need. For a one-off event like a local fair or a single in-store promotion, a small batch of 25 or 50 might be all you need. But if you're planning a wider marketing campaign, ordering a larger run of 250 or more often works out much cheaper per poster. Most online printers have a price calculator that clearly shows how the unit cost drops as the quantity goes up.
After you've picked your quantity, you'll upload your print-ready file and head to the checkout. For reliable, high-quality UK poster printing, using a service with a simple upload process and clear instructions makes all the difference. It ensures your A4 poster moves from design to dispatch seamlessly, arriving on time and ready to make an impact.
Answering Your A-Size-Poster Questions
Even after getting the basics down, a few nagging questions always seem to pop up when it's time to order an A4 size poster. To make sure you’ve got all the answers, we've put together a quick list of the most common queries we hear.
Think of this as your final pre-flight check before your design heads to the press. Getting these last few details right is the key to a smooth, stress-free printing process.
What Is the Best Resolution for an A4 Size Poster?
For a professional-looking A4 poster, you absolutely have to aim for a resolution of 300 DPI (dots per inch). This is the gold standard in the print industry for a reason – it guarantees your images and text will be razor-sharp, clear, and vibrant. It’s what separates a blurry, amateurish flyer from a print that truly reflects your brand’s quality.
While you might get away with 150 DPI for a simple notice that's viewed from a distance, 300 DPI is always the safest bet for a crisp, impressive finish. In practical terms, a 300 DPI A4 document should be set up as 2480 x 3508 pixels. Always double-check the quality of your images before you drop them into the design; a low-resolution photo will look pixelated when printed, no matter what your document’s DPI setting is.
Can I Print a Standard A4 Document as a Poster?
Yes, you can, but there's a huge "but" you need to know about. A standard A4 document, like one you'd create in Microsoft Word, is usually made without any 'bleed'. Bleed is the little bit of extra design—typically 3mm—that we add to all four edges and trim off after printing.
If your poster design has colours or images that run right to the very edge, printing a standard A4 file without that bleed will almost certainly leave you with thin, ugly white borders. For a flawless, edge-to-edge finish, your design file must be set up with this extra bleed area from the start.
What Is the Difference Between an A4 and an A3 Poster?
It’s all about size, and thankfully, it’s a really simple system. The 'A' paper size standard is cleverly designed so that each size is exactly double the one before it. This means an A3 poster (297mm x 420mm) is precisely twice the size of an A4 poster (210mm x 297mm).
Picture this: if you place two A4 sheets of paper side-by-side along their longest edge, you’ve just made one A3 sheet. An A3 poster gives you double the visual real estate, making it much better for grabbing attention from a distance, like in a shop window. A4, on the other hand, is perfect for things meant to be seen up close, like handouts, information sheets, or notices on a smaller board.
Which File Format Should I Use for My Poster?
The undisputed champion for professional printing is a high-resolution PDF (Portable Document Format). A correctly saved PDF acts like a sealed container; it locks in all your fonts, images, and graphics, perfectly preserving your layout and CMYK colour profile just as you intended.
While some printers might accept other formats like JPEGs or TIFFs, a print-ready PDF is always the safest and most reliable choice. When you export your file from your design software, look for an option like 'Press Quality' or 'High Quality Print' and make sure you tick the box to include the bleed and trim marks. If you're ever in doubt about your file setup, it’s always better to ask your printer. For specific questions about your artwork, you can always get in touch with our expert team for a bit of guidance.
Ready to bring your A4 poster design to life? At The Print Warehouse Ltd, we make it easy to get high-quality, professional results with a simple online ordering process and fast UK delivery. Start your A4 poster order today!

