
Getting cheap flyer printing in the UK doesn't mean you have to settle for poor quality. Far from it. The real secret is making smarter choices—understanding how small decisions about paper, quantity, and timing can have a massive impact on your final bill without watering down your message.
The Secrets to Affordable, High-Impact Flyer Printing
Finding a genuinely affordable printing deal means looking beyond the headline price. The true cost of your flyers is a mix of several factors, and once you get a handle on them, you can maximise your budget like a pro.
It’s a common myth that "cheap" equals flimsy paper and faded colours. Thanks to modern digital printing, it's totally possible to get professional, vibrant flyers that are also incredibly cost-effective.
The real trick is to know where your money is going. The biggest variables you can control are the paper weight, finish, size, and your chosen turnaround time. Each one of these can be tweaked to bring your costs down. For instance, opting for a slightly lighter paper stock or sticking with a standard A5 size instead of a custom dimension can lead to some serious savings.
Before you even think about ordering, it’s worth getting clear on exactly what you need. Understanding the subtle but important differences between printed materials can make all the difference. For a deeper dive, check out our guide on how to decide between flyers or leaflets.
Key Factors That Influence Your Flyer Printing Costs
To make sense of it all, here’s a quick-glance table breaking down the most significant variables that affect your final price. Use it to prioritise where you can make the biggest savings.
| Cost Factor | Impact on Price | Quick Tip for Savings |
|---|---|---|
| Paper Weight | High | Lighter stock (e.g., 130gsm or 170gsm) is cheaper and ideal for mass handouts. |
| Print Quantity | High | The cost-per-flyer drops significantly with larger orders. Order more if you can. |
| Flyer Size | Medium | Standard sizes like A5 or A6 are always more economical than custom shapes. |
| Turnaround Time | Medium | A faster turnaround costs more. Plan ahead and choose a standard delivery time. |
| Finishes | Medium | A simple gloss or matt finish is cheaper than special laminates or spot UV. |
| Single/Double Sided | Low | Printing on one side is always the cheapest option if your design allows for it. |
Getting to grips with these factors is the first step towards getting the most out of your printing budget. Small adjustments here and there can add up to big savings without anyone noticing a drop in quality.
Understanding the UK Print Market Dynamics
The UK printing industry has changed a lot, and these shifts have actually created some great opportunities for businesses looking for value. As competition has ramped up and technology has improved, printers have become much more efficient, and those savings are often passed on to you.
The industry has seen a market contraction, with total revenue for printing in the UK falling at a compound annual growth rate of 4.1% between 2020 and 2025. This trend has pushed printers to innovate and adopt more efficient digital processes to stay competitive. For you, this means printers are more focused than ever on offering real value to win your business.
Key Takeaway: Real savings come from informed decisions, not just hunting for the lowest price. By understanding the core cost factors—paper, size, finish, and turnaround—you can strategically cut your expenses while keeping the quality your campaign needs to succeed.
For more expert tips on getting affordable, high-impact printing, it’s always a good idea to explore resources from industry insiders. A great example is branditok's blog, which is packed with useful insights. Now, let’s break down each of these cost factors so you can order with confidence and get the best possible price.
Choosing Smart Materials: Paper, Finish, and Size
The physical stuff your flyer is made of—its paper, finish, and size—is the biggest factor in your final bill. Making smart choices here is the real secret to getting cheap flyer printing in the UK without your final product actually feeling cheap. It’s all about matching the material to the mission.
Let's break down what these options actually mean so you can pick the perfect combination for your budget and your brand.
Understanding Paper Weight (GSM)
In the print world, paper weight is measured in GSM, which stands for Grams per Square Metre. All that really means is how dense and thick the paper is. A higher GSM number equals a heavier, thicker, and more durable paper—which, you guessed it, usually costs a bit more.
You'll generally come across these common weights for flyers:
- 130-170gsm: This is the industry go-to for affordable, effective flyers. It’s light enough for big print runs but still feels professional. Think takeaway menus, mass event promotions, or door-to-door drops where you need quantity over anything else.
- 250-300gsm: Stepping up to this range gives you a much sturdier, almost card-like feel. It’s a great choice for flyers that need to stick around longer, like price lists, high-end shop promotions, or handouts at a trade show where you want to leave a quality impression.
- 350-400gsm: This is heavyweight territory, often used for things like business cards or postcards. You can use it for flyers, but for most campaigns, it's overkill and will drive up your costs unnecessarily.
For most businesses aiming for cheap flyer printing in the UK, sticking to the 130-170gsm range is the smartest move. It perfectly balances that feeling of quality with a budget-friendly price tag.
How Finishes Affect Cost and Perception
A paper's finish is the coating that changes its look, feel, and durability. The three most popular choices each have their own cost and are suited to different designs.
- Gloss: This is a shiny, reflective coating that makes colours really pop. It’s brilliant for flyers loaded with vibrant photos and bold graphics, like for a nightclub event or a flashy special offer. Gloss is often the most affordable finish available.
- Silk: Think of silk as the happy medium between gloss and matt. It has a smooth, low-sheen coating that whispers quality and sophistication without the high shine. It's a hugely popular and versatile choice for everything from corporate handouts to retail promotions.
- Uncoated: Just like it sounds, this paper has no coating at all, giving it a natural, matt, and slightly textured feel. It's perfect for designs that are more text-heavy or have a rustic, organic vibe. Uncoated paper is also easy to write on, making it ideal for feedback forms or appointment cards. To see some examples, check out our uncoated flyers on the product page.
Expert Tip: A gloss or silk finish on a lighter 130gsm paper can make it feel more substantial than it actually is. This is a brilliant little trick to boost perceived quality while keeping your material costs down.
To help you decide, here’s a quick breakdown of how these choices stack up.
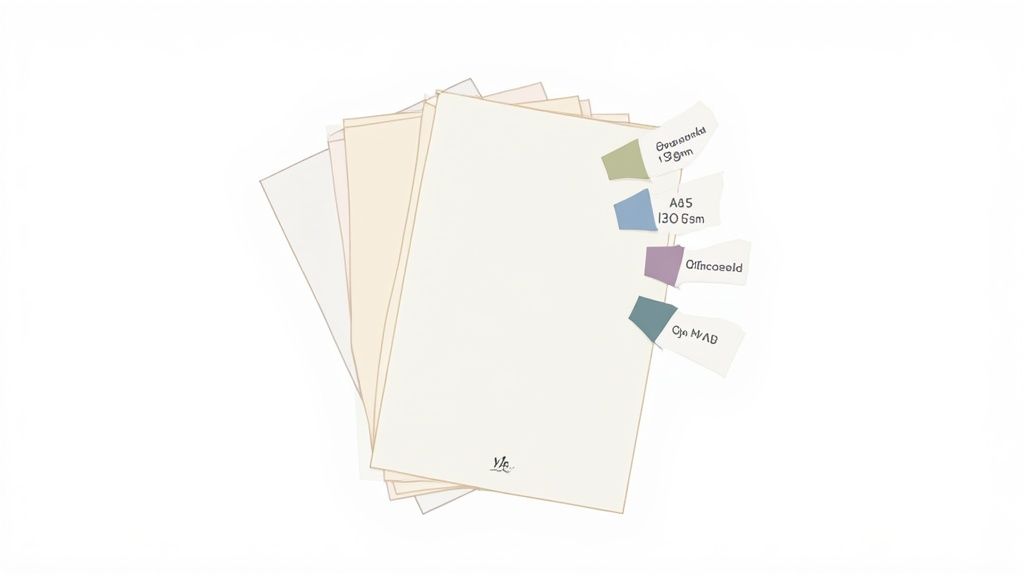
Paper Weight and Finish Cost Comparison
This table shows how different paper specs typically compare in price and what they're best used for. We've set the cheapest, most common option as our baseline of 100.
| Paper Spec (GSM & Finish) | Typical Cost Index (100 = Baseline) | Best For | Feel & Perception |
|---|---|---|---|
| 130gsm Gloss/Silk | 100 | Mass mail-outs, takeaway menus, event promos | Lightweight, professional, budget-friendly |
| 170gsm Gloss/Silk | 120 | Quality handouts, retail offers, mailers | More substantial, durable, great value |
| 250gsm Silk | 150 | Premium promos, price lists, trade shows | Sturdy, card-like, high-end feel |
| 300gsm Uncoated | 165 | Appointment cards, luxury brands, invitations | Heavy, natural, textured, easy to write on |
| 400gsm Matt Laminated | 200+ | VIP invites, luxury postcards, business cards | Very thick, premium, protected, soft-touch |
As you can see, a simple upgrade from 130gsm to 170gsm adds a noticeable touch of quality for a modest price increase, while jumping to heavyweight or laminated stocks can double your cost.
The Financial Sense of Standard UK Sizes
While a custom-shaped flyer can turn heads, it’s also one of the quickest ways to blow your budget. Printers price jobs based on how many items they can efficiently fit onto a single large sheet of paper. Sticking to standard sizes means they waste less paper, and they pass those savings on to you.
The most cost-effective flyer sizes in the UK are:
- A5 (148 x 210 mm): The undisputed champion. It’s the most popular and versatile size, offering plenty of room for your message and images without being too big to hand out easily.
- A6 (105 x 148 mm): A classic postcard size. It’s perfect for quick promotions, event invites, or as an insert in a package. Being smaller, it’s even cheaper to print and distribute.
- DL (99 x 210 mm): This tall, slim format is designed to fit neatly into a standard envelope, making it the go-to choice for mail drops or for use as a voucher.
By choosing one of these standard sizes, you’re automatically tapping into the most efficient and cheapest printing processes out there. Any deviation requires custom cutting, which adds labour and material waste, pushing your cost up. Unless your campaign absolutely depends on a unique shape, standard sizes are your best friend for keeping the budget under control.
How to Prepare Your Artwork to Avoid Extra Costs
Your design file can be a hidden source of unexpected costs. Even the most stunning flyer design can cause expensive problems if it isn't set up correctly for commercial printing. Getting this part right is one of the easiest ways to ensure your quest for cheap flyer printing in the UK is a success, saving you from frustrating delays, reprints, and extra fees.
The good news is that you don't need to be a graphic design expert to prepare a print-ready file. Understanding just a few core concepts will empower you to supply artwork that sails through the printing process without a hitch. Let’s translate the technical jargon into simple, actionable steps.
Get Your Colours Right: CMYK vs RGB
This is the single most common artwork mistake, and it can completely ruin the look of your flyers. Your computer screen, phone, and digital camera all create colours using the RGB (Red, Green, Blue) model. Think of it as mixing light it’s perfect for digital displays.
Commercial printing presses, however, work with ink. They use the CMYK (Cyan, Magenta, Yellow, Black) colour model, which is a subtractive process where inks are layered onto paper to create colour.
If you send us an RGB file, our software has to convert it to CMYK. This automatic conversion can cause some pretty dramatic and disappointing colour shifts. That vibrant electric blue might turn into a dull purple, or a bright, zesty green could end up looking muddy.
Actionable Tip: Always set your design software’s colour mode to CMYK before you start designing. This ensures what you see on your screen is a much closer match to the final printed product, saving you the headache and expense of a reprint.
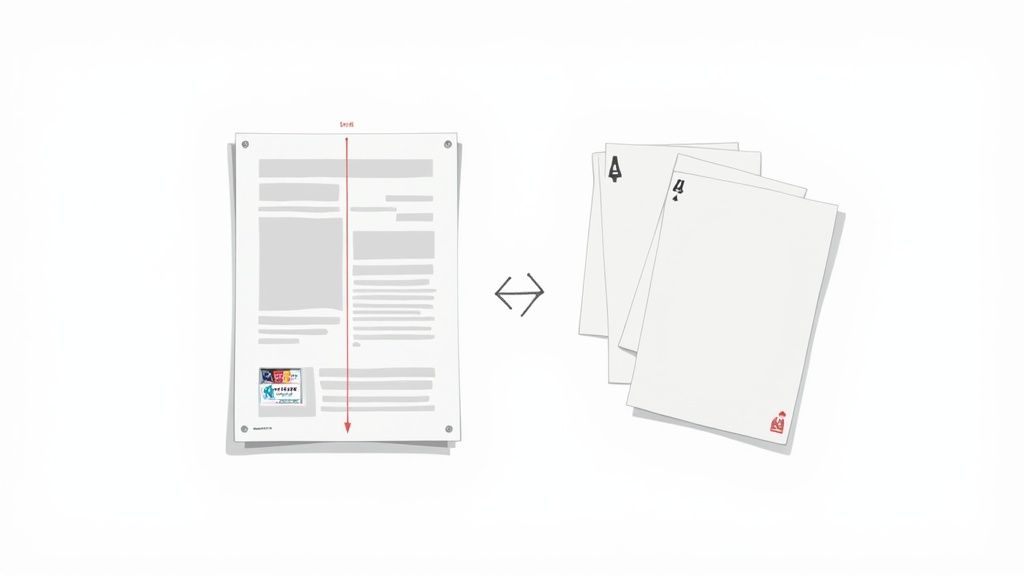
Master the Safe Zone, Bleed, and Trim
Ever seen a flyer where the text is dangerously close to the edge, or an image looks awkwardly chopped off? This is usually because the artwork didn't account for bleed and the safe zone. It’s a tiny detail that makes a massive difference.
- Trim Line: This is the final size of your flyer where the guillotine will cut. For an A5 flyer, that's precisely 148 x 210 mm.
- Bleed Area: No cutting machine is 100% perfect every single time. To prevent any unsightly white slivers at the edge of your finished flyers, you need to extend your background colours and images beyond the trim line. Most UK printers, including us, ask for a 3mm bleed on all sides.
- Safe Zone: This is an inner margin, usually 3mm to 5mm inside the trim line. Keep all your important stuff—like logos, text, and contact details within this area to guarantee it won’t get trimmed off.
Think of it like framing a picture. The bleed is the part of the image tucked behind the frame, the trim is the edge of the frame itself, and the safe zone is where you place the most important parts of the picture to make sure they're seen.
Why Image Resolution Matters
The final piece of the puzzle is image resolution, measured in DPI (Dots Per Inch). For high-quality, professional printing, the industry standard is 300dpi.
Images you pull from a website or social media are almost always low resolution, typically 72dpi. While they look perfectly fine on a screen, they’ll appear blurry, pixelated, and unprofessional when printed. Using a low-resolution image can completely undermine your investment, making your brand look amateurish.
Always use original, high-resolution photos and logos to ensure a crisp, sharp result. Many printers now offer a free file-checking service that will flag low-resolution images before they go to print, giving you a chance to fix it and avoid a costly mistake.
By taking a few minutes to check these three key areas—colour mode, bleed, and resolution—you can supply perfect, print-ready artwork. This not only avoids extra charges but also ensures a faster, smoother process from start to finish. For more details, you can explore the options on our dedicated flyers page and see just how simple it is to upload a compliant file.
Mastering Your Order Quantity, Turnaround, and Delivery
Right, you’ve got your artwork sorted and picked your paper. The final hurdles—quantity, turnaround, and delivery—are where a bit of smart planning can seriously slash your final bill. These aren't just logistical tick-boxes; they're your last chance to turn a standard order into a masterclass in affordable printing.
It’s all about striking the right balance between how many flyers you need and how quickly you need them. Let's dig into how you can fine-tune these details to get the absolute best value for your money.
The Power of Ordering in Bulk
One of the oldest tricks in the book for lowering your costs is simply ordering more. It might feel a bit backward, but the way commercial printing works makes it a golden rule for saving cash. The lion's share of the cost is in the initial setup—making the printing plates, getting the machines calibrated, and running the first few test sheets.
Once the press is whirring away, the extra paper and ink for more flyers are a tiny fraction of the overall cost. This is why the price-per-flyer takes a nosedive as your order gets bigger. For instance, ordering 5,000 A5 flyers often costs only a little more than ordering 2,500.
Here’s a real-world example: A local restaurant is launching a new seasonal menu. They figure they'll hand out 2,000 flyers this month and another 2,000 next month. Instead of placing two separate orders, they could place one single order for 5,000. They’d pay a bit more upfront, but they could cut their cost-per-flyer by up to 50% or even more, saving a tidy sum over the two months.
Before you click 'buy', have a think about your campaign's lifespan. If you're promoting something that won't go out of date, ordering a larger batch to use over several months is a brilliant cost-saving move.
Turnaround Time: The Trade-Off Between Speed and Savings
In the world of printing, patience really does pay off. How fast you need your flyers is a massive factor in the final price. Most online printers will give you a few options, and the logic is simple: the faster you want it, the more you’ll pay.
Here’s a typical breakdown of what you’ll find:
- Next-Day or 24-Hour Service: This is the premium, 'get me out of jail' option for last-minute deadlines. Your job gets bumped to the front of the queue, but that priority service comes with a hefty price tag.
- Standard Turnaround (3-5 Business Days): This is usually the sweet spot for great value. It gives the printer enough breathing room to group your job with others (a process called 'gang-run printing'), which makes everything super-efficient and brings the cost down for everyone.
- Economy Turnaround (7+ Business Days): If you're not in a rush, this is your cheapest bet. Plan your campaign well in advance, and you can take advantage of this slower service to lock in the lowest possible price.
Just by choosing a 5-day turnaround instead of a next-day service, you can often knock 20-30% off your printing bill. The secret is to factor printing time into your campaign schedule right from the start.
Choosing the Right Delivery Option
The final piece of the pricing puzzle is delivery. Unsurprisingly, just like with turnaround times, faster shipping costs more. Once your flyers are printed and boxed up, you'll typically get a choice of couriers.
- Standard Delivery (e.g., 48-hour courier): This is the most budget-friendly option and is often free if your order is over a certain value.
- Next-Day Delivery: For an extra fee, you can get your flyers delivered the day after they leave the print shop.
- Pre-12 or Saturday Delivery: These are premium services for guaranteed morning or weekend arrivals, and they come with the highest price tag.
Unless you're on an incredibly tight deadline, just opting for standard delivery is an easy win to keep your costs down. It’s always worth checking a printer's delivery policies, as some of the finer details will be in their T&Cs. You can see how we handle things by reading our own straightforward Terms and Conditions.
The UK printing industry is a tough, competitive market. Printers are always looking for ways to be more efficient, and your choices on turnaround and delivery directly affect their workflow—and your final cost. By planning ahead, you’re working with the system, not against it, which is how you unlock the very best prices.
Finding the Best Deals with Online UK Printers
The move to online printing has completely changed the game for anyone after cheap flyer printing in the UK. Forget the days of being tied to your local print shop; now, a whole host of specialist online printers are competing for your business, which puts you firmly in the driver's seat.
These digital storefronts are built for one thing: efficiency. With automated workflows, you can upload your artwork, pick your options, and get your order placed in minutes, day or night. This cuts out a ton of admin for the printer, and thankfully, they pass those savings straight on to you.
How Online Printers Keep Costs So Low
So, what’s their secret? One of the biggest cost-savers is a clever technique called gang-run printing. Instead of firing up a massive printing press just for your order, they digitally bundle dozens of different jobs onto a single large sheet. Your A5 flyer order might be printed right next to another company's business cards and a third's DL leaflets.
This process squeezes the maximum value out of every inch of paper and splits the hefty setup costs across multiple customers. It’s a brilliantly efficient system that makes professional, full-colour printing genuinely affordable, even for small businesses and start-ups.
The real hero here is digital printing technology. It’s perfectly suited for the short-run, quick-turnaround jobs that are vital for budget-conscious campaigns, mirroring the broader shift towards online ordering and customisation we see everywhere.
The chart below breaks down how things like quantity, turnaround time, and delivery choices stack up to affect your final printing bill. It’s a great way to see where the biggest savings are hiding.
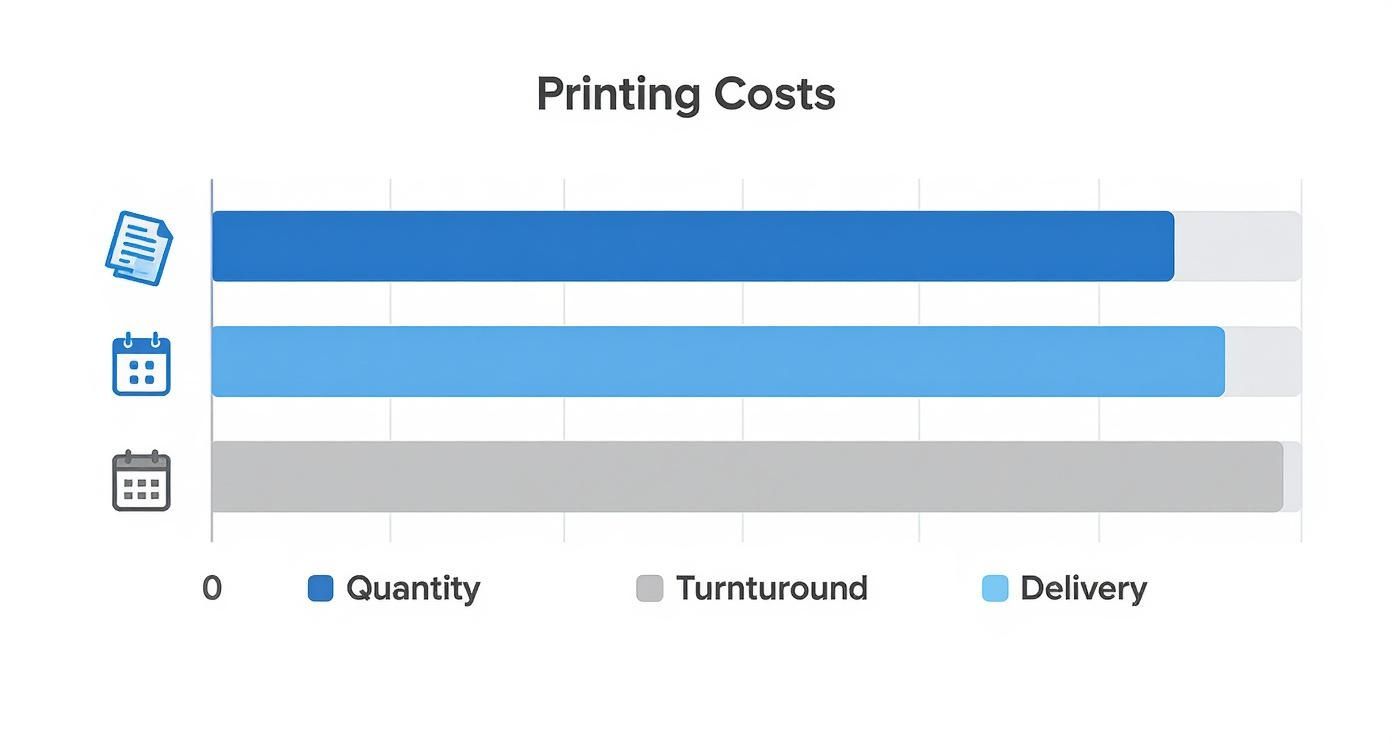
As you can see, being strategic about how many you order and when you need them delivered offers the most significant opportunity to trim your overall spend.
Taking Advantage of Digital Printing
Modern digital presses also make it incredibly easy and cheap to order small test runs. Before you commit to printing 10,000 flyers, why not order a small batch of 50 or 100? You can check the paper feel, see the colours in person, and gauge the overall impact. This used to be incredibly expensive with old-school printing methods, but now it’s a smart, affordable step.
The UK digital printing industry has seen impressive growth, with a compound annual growth rate of 2.8% between 2020 and 2025. This just goes to show how central it’s become to making flyer printing fast and flexible for everyone.
A Quick Checklist for Vetting an Online Printer
With so many options out there, how do you pick the right one? Let's be honest, not all online printers are created equal. Use this simple checklist to vet potential suppliers and make sure you’re getting great value without skimping on quality or service.
- Check Recent Customer Reviews: Have a look on sites like Trustpilot or Google. Don't just look at the star rating; read the comments. Are people happy with the print quality? Did their orders arrive on time? A few grumbles are normal, but a pattern of consistent complaints is a definite red flag.
- Look for a Free File Check: A good printer wants your artwork to look its best. Many offer a free check (either automated or by a human) to catch common slip-ups like low-resolution images or missing bleed before your job goes to print. This service can save you a fortune in reprints.
- Transparent Pricing and Delivery Costs: Make sure the price you see is the price you pay. Some seemingly cheap printers sting you with outrageous delivery fees at the very last step. Look for clear, upfront pricing from the get-go.
- Accessible Customer Support: Can you easily find a phone number or a live chat? If something goes wrong, you’ll want to speak to a real person quickly. It might be worth testing how responsive they are before you place a big order.
- Clear Proofing Process: Understand how they handle proofs. Most offer an instant digital proof (usually a PDF) for you to sign off on. This is your final chance to spot typos or design flaws, so make sure the process is simple and clear.
Taking a few minutes to run through this list can help you confidently choose an online partner who will deliver reliable, high-quality results every time. For more tips on getting the most from your print marketing, feel free to explore other articles on our blog.
Your Questions Answered
Even after you've got the basics down, a few common questions always seem to pop up when you're trying to get the best possible deal. Getting straight answers to these can be the final piece of the puzzle, giving you the confidence to place your order.
Let's clear up some of the most frequent queries we hear from customers aiming for genuinely cost-effective printing.
Is 130gsm Paper Too Thin for a Professional Flyer?
Not at all. In fact, for many jobs, it’s the smartest choice you can make. When you're dealing with huge quantities for mass distribution—think takeaway menus, event promos, or wide-scale door drops 130gsm paper is the industry go-to for good reason. It’s light, very affordable, and looks fantastic with a professional gloss or silk finish.
Of course, it all comes down to the flyer's purpose. If you're creating something that needs to feel more substantial, like for a luxury brand or a price list you want people to keep, then upgrading to a 170gsm or even a 250gsm stock is a solid investment. The trick is to match the paper's weight to its job.
What Is the Biggest Mistake to Avoid When Ordering Flyers?
Hands down, the most common and costly mistake is submitting artwork that isn’t print-ready. This one issue is the source of most delays, extra fees, and disappointing results. The main culprits are nearly always the same.
- Low-resolution images: Anything below 300dpi will look fuzzy and pixelated in print, which immediately makes your brand look amateur.
- Designing in RGB, not CMYK: This leads to nasty surprises with colour. The bright, vivid colours on your screen can end up looking dull or completely different on the finished flyer.
- Forgetting to add bleed: Without that extra 3mm of your background design around the edges, you risk getting ugly white slivers after the flyers are trimmed.
A quick 10-minute check of your artwork against your printer's specs before uploading is the single best thing you can do. It will save you more time, money, and hassle than any other tip.
Why Are 5000 Flyers Barely More Expensive Than 2500?
This boils down to the basic economics of litho (or offset) printing, the method used for most large-volume jobs. The vast majority of the cost is loaded into the initial setup—creating the metal printing plates and calibrating the massive press for your specific design.
Once that machine is running, the cost of the extra paper and ink to print more copies is tiny in comparison. That setup cost is the same whether you print 1,000 flyers or 10,000. It’s why the price-per-flyer plummets as you increase the quantity, and one of the easiest ways to slash your unit cost if you know you’ll use them. It's the secret to maximising your budget for cheap flyer printing in the UK.
Should I Just Pick the Absolute Cheapest Online Printer?
It's tempting to just sort by price and click the lowest number, but this is often a false economy. You should always be looking for the best value, not just the rock-bottom price. Some printers who advertise incredibly low prices might be cutting corners somewhere else.
This could mean they're using lower-grade paper, their machines have less accurate colour calibration, or their customer service is non-existent when something goes wrong. Instead of focusing only on price, take a moment to check:
- Recent, independent customer reviews.
- If they offer a free file-checking service.
- That there are no hidden delivery fees at checkout.
A dependable printer who delivers a quality product on time is a far better partner for your brand than a rock-bottom price that ends in a disappointing result.
Ready to put these insights into action and get professional results without the high price tag? At The Print Warehouse Ltd, we combine high-quality materials with efficient printing processes to deliver outstanding value on all your marketing materials. Explore our full range of affordable printing options today!

