
When it comes to pull up banner dimensions, you'll find that one size, in particular, dominates the UK market: 850mm x 2000mm. This has become the industry go-to, and for good reason. It strikes the perfect balance between making a real visual impact and still being incredibly easy to transport, making it ideal for everything from trade shows to in-store promotions.
A Quick Guide to UK Banner Dimensions
Trying to figure out which pull up banner dimensions you need can feel a bit overwhelming at first, but thankfully, the UK market has settled on a handful of standard sizes that cover most situations. This makes life much easier for designers and marketers, as you can plan your creative with confidence.
The 850mm x 2000mm option is so common that it’s become a benchmark. Its proportions are just right for displaying key information without dominating the room. You’ll find this size offered by pretty much every print supplier, so it's a safe and versatile bet for any campaign. You can browse our own range of standard roller banners to see these popular options for yourself.
To help you get a clearer picture, here's a quick rundown of the most common dimensions and where they work best.
Standard UK Pull Up Banner Dimensions at a Glance
| Banner Name/Type | Width (mm) | Height (mm) | Common Use Case |
|---|---|---|---|
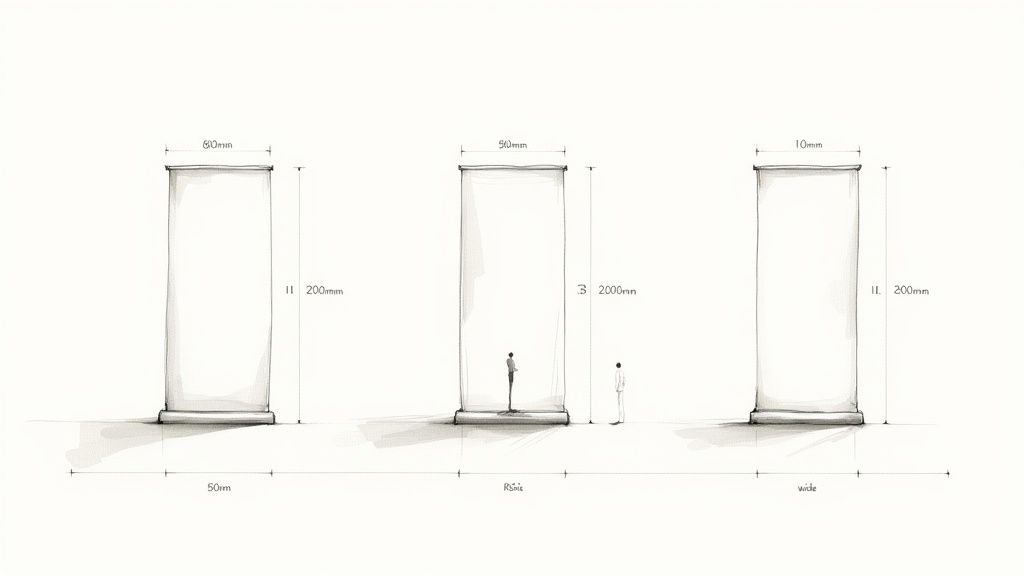
| Narrow | 600 or 800 | 2000 | Tight spots like shop entrances or small exhibition booths |
| Standard | 850 or 1000 | 2000 | The all-rounder for conferences, lobbies, and promotions |
| Wide | 1200 or 1500 | 2000 | Event backdrops, media walls, and photo opportunities |
| Super Wide | 2000 | 2000 | Large-scale backwalls for making a huge statement |
These key sizes give you a great starting point, whether you need something discreet for a tight corner or a massive graphic to fill a large venue.
Common Standard Dimensions
While 850mm x 2000mm is the champion, other standard sizes are tailored for more specific jobs. Here’s a simple breakdown of what you'll find:
- Narrow Banners (600mm or 800mm wide): Perfect when you're short on floor space. Think small retail entrances, narrow corridors, or a cramped corner in an exhibition hall.
- Standard Banners (850mm or 1000mm wide): These are the true workhorses. Versatile enough for conferences, reception areas, product launches, and just about any general promotional event you can think of.
- Wide Banners (1200mm, 1500mm, or 2000mm wide): When you need to make a big impression, go wide. These are fantastic as backdrops for presentations, creating a branded photo wall, or simply standing out in a cavernous hall.
Getting familiar with these common pull up banner dimensions is the first step to making sure your display is not only practical for the space but looks fantastic, too.
A Detailed Breakdown of Standard Banner Sizes
While a quick-reference chart is a great place to start, getting to grips with what different pull up banner sizes are actually for is the key to a smart investment. Each dimension isn't just a number; it represents a specific tool designed for a particular environment. The right choice all comes down to your venue, your audience, and what you’re trying to achieve.
Think of it this way: a narrow banner isn't just a space-saver, it’s a tactical choice for creating focused messaging points in a busy area. On the other hand, a wide banner doesn't just fill a large wall; it creates an immersive brand experience. The trick is to match the physical footprint of the banner with your promotional goals.
Choosing Your Ideal Width
The width of your pull up banner is arguably its most important dimension. It dictates its physical presence and, crucially, how much information you can display without it looking cluttered.
-
600mm Banners: These are the specialists. They're perfect for tucking into tight retail corners, slotting into narrow walkways, or acting as subtle directional signs at an event. Their slim profile means you can place them almost anywhere without getting in the way, giving you a branding opportunity where larger banners just wouldn't fit.
-
850mm Banners: This is the UK's favourite for a reason. The 850mm banner is the ultimate all-rounder, offering plenty of space for a strong headline, a few key bullet points, and your contact details without feeling crowded. It's the go-to for standard exhibition booths, reception areas, and general day-to-day promotions.
-
1200mm Banners: Once you move into the wider formats, a 1200mm banner starts to offer a more substantial backdrop. It’s ideal for product launches where you need to show off larger product images or for carving out a more defined brand space within a sprawling exhibition hall. This size feels less like a sign and more like a feature wall.
-
1500mm+ Banners: At 1500mm and beyond, you’re essentially creating a portable media wall. These expansive banners are perfect for event photography backdrops, on-stage presentations, or any scenario where you need to command attention from a distance.
Your choice should be a direct reflection of how you plan to use the banner. A versatile 850mm model might be perfect for a conference, but a 1500mm backdrop could become the centrepiece of your entire trade show stand.
Ultimately, taking a moment to analyse your space and your message will guide you to the perfect fit. For a visual comparison and to explore the different hardware options, you can find a complete selection of pull up banners that cater to every need. Making a strategic choice here ensures your investment really pays off.
Artwork Specifications for Flawless Printing
Getting your artwork print-ready is single-handedly the most important part of achieving a professional finish. Nailing the technical details from the get-go is the best way to prevent common (and costly) printing mistakes like blurry images, unexpected colour shifts, or incorrect sizing. This guide lays out the essential specs you need for a perfect result, every time.
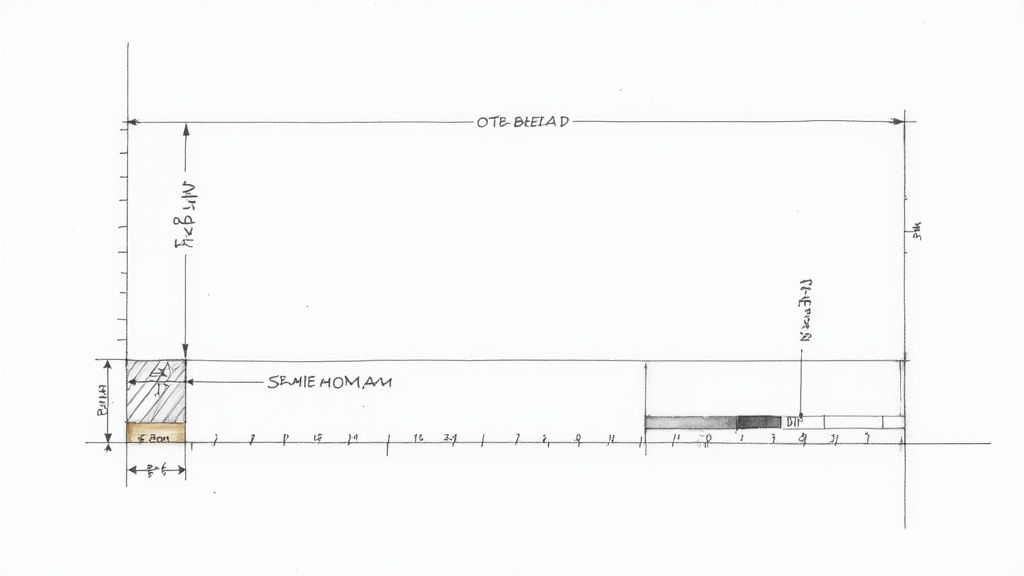
One of the most frequent slip-ups we see is designers forgetting about the non-visible area of the banner. A good portion of your printed graphic will always stay hidden inside the roller cassette at the bottom. While the exact amount can vary slightly between different hardware models, it’s something you must factor into your design.
Crucial Tip: Always leave at least 150mm at the very bottom of your design as a 'quiet' or non-essential area. This section needs to be a seamless continuation of your background but must not contain any text, logos, or key contact details, as it will be completely hidden inside the base.
Setting Up Your File Correctly
Before you even think about adding logos or text, make sure your document is properly configured for large-format printing. Setting up your canvas with the right dimensions, resolution, and colour mode isn't just a suggestion—it's non-negotiable for a high-quality pull-up banner.
Follow these key steps for your artwork setup:
- Resolution (DPI): Set your artwork to 150 DPI (dots per inch) at its final, full physical size. You might be used to 300 DPI for smaller prints like flyers, but 150 DPI is the industry benchmark for large-format graphics. It provides excellent clarity without creating massive, unmanageable files.
- Colour Mode: Always, always design in CMYK (Cyan, Magenta, Yellow, Key/Black). This is the colour model all commercial printers use. If you design in RGB (which is for screens), you'll see some pretty dramatic colour changes when your file is converted for print.
- File Format: When you're ready to export, save your final design as a high-resolution PDF. Other formats like AI (Adobe Illustrator) or EPS can also work. Just make sure all your fonts are outlined or embedded, and that every image is fully embedded in the document to stop anything from going missing.
Final Artwork Checklist
A quick double-check before you send your file to print can save a world of time, money, and frustration. Run through this final checklist to catch any last-minute issues.
- No Bleed Required: Unlike poster printing where bleed is essential, most pull-up banners don’t need it because they aren't trimmed to the edge. It's always worth confirming with your printer, but it's not standard practice.
- Check Safe Zones: Keep all your important text and logos well away from the absolute edges of the banner, and especially clear of that bottom 150mm cassette area.
- Proofread Thoroughly: It sounds obvious, but you'd be surprised. Give all your text one last check for any typos or grammatical errors.
- Verify Image Quality: Zoom in to 100% on your screen. This will give you a good idea of the final print size. If any of your images look pixelated or blurry, they'll definitely look that way on the finished banner.
Sticking to these specifications for your pull-up banner's dimensions will ensure your design translates perfectly from screen to print, giving you a crisp, professional, and effective marketing tool.
Mastering Bleed and Safe Zone Requirements
Getting to grips with bleed and safe zones is absolutely non-negotiable if you want a professional-looking pull-up banner. These two concepts are the secret sauce to ensuring your final print looks clean, polished, and exactly how you pictured it—no awkward white edges or chopped-off text. Honestly, getting them right is fundamental to good print design.
While they might sound a bit technical, the ideas behind them are dead simple. Bleed is just a little bit of extra background colour or imagery that goes past the final trim edge of your design. The safe zone, on the other hand, is the inner margin where all your critical bits and pieces, like text and logos, need to live to avoid being cut off or hidden.
Why Bleed Is So Important
When a large graphic gets printed and cut down to size, tiny variations in the trimming process are just a fact of life. Without any bleed, even a shift of less than a millimetre can leave a glaring sliver of unprinted white paper along the edge. It's a small thing, but it instantly makes a banner look cheap and unprofessional.
To get around this, we simply extend the background artwork slightly beyond the final dimensions.
- Standard Bleed Allowance: For most pull-up banners, a bleed of 3mm to 5mm on all four sides is the industry standard. Any decent printer will expect this.
- How It Works: This extra margin gives the printer a bit of wiggle room for trimming. The excess is sliced off, leaving you with a flawless, edge-to-edge colour finish.
- Setting It Up: When you create your file in software like Adobe Illustrator or InDesign, you can specify the bleed amount right in the document setup options. It couldn't be easier.
By adding a simple 3mm bleed, you're essentially insuring your design against the physical realities of printing and trimming. It’s a tiny step that makes a world of difference to the final quality.
Defining Your Safe Zone
Just as crucial as the bleed is the safe zone. Think of this as the area inside the final dimensions where you must keep all your vital elements. This means your company logo, headlines, contact details, and any important calls to action.
Picture the safe zone as a protective bubble around your most important content. Anything placed outside this area is at risk of being trimmed off during finishing. For pull-up banners, there's an added danger: content at the bottom can get hidden by the hardware or cassette. A generous safe margin ensures your message is delivered loud and clear, with nothing important lost.
Matching Banner Dimensions to Your Marketing Goals
Choosing the right pull-up banner dimensions isn't just about picking what looks good; it's a strategic decision that directly impacts how effective your marketing is. Think of it less like ordering a print and more like matching the banner's physical presence to a specific goal. Your choice has to work in harmony with the environment it’s going to live in to make sure it gets noticed for all the right reasons.
It’s crucial to select dimensions that not only carry your message but also suit the space, especially when maximizing impact in small event spaces. A banner that’s too big can completely overwhelm a small booth, but one that’s too small will simply get lost in a cavernous exhibition hall. The sweet spot is finding that perfect balance between your banner, the venue, and your message.
Selecting Dimensions for Common Scenarios
Let's connect the physical sizes of pull-up banners to real-world situations. This practical approach will help you picture exactly how each option will perform, ensuring you get the best possible return on your investment.
-
Standard Exhibition Booth (850mm x 2000mm): This is the industry workhorse for a reason. An 850mm wide banner gives you plenty of visual real estate within a standard 3m x 2m shell scheme, without making your space feel cramped. It’s large enough for key messaging and bold graphics but still leaves you room for a table, products, and your team.
-
Spacious Reception Area (1000mm x 2000mm): In a bigger, more open-plan area like a corporate lobby or hotel reception, a slightly wider 1000mm banner really holds its own. It fills the space more effectively, creating a permanent and professional branding feature that greets every visitor with confidence.
-
Press Event or Photo Backdrop (1500mm+ x 2000mm): For any event where photography is a key component, wider is always better. A 1500mm or even 2000mm banner creates a seamless, branded backdrop, guaranteeing your logo is clearly visible in every single shot. If you need something for a larger stage, explore our complete range of displays for exhibitions to find the ideal backdrop solution.
To help you get the artwork just right, this diagram shows the two most critical areas of your banner design: the safe zone and the bleed area.
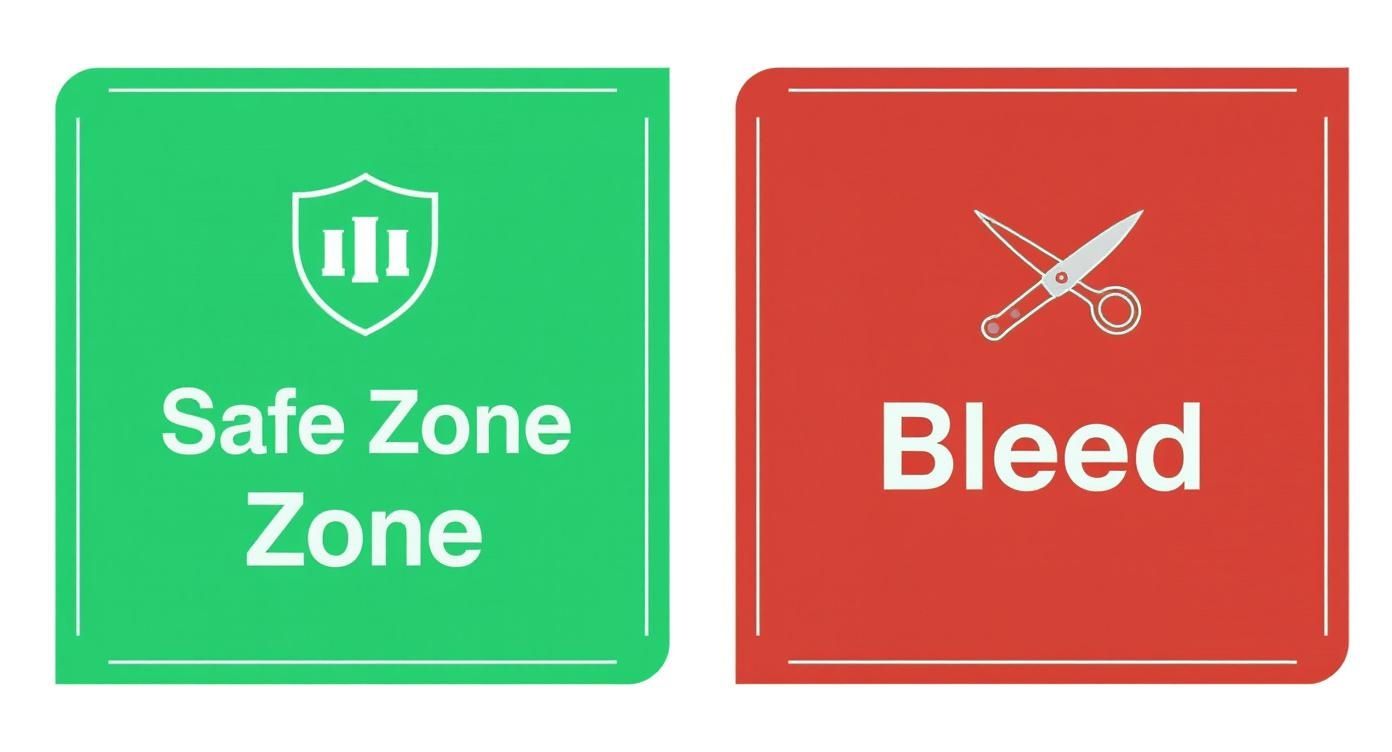
This visual is a great reminder for designers to keep all the vital stuff – like logos and text – well within the green safe zone. At the same time, any background colours or images should extend all the way out into the red bleed area. This ensures a flawless, edge-to-edge finish after trimming.
Eco-Friendly Banner Materials and Trends
As sustainability becomes a core focus for UK businesses, the demand for greener marketing materials is growing fast. Choosing an eco-friendly pull-up banner lets your brand reduce its environmental footprint without ever sacrificing visual quality or impact. This isn’t a niche interest anymore; it's a mainstream expectation from modern consumers.
This shift towards responsible materials is especially noticeable in the events world. In fact, recent industry insights show that 92% of UK businesses exhibiting in 2025 have already committed to more sustainable practices. This trend directly influences purchasing decisions for essentials like pull-up banners, making your material choice a key part of your brand's identity.
Exploring Greener Material Choices
The biggest step you can take towards sustainability is moving away from traditional PVC. Thankfully, modern alternatives deliver excellent print quality while being much kinder to the planet.
Here are a couple of the most popular eco-friendly options:
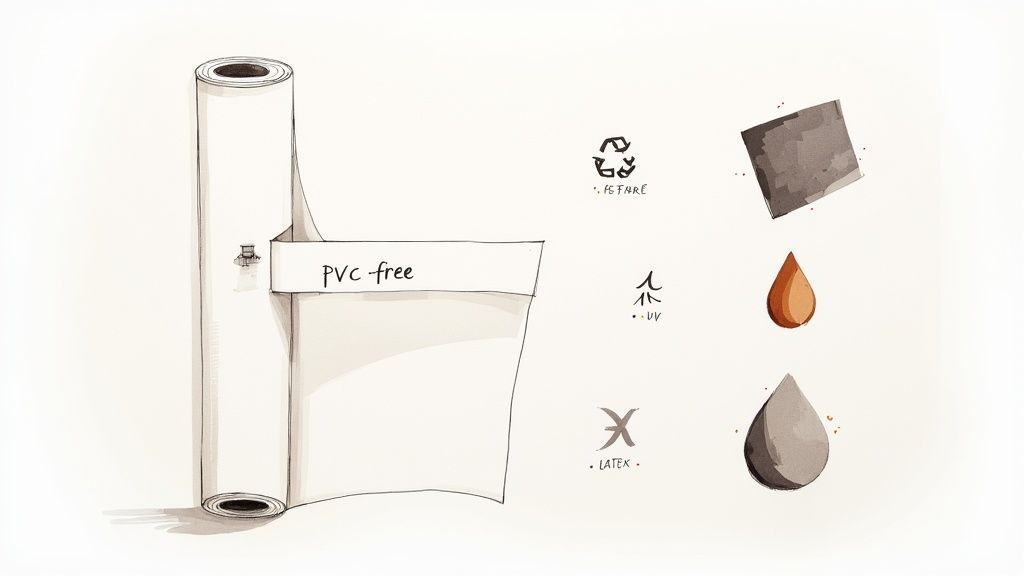
- Polyester-based fabrics: Often made from recycled materials, these textiles are durable, lightweight, and fully recyclable after use. They produce a vibrant, matte finish that keeps glare to a minimum.
- Polypropylene (PP) films: A PVC-free plastic that is widely recyclable. It’s tough, tear-resistant, and creates sharp, high-quality graphics perfect for any professional setting.
By choosing these substrates, you align your marketing with your corporate responsibility goals. For those ready to make the switch, you can explore a full selection of high-quality PVC-free banners and find the perfect sustainable solution for your next event.
Beyond the banner material itself, the printing process also plays a huge part. Modern UV and latex inks are water-based and release far fewer volatile organic compounds (VOCs) than old-school solvent inks. This makes for a healthier production environment and a final product that's much more environmentally sound.
Frequently Asked Questions About Banner Dimensions
Getting the details right on your banner artwork can feel a bit daunting, especially if it's your first time. A few common questions always pop up, and getting them sorted early is the best way to avoid simple mistakes that could delay your print job or leave you with a less-than-perfect result.
We've put together the questions we hear most often from clients to give you a quick, reliable reference point. Use this guide to finalise your design with confidence, knowing it meets all the technical specs for a professional finish.
What Is the Most Popular Banner Size in the UK?
Hands down, the most popular and widely used pull-up banner dimension in the UK is 850mm x 2000mm. It’s become the industry standard for a very good reason: it strikes the perfect balance between visual impact and portability. This makes it a fantastic all-rounder for trade shows, retail spaces, conferences, and reception areas.
Because it's so common, the hardware is readily available and usually more cost-effective. If you’re ever unsure which size to go for, the 850mm x 2000mm is almost always a safe and effective bet.
How Much Space Should I Leave at the Bottom for the Cassette?
This is one of the most critical parts of setting up your artwork. You absolutely must leave a non-essential area at the bottom of your design that will stay hidden inside the banner’s base unit, or cassette. The exact measurement can vary a little between different hardware models, but a safe industry standard is to keep the bottom 150mm of your artwork free of anything important.
Key Takeaway: Think of the bottom 150mm of your banner design as a 'hidden' area. Your background colour or image needs to extend fully into this space to avoid any awkward white gaps, but never place logos, text, or contact details there. They simply won't be visible when the banner is assembled.
What Is the Best Image Resolution for a Large Banner?
For large-format printing like pull-up banners, you don't need the 300 DPI (dots per inch) resolution that’s standard for smaller print like flyers or business cards. The ideal resolution for a pull-up banner is 150 DPI when the artwork is set to its final, full physical size.
This resolution ensures your images and graphics will look sharp and clear from a normal viewing distance. It also stops you from creating ridiculously large file sizes that are a pain to manage and upload. A good rule of thumb is to always check your images by viewing them at 100% on your screen. If they look fuzzy or pixelated there, they’ll definitely look that way on the final print.
At The Print Warehouse Ltd, we simplify the process of getting your marketing materials just right. From roller banners to business cards, we provide high-quality, reliable printing for UK businesses. https://theprintwarehouse.uk

